
It’s no wonder that AWS provides scalable, reliable, and low-cost infrastructure to over 190 nations with over 32% of the global public cloud market. In terms of popularity and power, Amazon EC2 (Elastic Cloud Compute) is one of its most popular services. In this article we will set up Amazon EC2 Web Hosting.
Amazon AWS provide range of services and people get confused as to how they can set up web hosting on EC2. Amazon provide two services to create virtual machines:
- AWS EC2 (Scaleable but complex)
- Amazon Lightsail (low cost alternative to AWS EC2)
This article focuses on amazon ec2 web hosting for your websites. Let’s first discuss what Amazon Web Services (AWS) is, then briefly describe Amazon EC2.
Table of Contents
What is Amazon Web Services (AWS)?
Amazon Web Services (AWS) provides cloud computing infrastructure, which includes compute, storage, bandwidth, Amazon SES (email service) and customized application programming interfaces (APIs) over the Internet.
During cloud computing’s early transitional phase, Amazon launched AWS. Later Amazon realized that its host servers were approximately 50 percent below capacity, they then rebuilt its infrastructure to consolidate server power and storage prior to the launch. Amazon Web Services utilizes the same infrastructure as other Amazon Web properties, such as Webstore.
Computing, storage, and bandwidth resources are virtually unlimited on Amazon Web Services. With AWS, you pay for the services you use according to a subscription model.
Infrastructure as a Service (IaaS), Platform as a Service (PaaS), and packaged Software as a Service (SaaS) are among the many services it offers.
AWS provides two options for creating virtual servers in the cloud:
- Amazon Elastic Cloud Compute (EC2)
- Amazon Lightsail
When you require highly flexible environments and instances with consistently high CPU performance for your applications, Amazon EC2 is the way to go or you can also for rather simple model which is Amazon Lightsail.
What is “Amazon EC2”?
As part of Amazon Web Services (AWS), Amazon Elastic Compute Cloud (Amazon EC2) offers scalable computing resources. By utilizing Amazon EC2, you do not have to purchase hardware upfront, which allows you to develop and deploy applications more quickly. AWS EC2 can be used to launch as many or as few virtual servers as needed, configuring security and networking, and managing storage. Amazon EC2 lets you scale up or down to meet changing requirements and handle spikes in traffic, eliminating the need to forecast traffic.
Why is AWS EC2 important?
- You don’t require any hardware units
- Easily scalable (up or down)
- You only pay for what you use
- You have complete control
- Highly secure
- You can access your assets from anywhere in the world
Features of Amazon EC2
- Instances are virtual computing environments.
- Amazon Machine Images (AMIs) are preconfigured templates for your instances that package the parts you need for your server (including the operating system and additional software)
- Instance kinds are different configurations of CPU, memory, storage, and networking capabilities for your instances.
- Key pairs are used to safeguard login information for your instances (AWS stores the public key, and you store the private key in a secure place)
- Instance store volumes are storage volumes for transitory data that is destroyed when you suspend, hibernate, or terminate your instance.
- Amazon EBS volumes are persistent storage volumes for your data created with Amazon Elastic Block Store (Amazon EBS).
- Regions and Availability Zones are physical locations for your resources, including as instances and Amazon EBS volumes.
- Using security groups, you may decide which protocols, ports, and source IP ranges are allowed to access your instances.
- Elastic IP addresses are static IPv4 addresses for dynamic cloud computing.
- Tags are a type of metadata that you can add to your Amazon EC2 resources.
- Virtual private clouds are virtual networks that you can construct that are conceptually isolated from the rest of the AWS Cloud and can optionally connect to your own network (VPCs)
Procedure to Set Up Amazon EC2 Web Hosting
As discussed above Amazon AWS provide wide range of services. However, in this article we will be discussing EC2 and specially how to set up web hosting on EC2 instance.
One of the first thing you need is Amazon AWS account to use EC2, you can create an account on AWS from here, once done follow the procedure below.
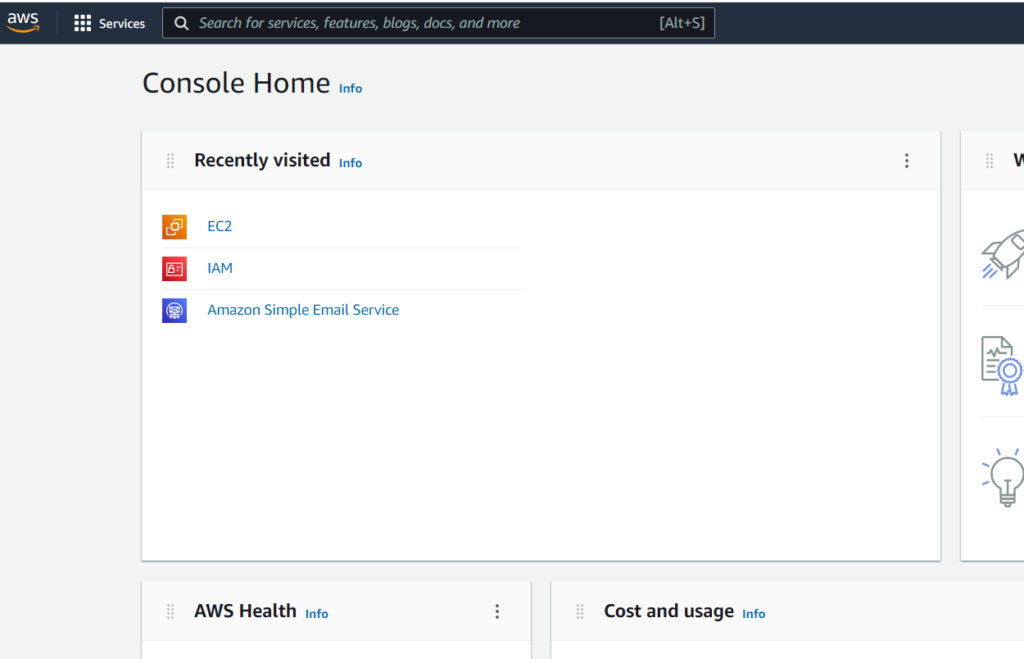
- Login to AWS Dashboard, upon login you will see your AWS dashboard
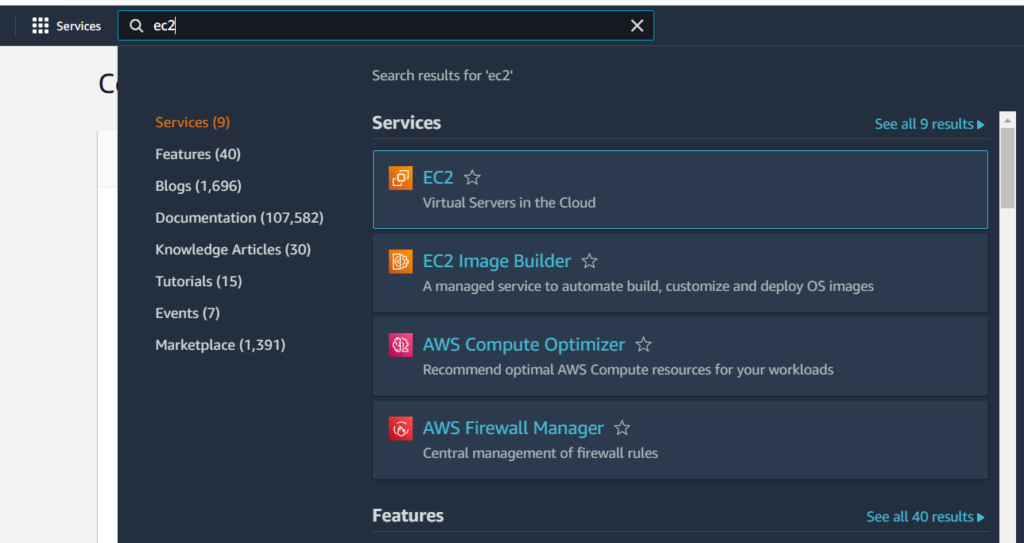
- Search for EC2 from the top menu as we are going to use its EC2 service
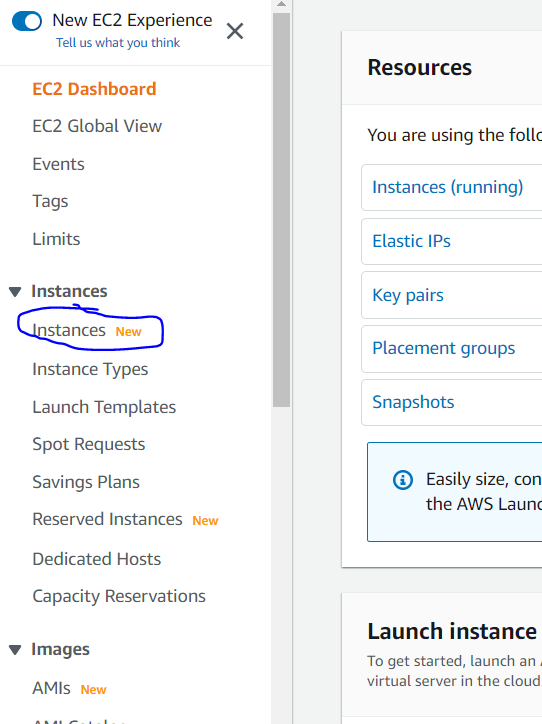
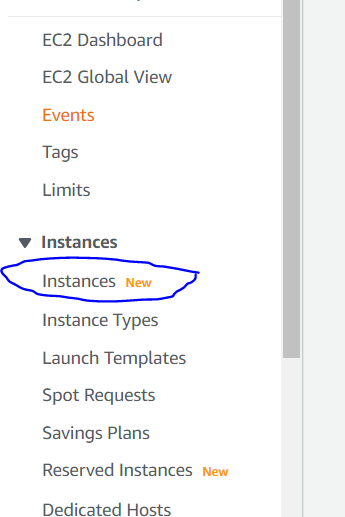
- This is your EC2 dashboard where you can create instance. Select Instances from left hand side menu
- Click on “Launch Instances” from the top right corner to start the process of creating an instance

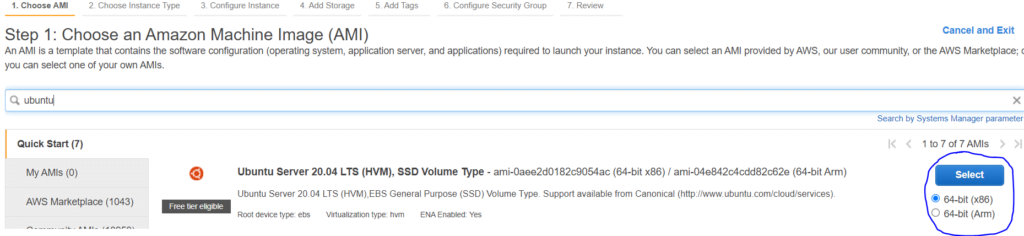
Step 1: Choose OS
There are total of 7 steps for creating an instance. First step is to choose OS for your instance. For OS search for “Ubuntu” and select “Ubuntu 20.04”
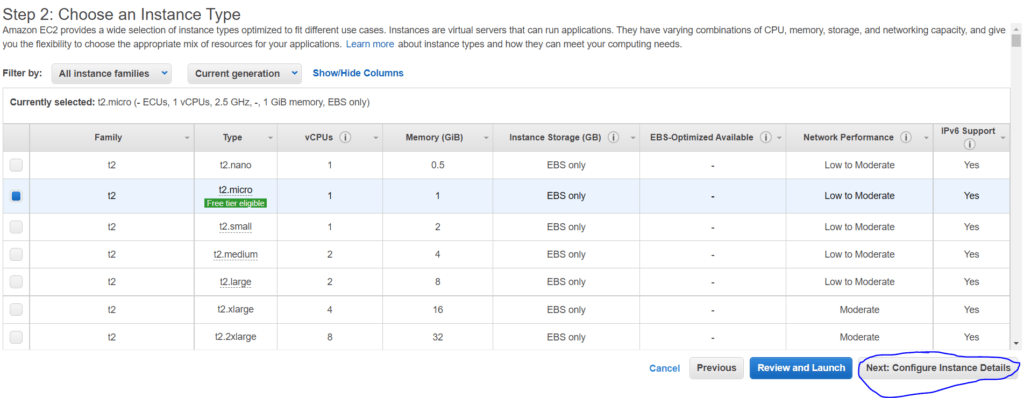
Step 2: Choose an Instance Type
Choose your instance type , you will be choosing your CPU cores and memory here for storage you will use the upcoming windows (on step 4)
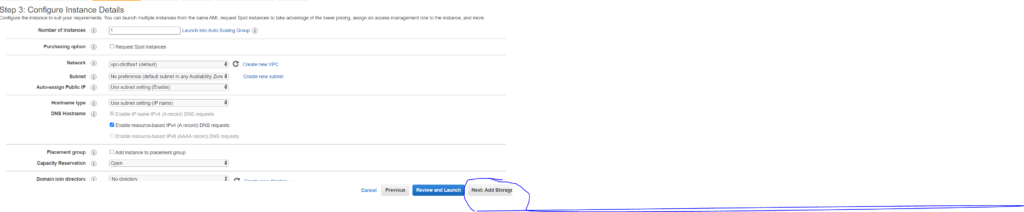
Step 3: Configure Instance Details
On “Configure Instance Details” window just leave as it is, if you want to change something that is upto you but for our case defaults are enough.
Step 4: Add Storage
Please choose storage carefully as per your needs, for example if you app needs 100GB then choose at least 150GB and click “Next”

You can also later increase this storage using this guide: How to Increase EC2 Volume Size
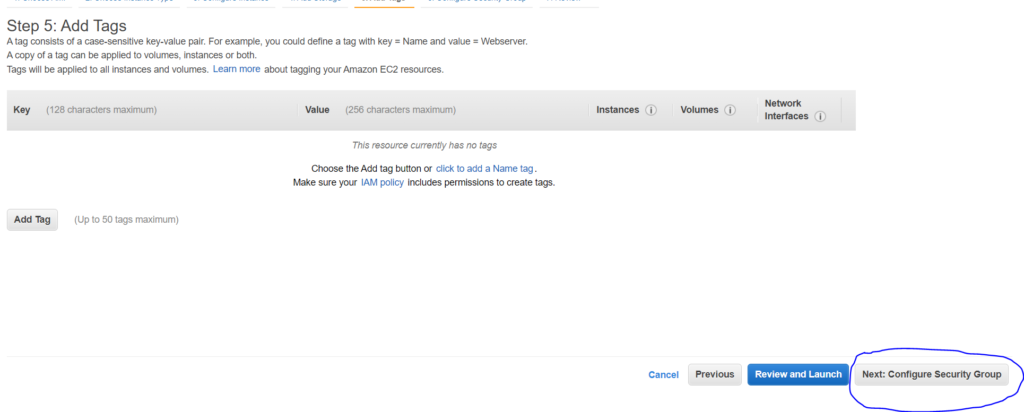
Adding tags is totally up to you, if you don’t want to add tags its not necessary just Click “Next : Configure Security Group“
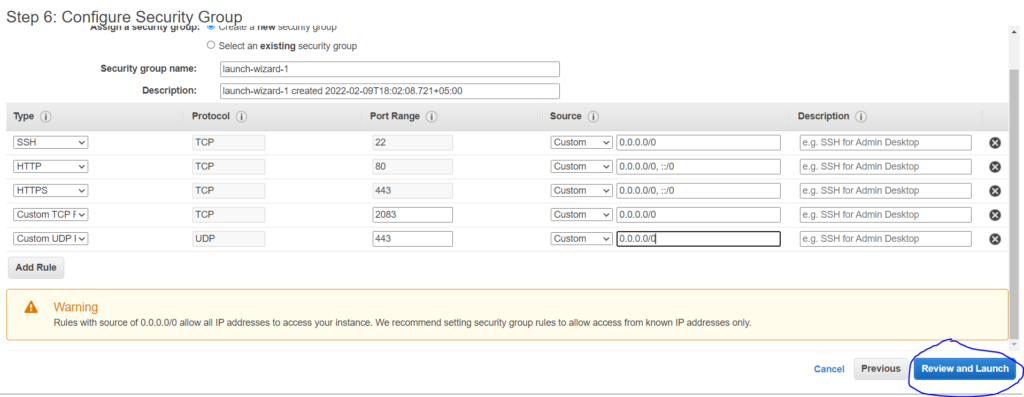
Step 6: Configure Security Group
This window is really important, you need to open all the required ports so that your ec2 web hosting works perfectly. Make sure to open ports 80, 443 (tcp), 443 (udp) and port 2083 as shown in the window below
Note: This will create a new security group and once you deploy again you can use existing security group which already have required ports open, but if this is your first time you will have to create a new security group.
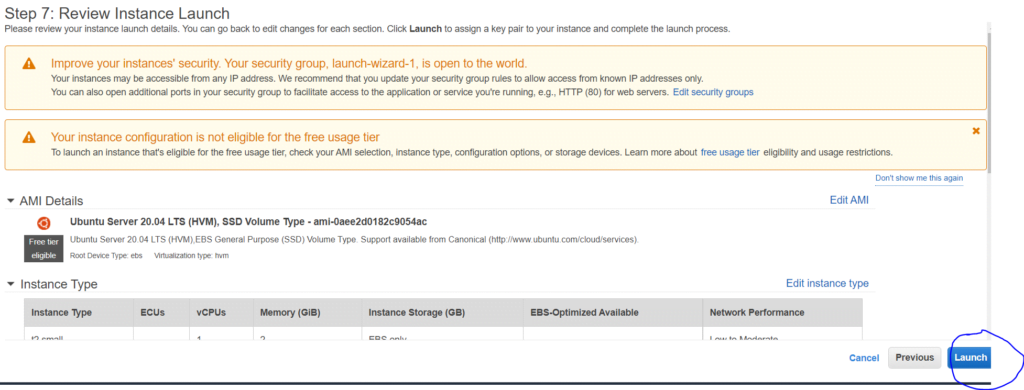
Step 7: Review Instance Launch
Finally review your Instance details and click on “Launch”. This window is just the summary of what you have selected in previous steps
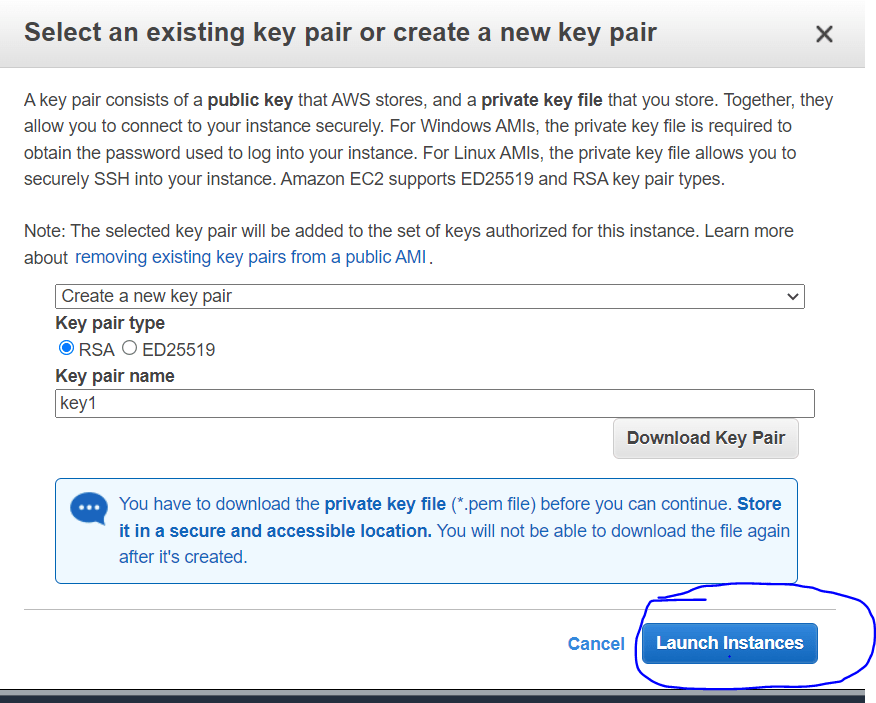
Step 8: Instance Key
You need SSH key to later log into your instance. If this is your first time you can let Aamzon generate new key for you and you can download that key.
However, in this specific article we will use Amazon console to use SSH which does not require key, but since this step is mandatory you will have to go through it.
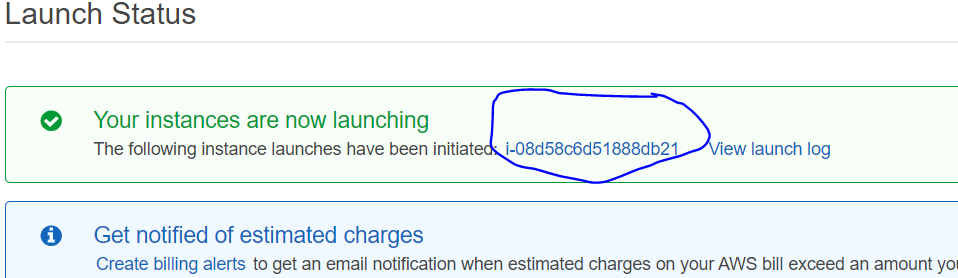
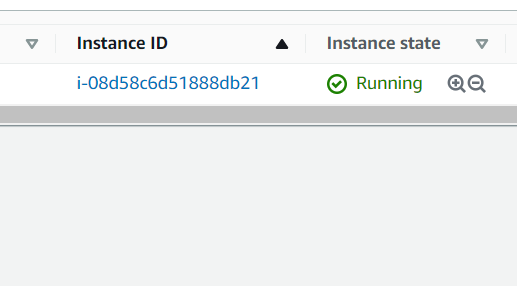
Finally your instance is created, Click on Instance ID and it will take you to instance list, we still have to assign and elastic IP to our instance.
- You will see your Instances over here

Step 9: Assign Elastic IP
Normally with other provides they give you static IP upon deployment. So even if VPS is shut down, their IPs do not change.
But with Amazon EC2, If the instance is shut down, after turning it on, you will see that IP has changed. So we need to create an Elastic IP and attach it to your Instance that you have just created above.
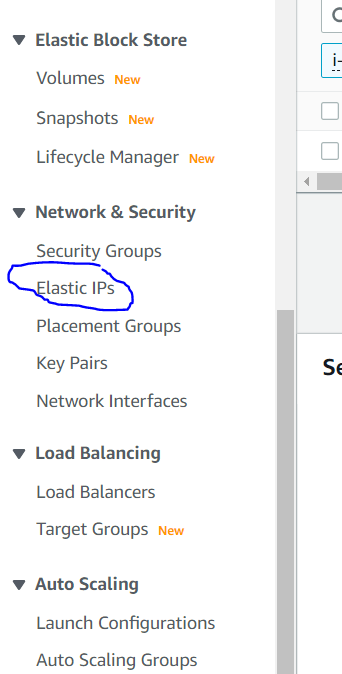
- In your EC2 dashboard scroll down the left hand side menu, and select Network and Security -> Elastic IPs
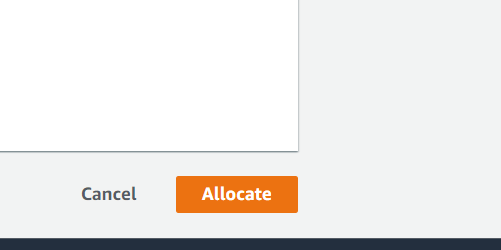
- Click on “Allocate Elastic IPs”

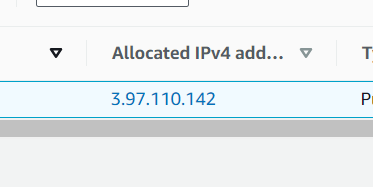
- Click on “Allocate” and Amazon will give you an IP which you can now associate with your instance.
- Click on the IP
- Click on “Associate IP with an Instance”
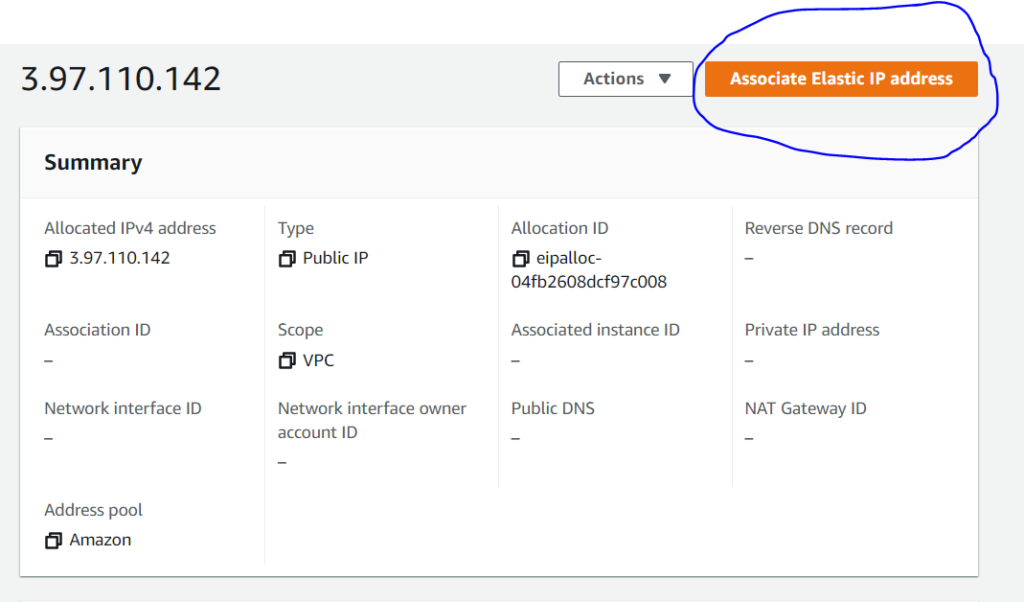
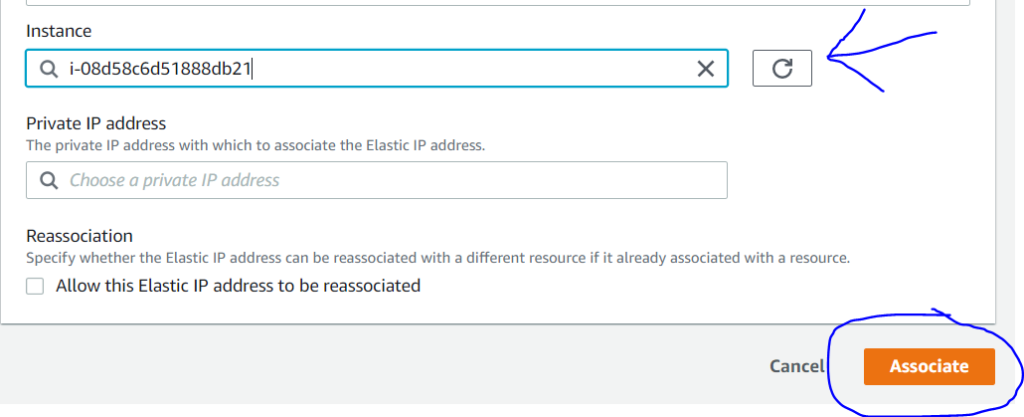
- Choose your Instance (that you have created above) and click on Associate
Step 11: Install CloudPages to use EC2 for Web Hosting
- Now we will install CloudPages on the instance we’ve just created so that we can use it for ec2 web hosting. From the left hand side menu select “Instance”
- Select your Instance
- Click “Connect”

- Click “Connect”
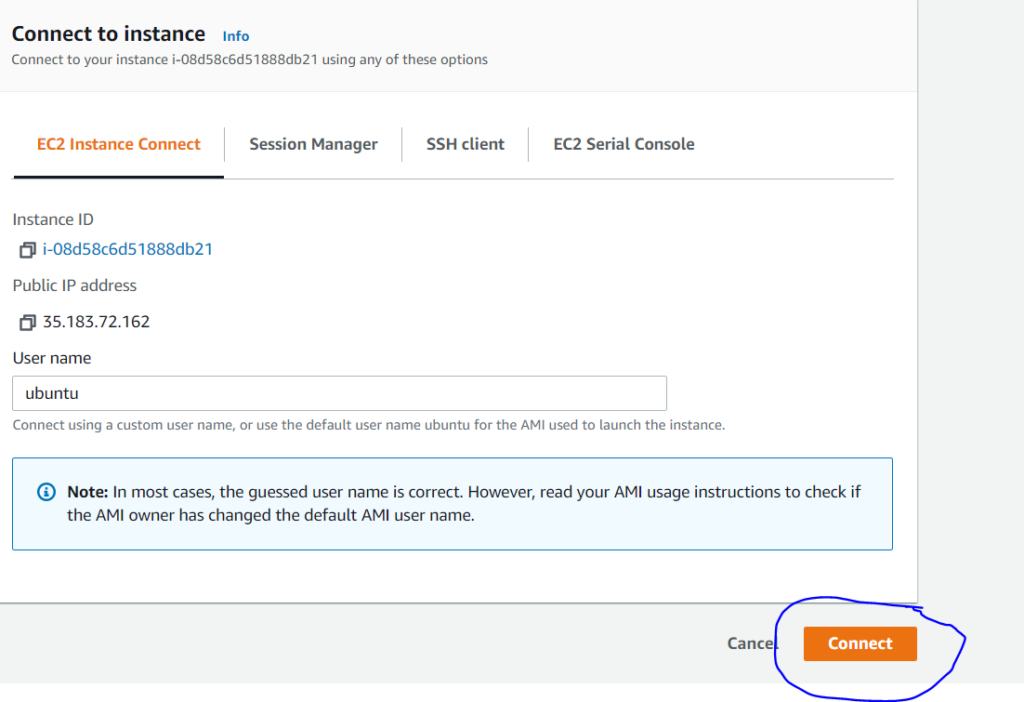
- Command Console window will open up
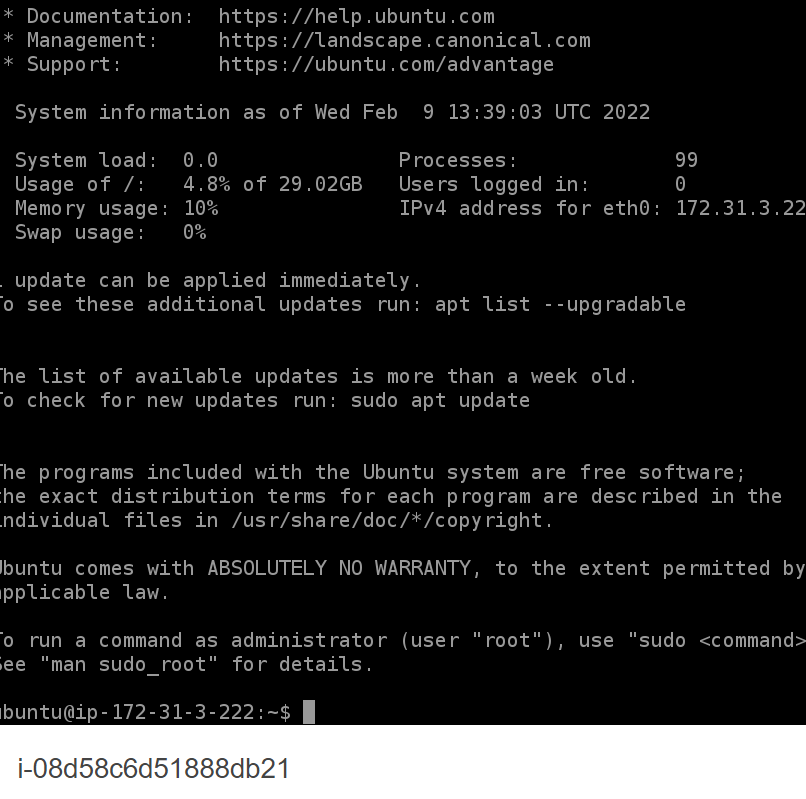
- Write “sude su -” and click enter

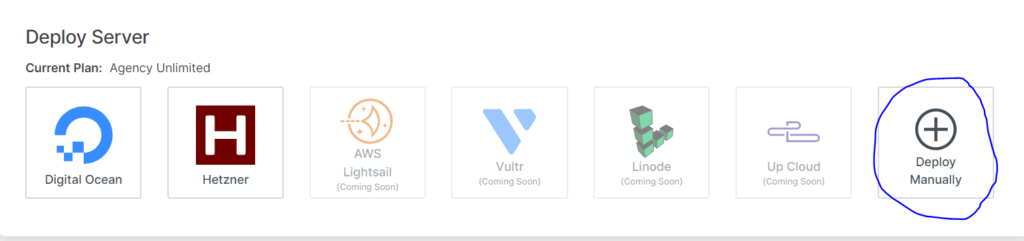
- NOW – Open your CloudPages dashboard and select “Deploy Manually”
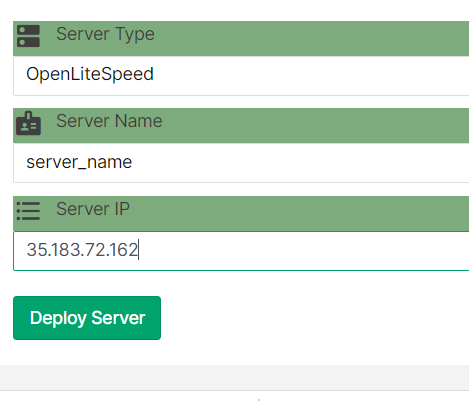
- Add Server Name and Server IP (Elastic IP that we created above). Click Deploy Server
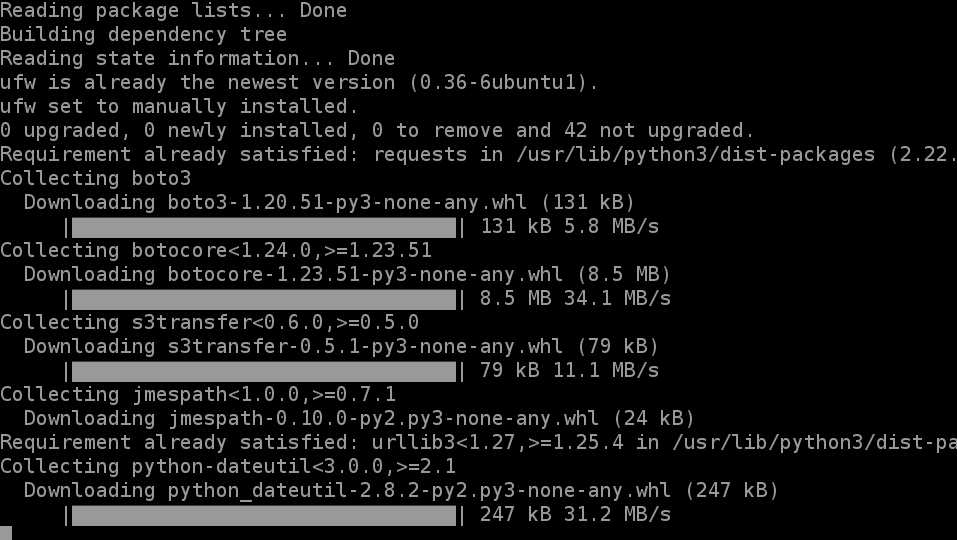
- Copy the script and paste it in the Command Console and click Enter

- Your server deployment will start automatically
- Your server is deployed

Now that your Amazon instance is created and CloudPages is installed, you can deploy your first WordPress site on CloudPages.
Conclusion
Cloud computing services provided by Amazon EC2 are scalable. Using it to build and deploy websites allows companies to avoid upfront hardware investments. An intuitive dashboard makes it easy for users to manage virtual servers, network settings, and cookies.