
Every website owner, manager, creator, designer, and even if you are not one of them but an IT guy, you must have heard about DNS, but maybe you don’t know what DNS is? How to manage DNS? How DNS works? and you must have other questions like these in your mind.
Our goal in this article is to answer the question, “What is DNS?”? How does it work? The most important part is how to manage your DNS with Cloudflare.
DNS refers to the Domain Name System, which converts your server IP address into a valid domain name that humans can understand and access.
Table of Contents
What is DNS?
To put it simply DNS maps your domain name to the server IP address where you host your website’s content. If we examine the details of the website and server. How do domain names reach content is a common question. DNS is a thing that comes up.
The DNS checks the IP address of the server against the domain name and then retrieves all of the content. We can say that it is a bridge between the server and the domain name.
Let’s take an example when we search CloudPages.cloud in our browser. Our DNS manager looks for server IP and checks where it is. Get everything from that server and map it to our domain name and show us content on our website.

Short history of DNS:
DNS (domain name system) was introduced in 1883 even though it was officially released in 1884. In order to make it easy for the user to access any content through using a human-readable format, it was built to connect or map IP addresses to domain names.
As computers increased day by day in the 1970s, the need for people to communicate increased.
According to Paul Mockapetris, the first working domain name server was written in 1983-84 for DEC Tops-20 machines at the University of Southern California’s Information Sciences Institute (USC-ISI) and SRI International’s Network Information Center (SRI-NIC).
How DNS works?
Combination or mapping of a hostname to an IP address in a DNS server. DNS consists of two elements, one being an IP address and the other, a domain name.
Whenever you search for a website by its domain name, the data is not on the domain name, but on a server with a valid IP address. The DNS maps domain names to their server IP addresses by looking up the IP address associated with the domain name. You can then show the data to the users based on that.
DNS made understanding and access easy for the users.
How to manage your DNS using Cloudflare?
Currently, Cloudflare is the most popular DNS management service. In addition to its DNS management feature, Cloudflare offers a wide range of security and speed enhancement options.
Nevertheless, this article focuses solely on how Cloudflare lets you manage your DNS. You must follow these steps to manage DNS with Cloudflare.
Step 1: Sign-in or Sign up on Cloudflare:
Do have a Cloudflare account is one of the core requirements. If you already have an account then you can simply log in to your account using credentials. And if you don’t have an account the visit here and register now.
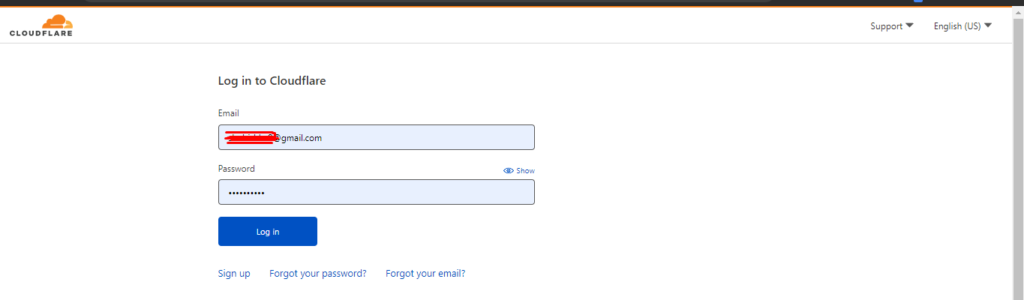
Once you logged in you can see a dashboard like this.
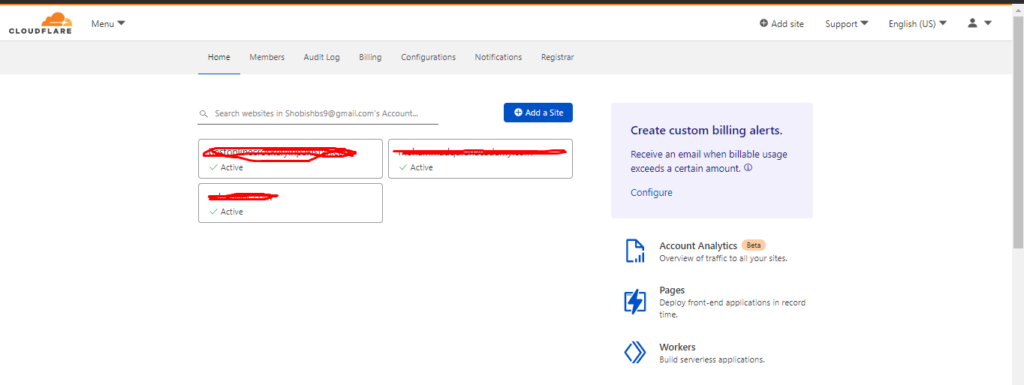
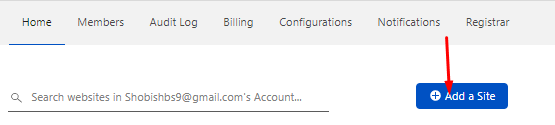
Step 2: Add your domain:
Now you have to add the domain to your account for which you want to manage your DNS. To do so press on Add Domain button on the Cloudflare dashboard.
In the next screen, you have to provide the domain name and the press Add Site button.
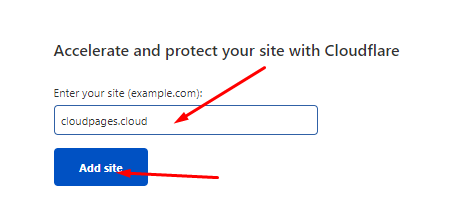
once done you will move next step.
Step 3: Select your plan
Here you have to choose a plan. We will choose a free one as it is enough for DNS management and basic features are enough for our use.
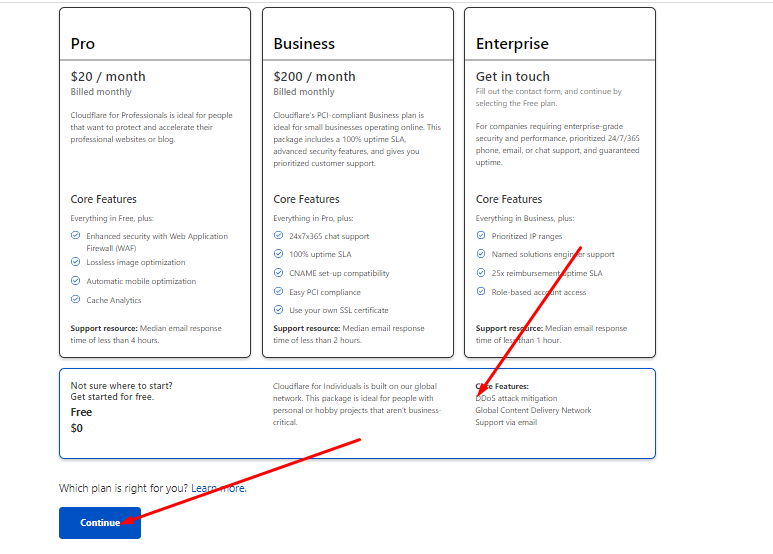
Select the plan and press Continue.
Step 4: Review DNS records:
Now Cloudflare will auto load some records you can check and if any new records need to add press the Add Record button above the records.
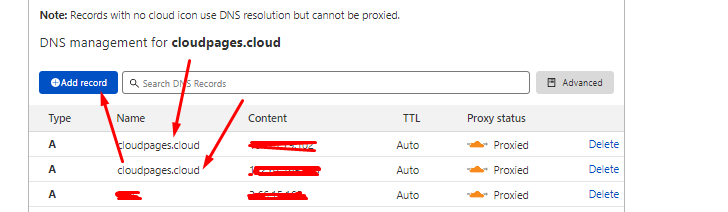
You can update the IP for your site by press the content box. After reviewing all records press the Continue button and move forward.
Step 5: Change your nameservers:
it’s the last step toward the setup of DNS on the Cloudflare side. When you click on continue from the records screen and move on this page. Now you have to just check and Copy Nameserver from this page.
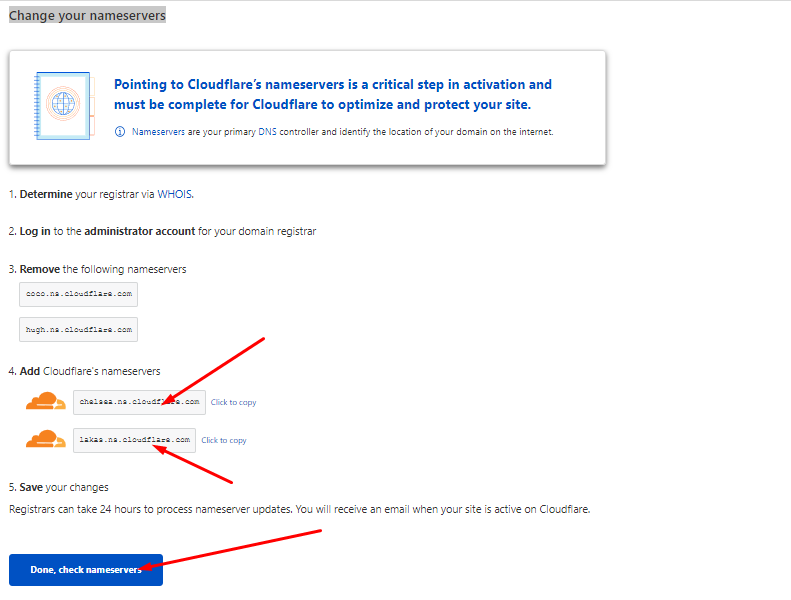
Copy these records and then add these to your domain provider all set from the Cloudflare end.
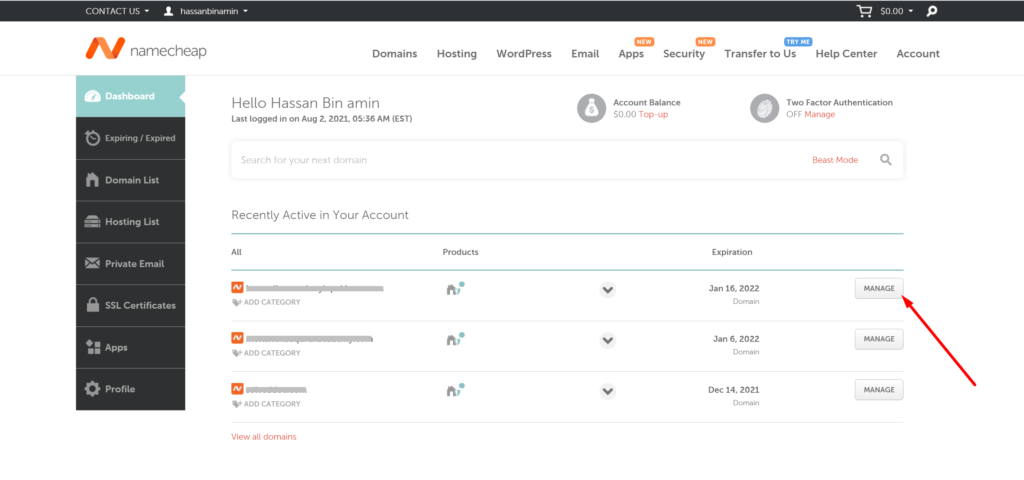
Step 5: Set Nameservers in domain provider:
Now in this step, go to the Namecheap dashboard, here you can see the domain name, click on the Manage button of that website that you want to set their DNS records.
In this step, goto to Name Server, choose the custom DNS, and paste the DNS records that you copied from Cloudflare, and save it.
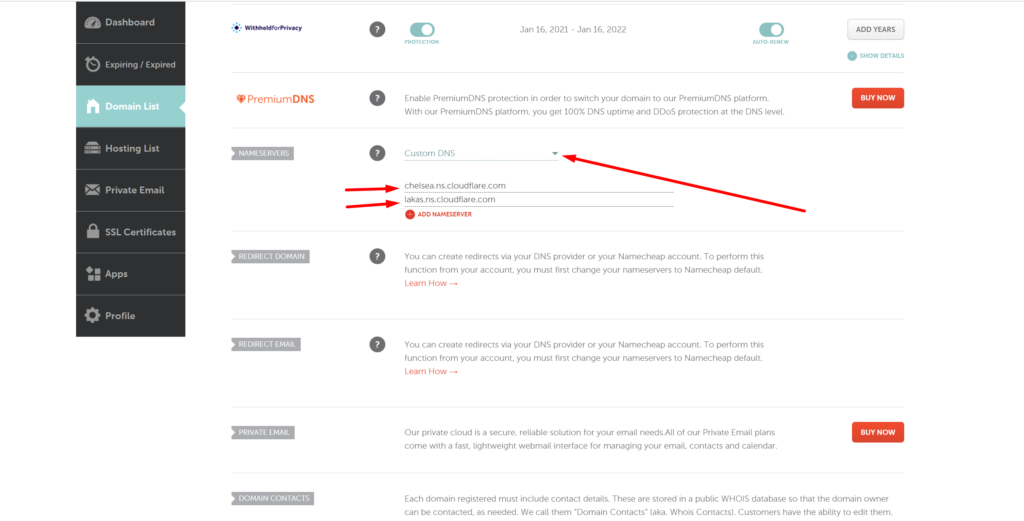
Once you have done all processes, the DNS is properly set you can access your website in any browser.
Read: How to Start an Online Store using WooCommerce?
Does CloudPages have CloudFlare integration?
CloudPages is going to launch Cloudflare auto integration soon.
Is possible to manage Digital ocean VPS DNS with Cloudflare?
Yes, you can manage any provider’s DNS with cloudflare.
Is it possible to manage multiple domain DNS in one Cloudflare account?
You can manage as many domains as you want in your want account.
Cloudflare DNS management is free or paid?
The basic Cloudflare DNS management is totally free. If you want you can get their paid plan too.