First and foremost, website security should always be a priority. If you have a custom website, you must deal with all the security hacks during the development phase of your website. You have to block all external access and keep all hackers away from your site. If you want to learn how to enable Advanced Wordfence Protection options continue reading.
When you use a CMS like WordPress or Joomla, the tool will take care of your security and keep you safe from hackers, but when you are using any CMS, it will have some mechanism to handle this. There are a number of security plugins for WordPress, but one of the most popular is WordFence Security Protection.
Coming to OpenLiteSpeed, If you are using LiteSpeed Enterprise that is fully Apache compatible, you can use Advanced Wordfence protection without doing any additional steps.
But in the case of OpenLiteSpeed, you have to do some configuration in order to enable Advanced Wordfence Protection.
Table of Contents
Wordfence Security Plugin:
Wordfence is a popular security plugin that is growing in popularity every day.
The WordPress security plugin uses an endpoint firewall and malware scanner that were specifically designed for WordPress. Wordfence’s Threat Defense Feed provides it with the latest firewall rules, malware signatures, and malicious IP addresses necessary to protect your website. In addition to Wordfence’s extensive security features, it offers a suite of additional features.
Wordfence has both free and paid versions. If you want to use the free version you can go to WordPress plugins directory and can use it. If you want to buy their paid plan visit here to check to price.
For this article, we will go with the free version installation from the WordPress plugin section.
Install Wordfence on your Website:
Installing Wordfence on your WordPress site is similar to installing any plugin. Below are the steps to install Wordfence.
The first thing you have to do is log into your WordPress admin dashboard to install WordFence.
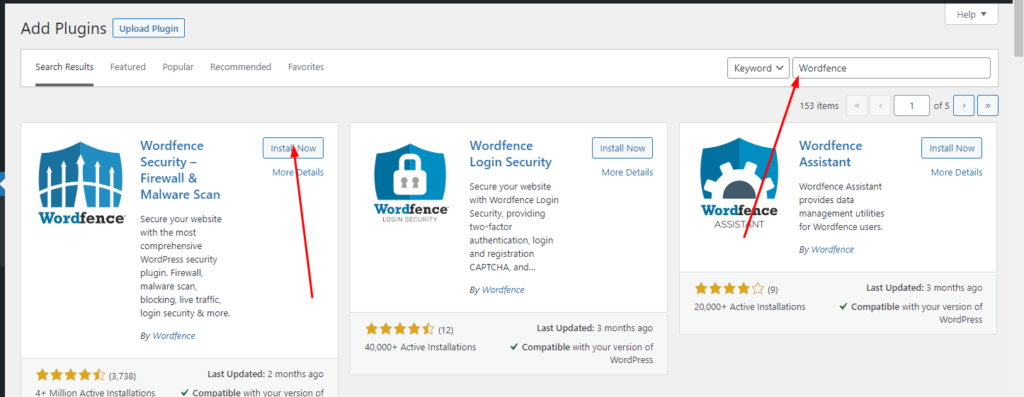
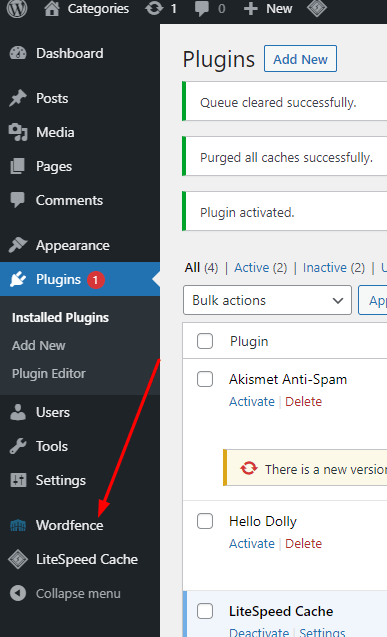
After login go to the Plugins -> Add new plugin from the left menu.
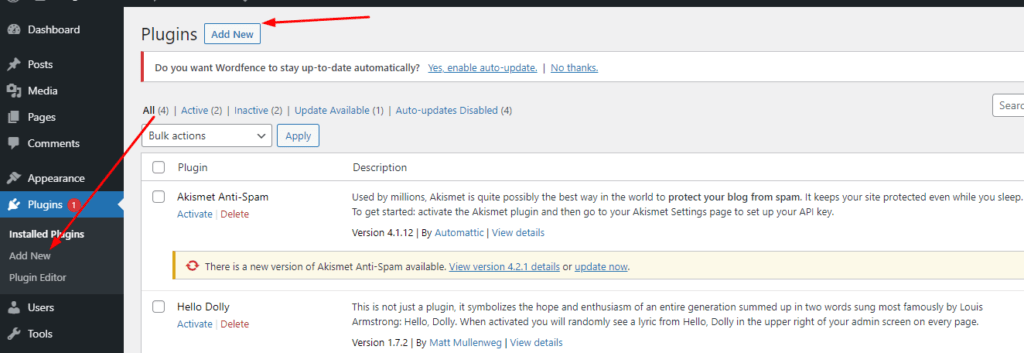
If you search for Wordfence in the search bar, you will receive the results for Wordfence. Select the first result (the one with the Wordfence logo) and click install.
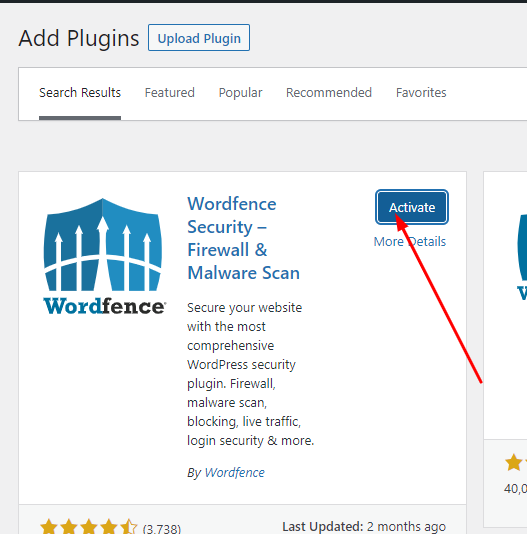
Activation of the plugin can be done by clicking Activate after installation is complete:
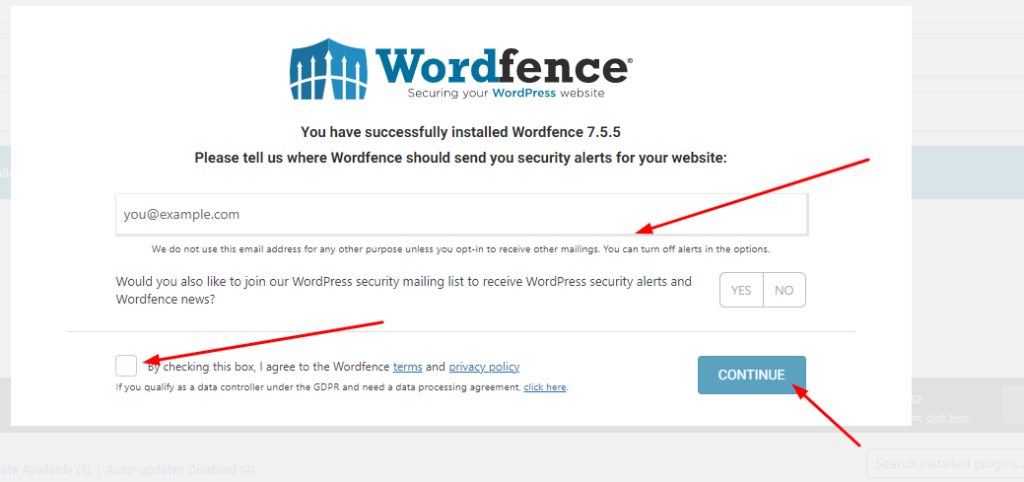
Upon activation, they will ask you for the email address they will use to send you emails regarding your website. Provide your email, click yes if you’d like to receive emails, check the box for agreement, and click continue.
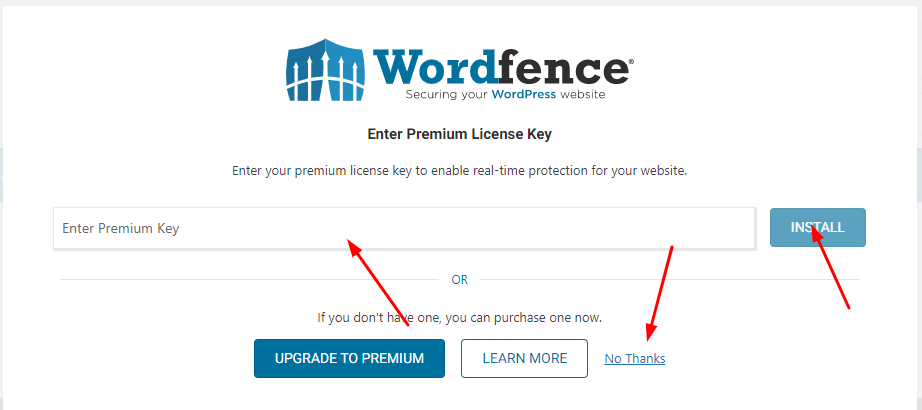
Enter your key here if you have the premium version, otherwise, click on No thanks to use the free version.
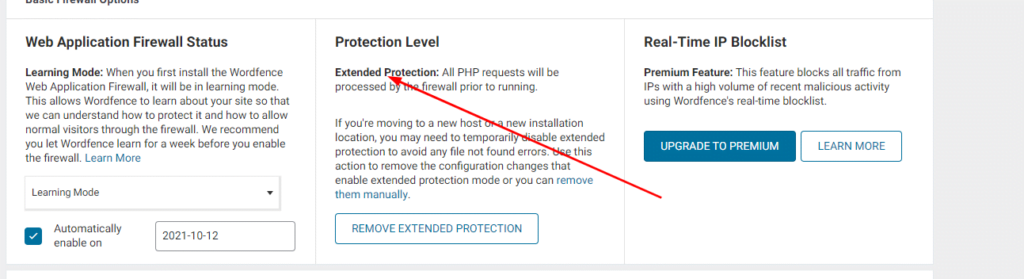
You are now ready to use Wordfence. Click on Wordfence on the left menu. When you click that, you will be prompted to configure full/extended Wordfence protection.
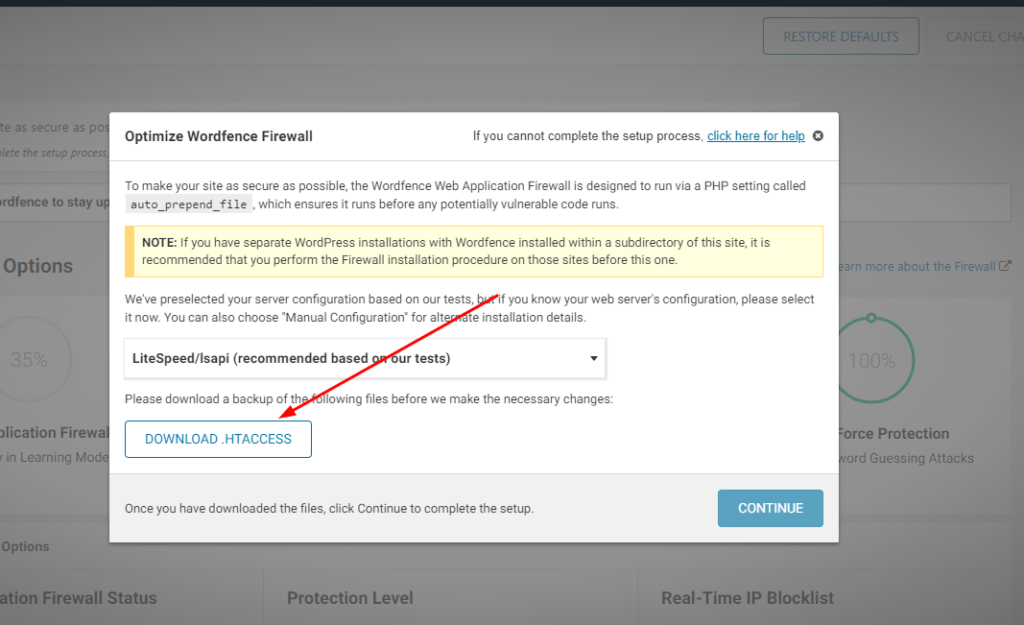
When you click the configuration button, a prompt appears asking you to download the .htaccess file. Click the download button and then press the continue button.
As in the case of LiteSpeed Ent. While most configurations are done out of the box, we need to perform a few additional steps for OpenLiteSpeed.
Access OpenLiteSpeed Webadmin:
To access OpenLiteSpeed Webadmin, the port 7080 must be opened on any external or internal firewall. If it is not opened then you cant access OpenLiteSpeed web admin. In CloudPages you need to open port 7080 read the documentation here.
You can access your OpenLiteSpeed webadmin on port 7080 and your URL for this will be like:
https://<ip>:7080
Use your credentials to log in.
here you also need to reset the LiteSpeed admin password please click here to do so.
Setup Vhost Configuration for Advanced WordFence Protection options:
As I mentioned already in this article that Advanced WordFence Protection options need some configurations in the case of OpenLiteSpeed and without doing those configurations you just have a basic version active on your website.
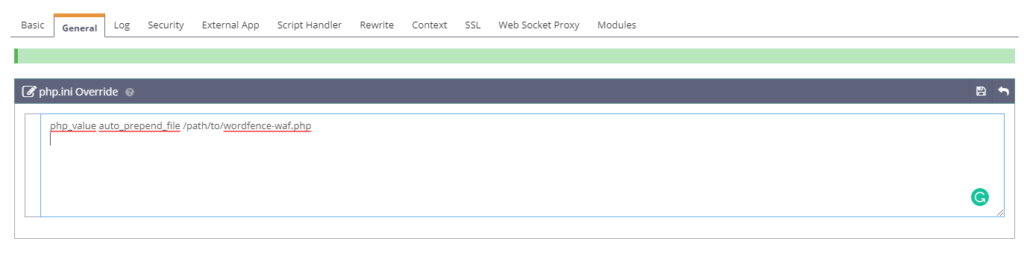
Access your Litespeed web server to enable the advanced protection. In the OpenLiteSpeed dashboard, click on the VHost -> Site->General.
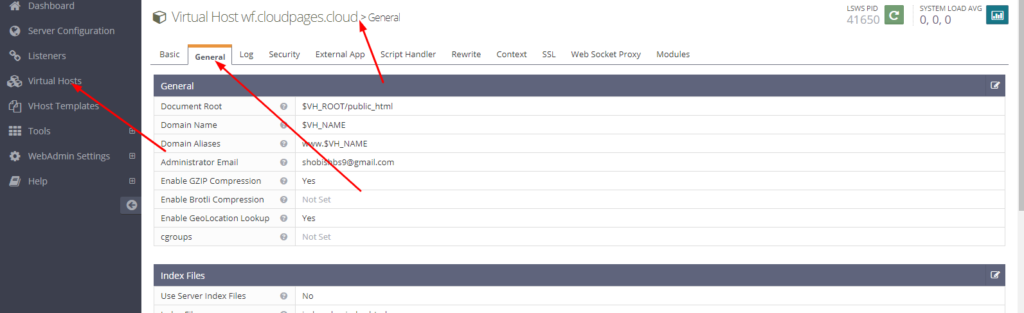
If you scroll to the bottom of the page, you will find php.ini overwrite By clicking edit, you can edit your document.

in the edit mode of this please add these lines.
php_value auto_prepend_file /path/to/wordfence-waf.php
In the case of CloudPages, the path of this will be like this:
php_value auto_prepend_file /home/<replace with path you choose while website creation>/public_html/wordfence-waf.php
After providing all this information just restart the OpenLiteSpeed web server. You can also do it using the command line.
systemctl restart lsws
or you can do it from the Webadmin itself.

All done for configurations and setup now go back to your Wordfence and you can see the Basic Protection is converted to the Extended Protection.