
Amazon EC2 (Amazon Web Services) is one of the most popular and reliable sources for cloud servers. Amazon EC2 is taking more and more space in the cloud market day by day. It is a part of Amazon’s cloud computing platform and web services.
You can easily get the server from Amazon and can install CloudPages on it to manage your websites.
In this article, I will discuss briefly how you can set up an EC2 instance and install CloudPages to run/host your websites.
Table of Contents
Step 1. Create an Amazon EC2 Instance:
In order to move toward the creation of an EC2 instance, you must have an AWS account. If you don’t have an AWS account click here to register and proceed. If you have an account then simply click here to provide credentials and log in.
Amazon always offers a Free Tier to its customers. This Free Tier lets customers try out Amazon’s services and explore everything about them. This offer is comprised of three types of deals: a one-year, Always Free deal; and short-term offers. Try this before buying it.
Now once you’ve logged in follow the steps to create an EC2 instance.
Select Region for Server from AWS:
Before going to start the setup of the server first you have to select a region where you want to set up the server. Region selection is very important and you have to be very careful while selecting your region.
You must choose the region closest to your website users. For example, your website users are from the US then you must have to choose any region closest to them. This will affect the performance as well as the user experience.
To select the region in AWS EC2, you can select and change the AWS EC2 region from the top menu (once logged into your account) as shown in the picture below. Like in my case I selected US West (N. California)us-west-1. You can select according to your choice.
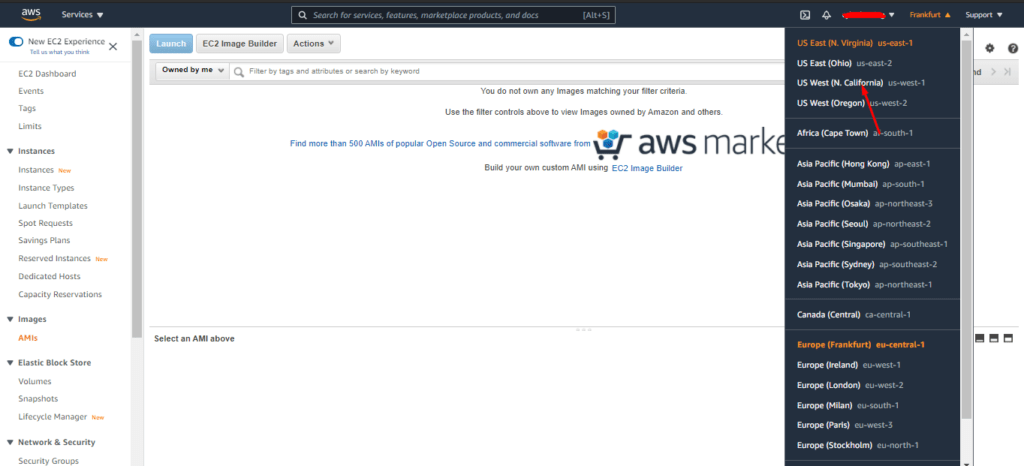
Once you change/select a region, you can see that on the top bar. AWS has many regions and locations for your choice. You can read about all regions and locations by visiting here.
Create EC2 Instance:
First, you go to the Launch Instance page. Click on the Instance button from the left menu and you will then land on this page, its now time to create your instance.
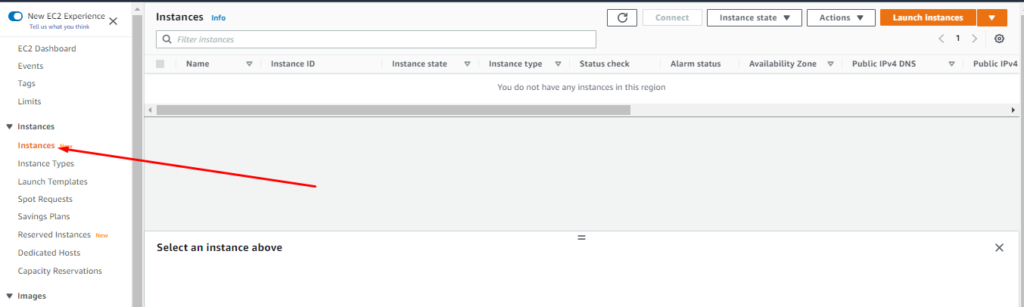
Now click on the Launch Instances button. Click on that, and the processing commences.

Choose an Amazon Machine Image (Must be Ubuntu 20.04):
Here, the real process begins. You have to choose Amazon Machine Image (Operating System for your server), as CloudPages is comparable only with the Ubuntu 20.04. So, you must choose Ubuntu 20.04 for your server.
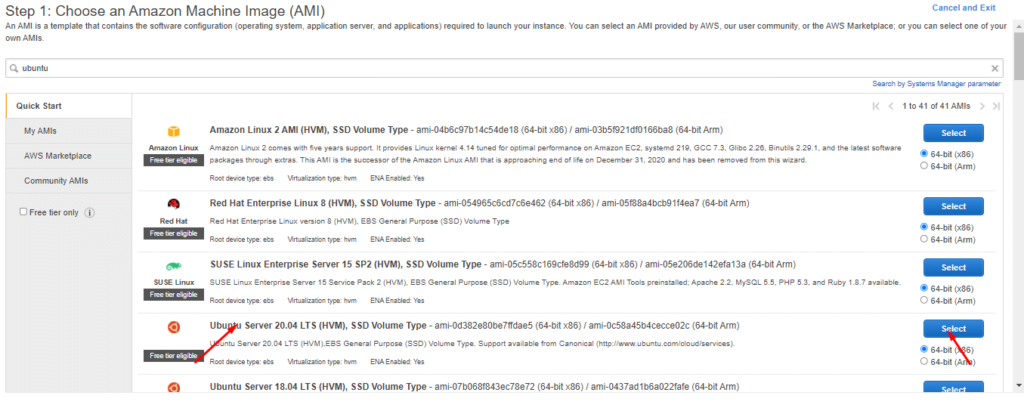
Press the Select button and jump to the next step.
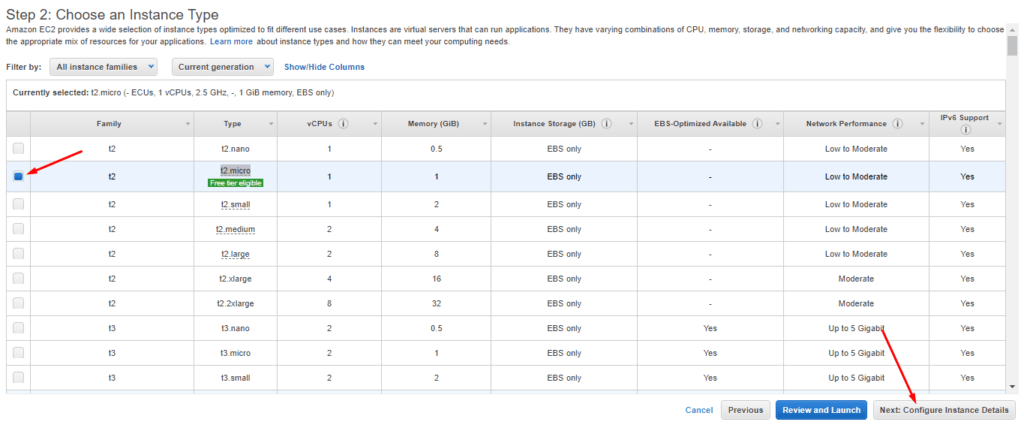
Choose an Instance Type:
Now you need to choose the type of instance you want. Like how much RAM, CPUs, and all you want in your server. You can choose any of the server specifications according to your requirement. If you only want to test the AWS services and check the performance select the type of instance that is available in the AWS Free Tier like for now t2.micro is under this offer.
Choose any instance type by clicking the check button and then press the Next: Configure Instance Details button.
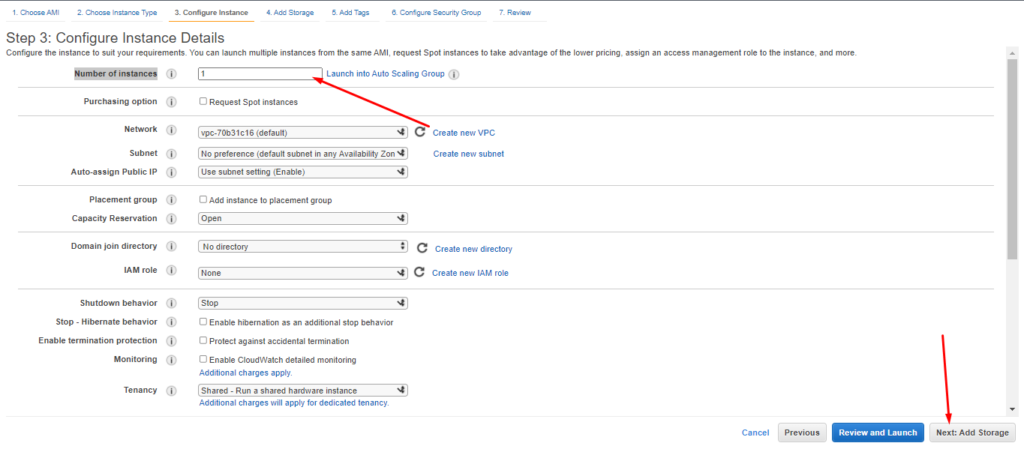
Configure Instance Details:
In this step, you can do some configurations like if you want to create 2 instances with the same specifications and settings go to the option Number of instances and add 2 in the input box.
There are a lot of other options like this and you can choose according to your choice. (Will leave everything to their defaults in this section)
Add Storage:
Add storage space you want to add or use for the server. In this instance, I choose 20GB of space. That is a lot for the CloudPages setup, however, choose more if you need.

After adding the size press Next: Add Tag button and move to the next step.
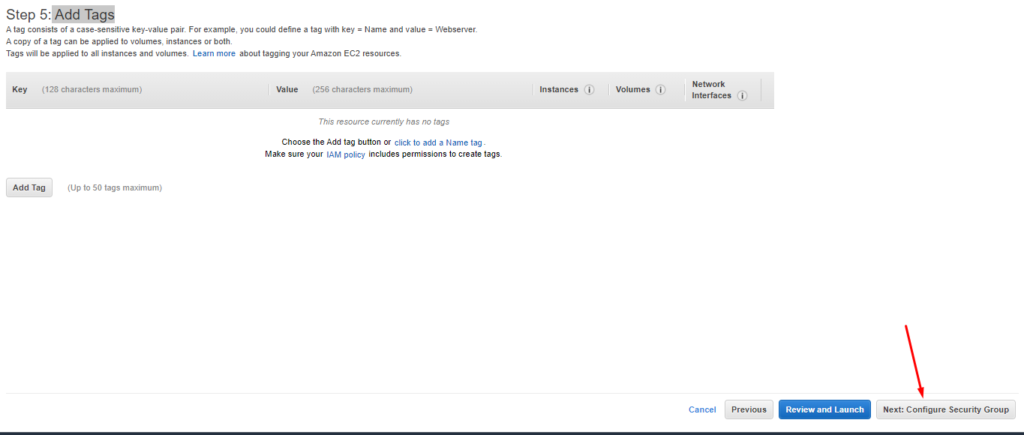
Add Tags:
Leave this section as default and move next. If you know about tags and want to add a tag for instance you can do that.
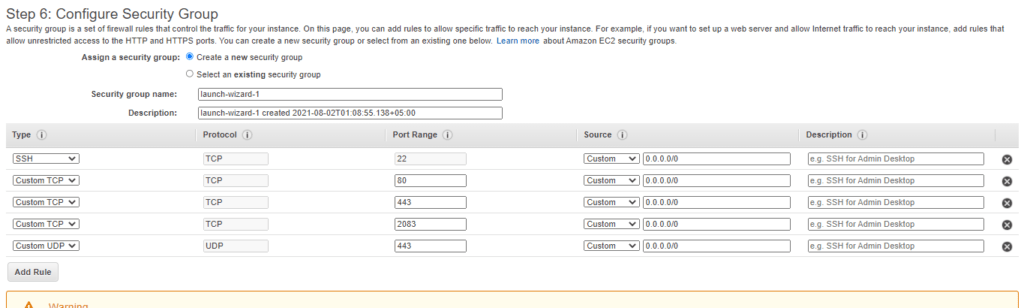
Configure Security Group:
This is a very important step because now you have to open a port that CloudPages or any services you want to use on the server will use. In the case of CloudPages, we need to open these ports.
- 80/tcp,
- 443/tcp,
- 443/udp
- 2083/tcp (CloudPages internal Firewall will restrict this port to 1 IP)
Add these in the firewall of the AWS EC2 instance and press Review and Launch button.
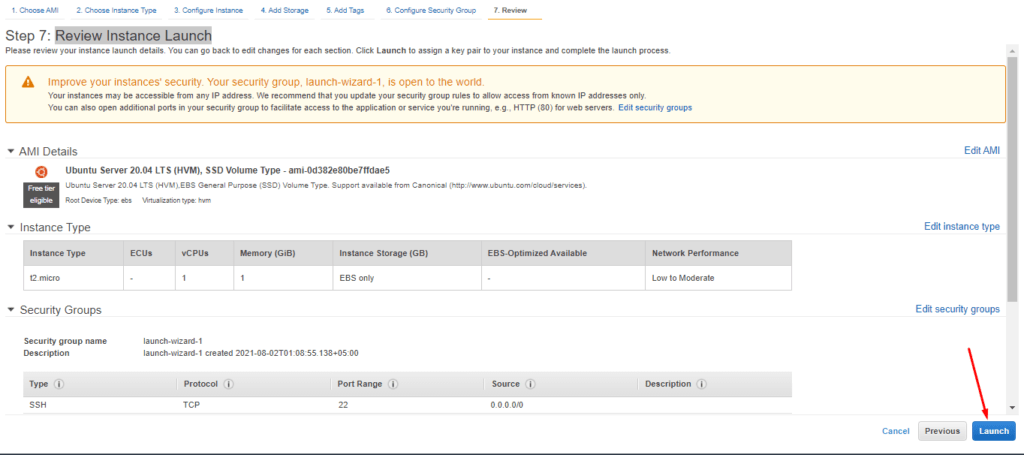
Review Instance Launch:
In this last step review all settings, you did in the previous steps. If you think or got any issue in configuration edit and fix that. And then press the Launch button.
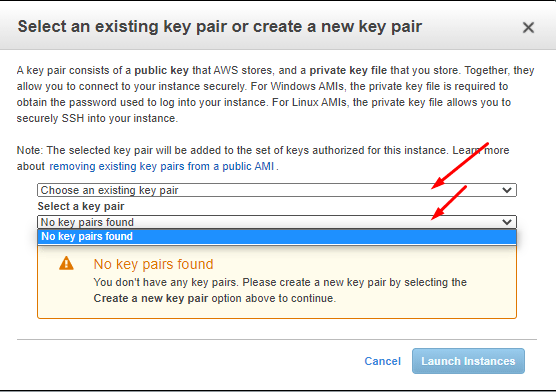
When you click the launch button a popup will appear on your screen that will ask for the selection of the SSH key to access and proceed further (SSH key is required to access the server from the command line)
Select old key if you have or add the key to access.
Step 2. Setup CloudPages on your server:
Now your instance is ready to set up CloudPages and manage your Website here.
Setting up CloudPages on your server is very easy and a few click process. First sign in to your CloudPages account here. If you don’t have an account register here.

After registration follows these two steps.
- Create a project on CloudPages following this documentation.
- Deploy Server following this documentation.
CloudPages have a free plan and 7 days trial for new users, visit our pricing page to learn more.
You can also check our lifetime deals here (It is possible that our lifetime deals are finished when you are reading this article).
Step 4. Create Website:
CloudPages made the creation of a website very easy to create a website just follow this documentation or you can also deploy WordPress.