
WordPress and WooCommerce (the online store plugin) are two applications that work together to power almost 40% of all e-commerce stores on the planet.
After Coronavirus pandemic everyone is trying to launch their online presence. In this tutorial, we will learn how to start an online store using WooCommerce. So that you can bring your product online and keep your shops running during this pandemic.
There are many advantages of creating your own online store, including increased worldwide acceptance of e-commerce and the potential to promote your online presence, products, and values.
Table of Contents
Why create an online store?
There can be two main reasons for creating an online store:
- Create online store and start making money.
- Bring your offline business presense to ecommerce world.
Starting an online store remains one of the most reliable ways to make money online. You too can start an e-commerce store even if you have minimal to no web development experience. Because you can use WordPress and WooCommerce to launch your online shop.
If you already have a WordPress and WooCommerce site make sure to Speed up your WordPress Website using LiteSpeed Cache Plugin. We’ve also created a list of plugins to boost your sales on WooCommerce.
What is eCommerce?
E-commerce is the practice of buying and selling physical/digital products or services from online platforms.
You can purchase virtually anything online. Whatever your product or service is, it can be purchased/sold over the Internet.
However, you need some sort of platform to sell stuff. In this article, we are going to discuss one such platform which you can use to launch your online store at minimal possible cost.
What is WordPress and WooCommerce?
There are many marketplaces where you can sell your products online such as Amazon is a popular option, however, most people like to start their own online stores. Starting your own store gives you complete control and freedom. Now, launching your own store requires a platform and one such popular platform is WordPress.
WordPress is a free web platform for publishing content and for creating any other type of website. It’s easy to set up your own WordPress site, even if you have no experience with programming or websites. It’s also user-friendly.
These days you can even use WordPress to launch your own E-commerce store using a plugin called WooCommerce.
What do you need to create an online store?
There are few things that you need to create your online store.
- Domain: It act as address of your store, which you users can use to visit and purchase.
- Hosting: You need hosting to bring your store online.
We will discuss both of these points in detail. A good domain and fast hosting are very important for the success of your online store.
Let’s discuss step-by-step how to launch your eCommerce store using WordPress and WooCommerce.
Step 1: Purchase a domain name
In this section, I will discuss how to buy a domain name from Namecheap. If you already have a domain name you can skip this step.
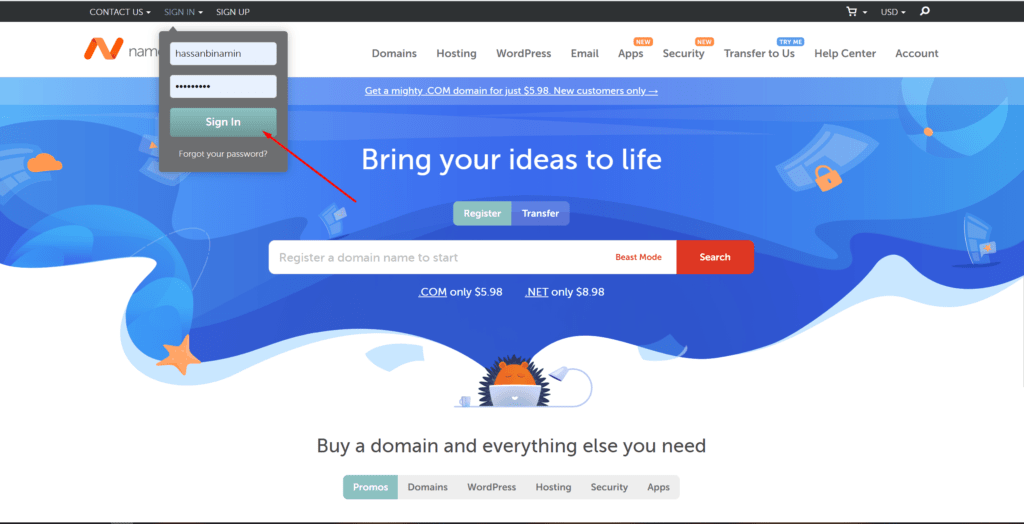
Goto the Namecheap website, If you don’t have an account on Namecheap, you can register yourself for free, If you already have an account click SIGN IN from the top menu, provide your login details, and sign in to your account.
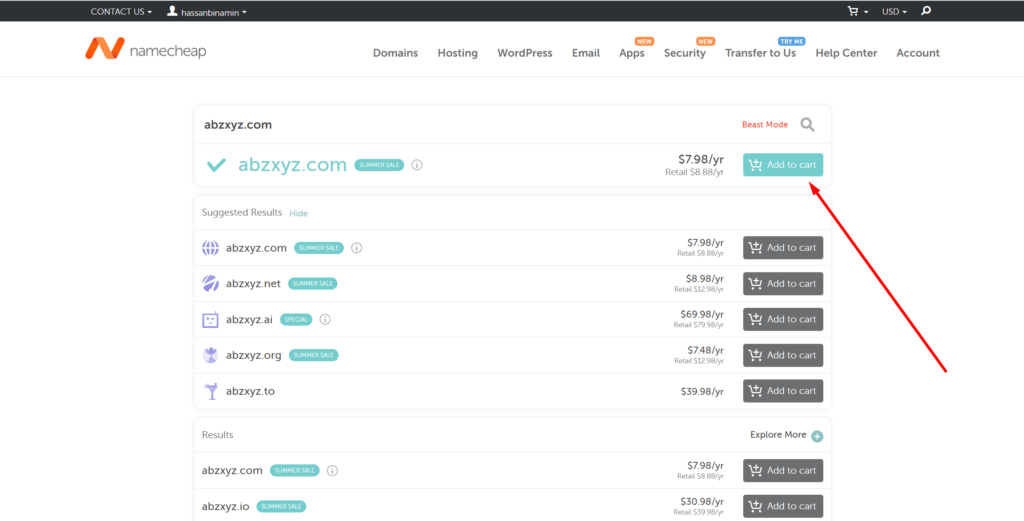
Once inside your dashboard, here you can search the domain name that you want to buy from Namecheap, enter the domain name in the input box and click on the Search icon shown in the following image.

In the next step, all the relevant information for your domain is shown in a list, it will also let you know if the domain name that you searched is available or not. If the name is not available you will have to choose a different name.
Once you are comfortable and ready with your domain name selection, click Add to cart for the purchase of that domain name.
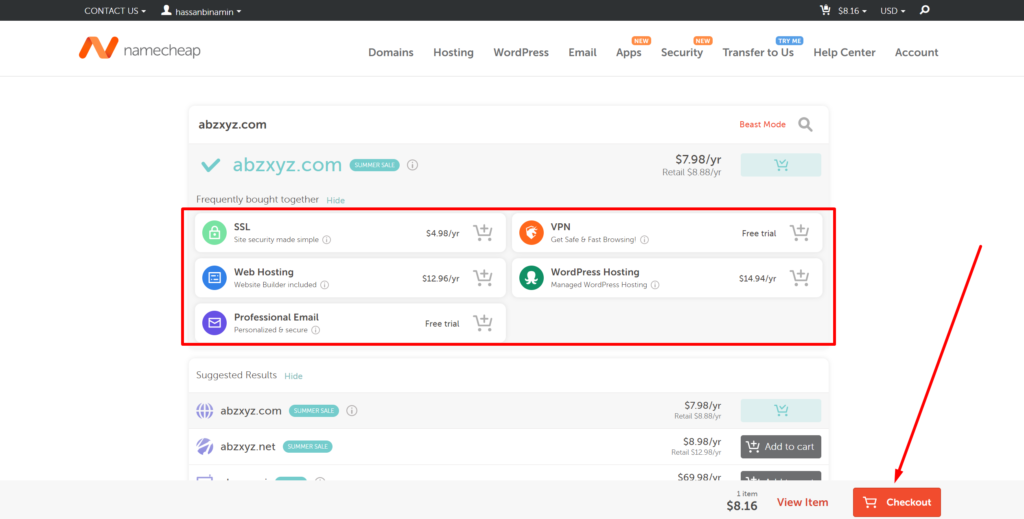
Once you clicked on Add to chat, you can see some frequently bought together things are shown on your screen, you can also buy them if something is of your interest, but in this step, I will only buy the domain as I am not interested in other things, so click on Checkout button.
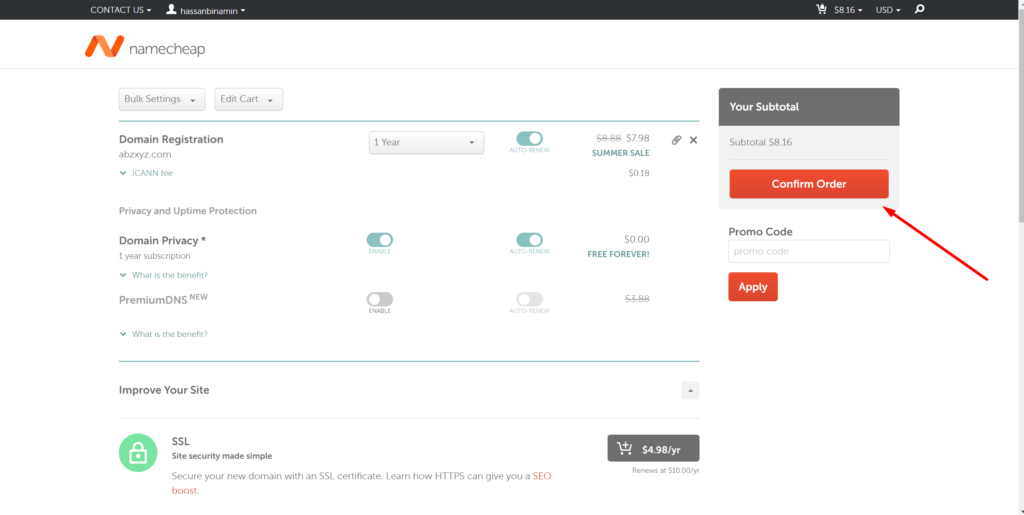
In the next step, there are some things that are shown on your screen you can set according to choice, and then click on Confirm Order button for the confirmation of your order.
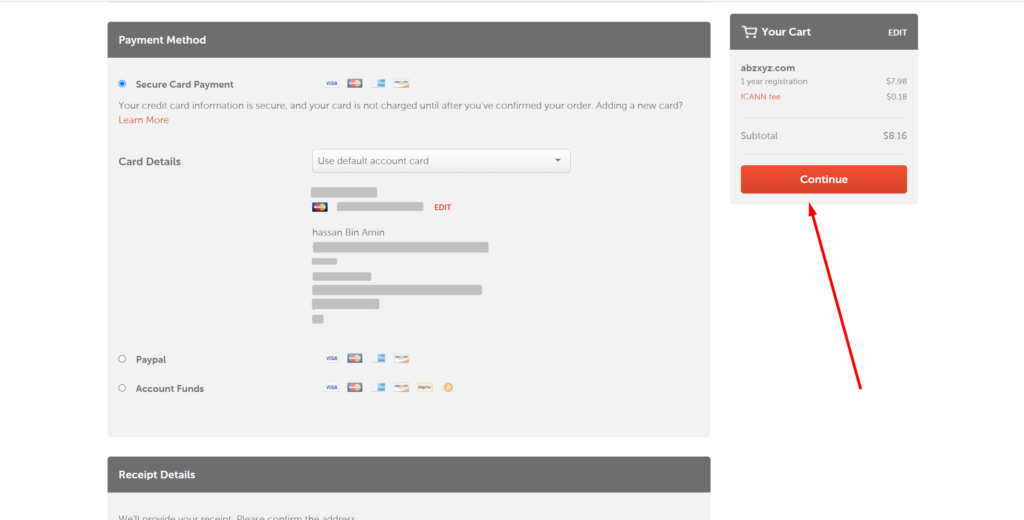
In the next step, add your payment method and click on Continue button.
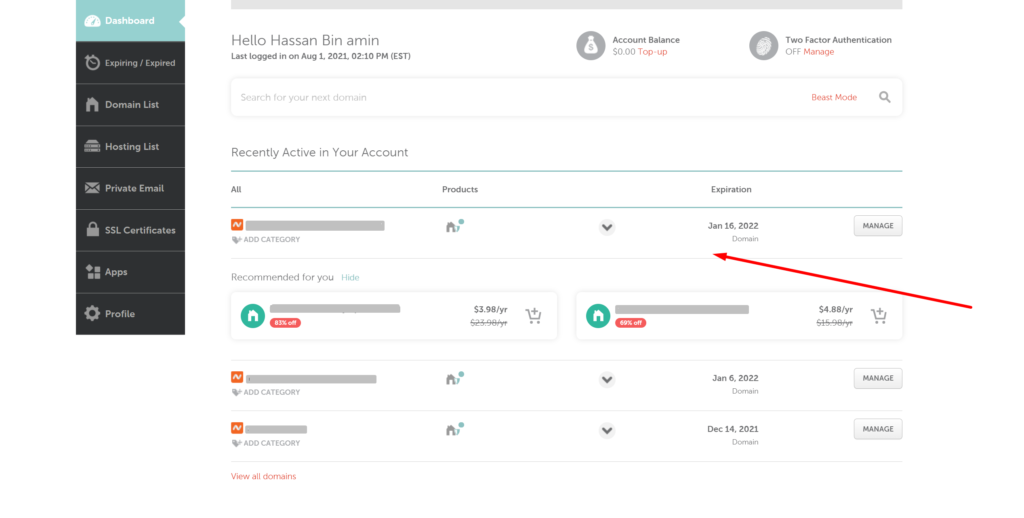
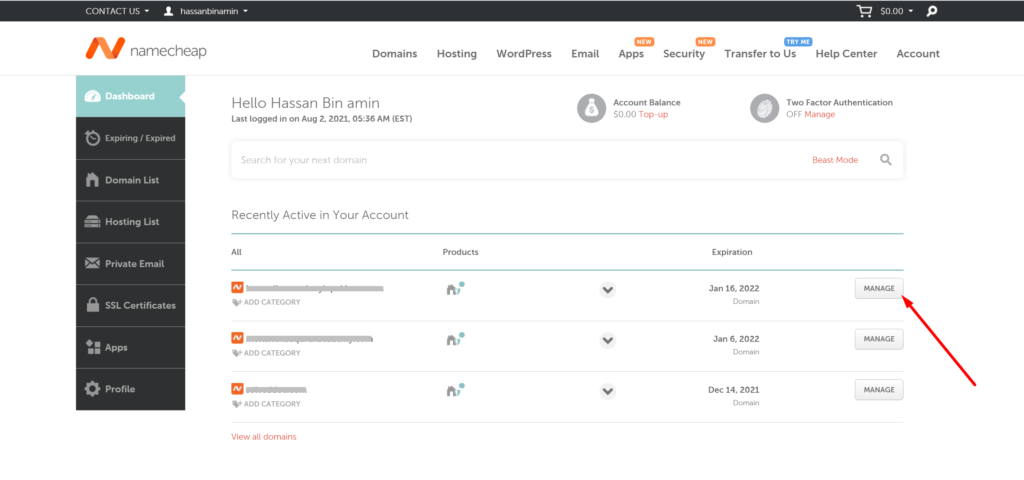
You have now successfully purchased a domain name, and if you go back to your Namecheap dashboard you will see that your new domain is listed there with all other previous purchased domains if any.
Step 2: Get Hosting
In this section, I will discuss how to get a server on DigitalOcean. You can also buy a shared hosting account but usually, an E-commerce shop requires higher resources so having a cloud server sounds good.
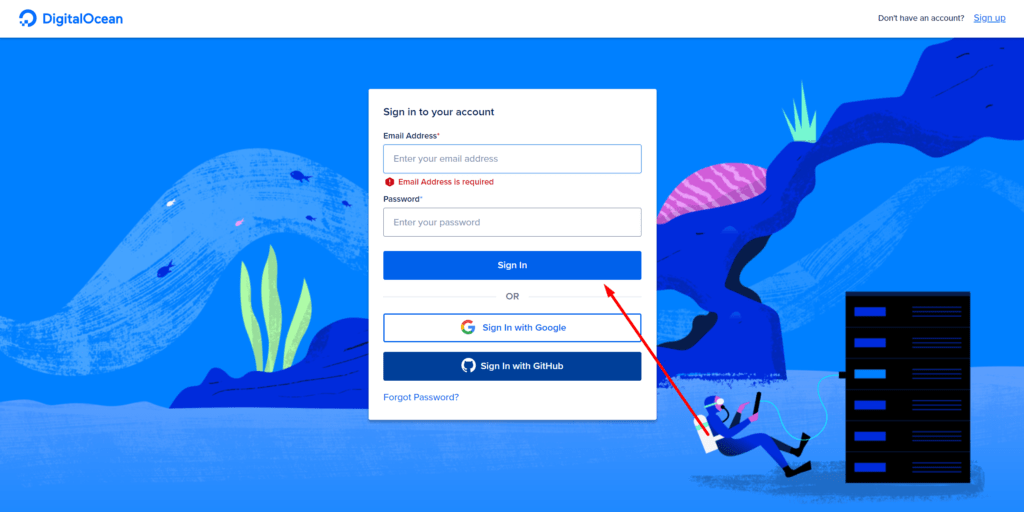
Goto DigitalOcean website, if you don’t have an account on DigitalOcean, you can register yourself for free, and if you already have an account on DigitalOcean, provide your credentials, and click on the Sign In button.
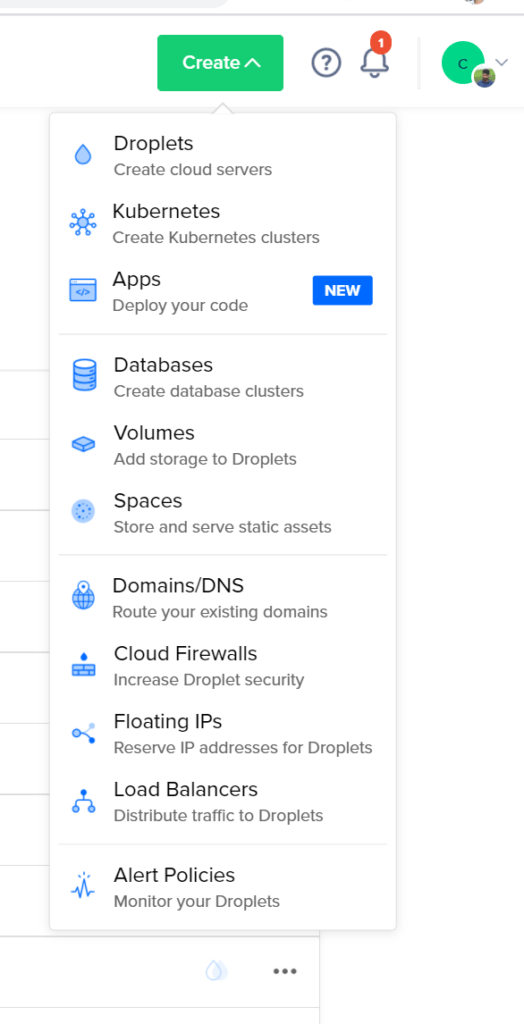
On the dashboard, you can see Create button on the top right corner click on it to create a new server on the digital ocean.

By clicking on the Create button, you will see various options, click on the Droplets button.
In this step, you can follow the procedure for creating a server.
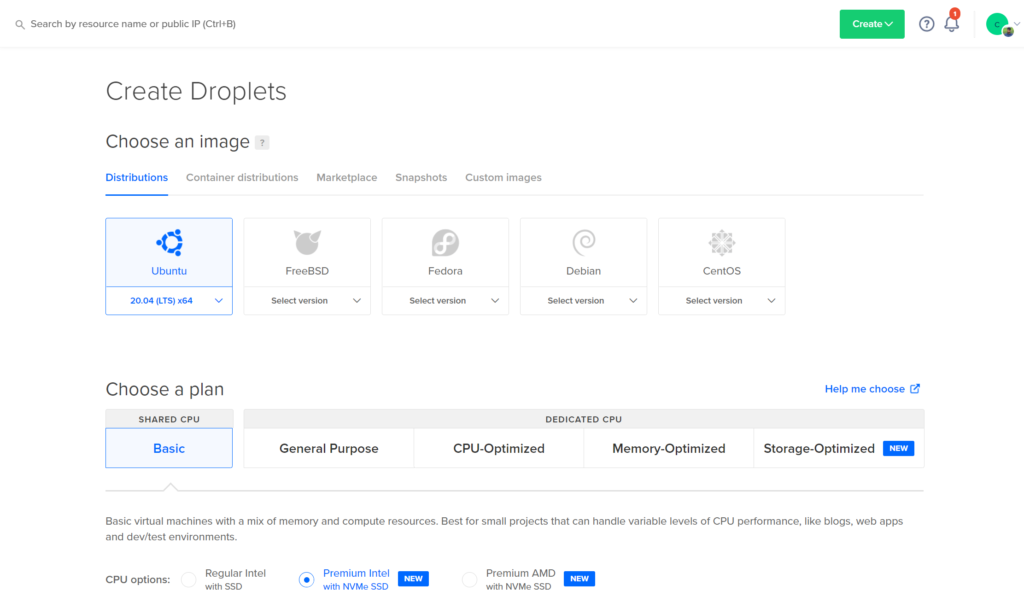
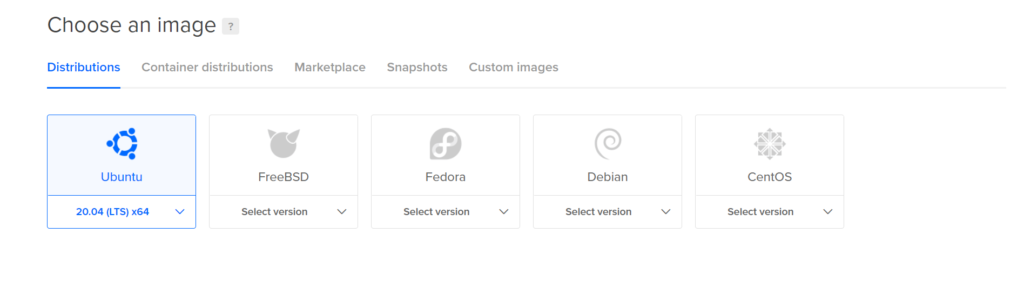
Step-1: Choose an image
In this section, you must choose Ubuntu 20.04 LTS x64, because CloudPages only works with Ubuntu.
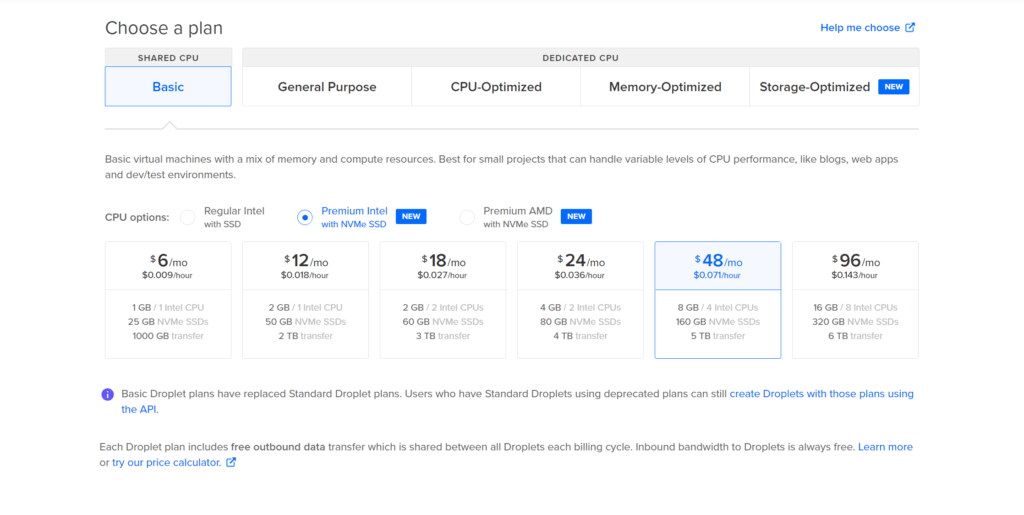
Step-2: Choose a plan
Choose a plan according to your choice, the price depends upon the system specification, so choose whatever you think will be good for your shop.
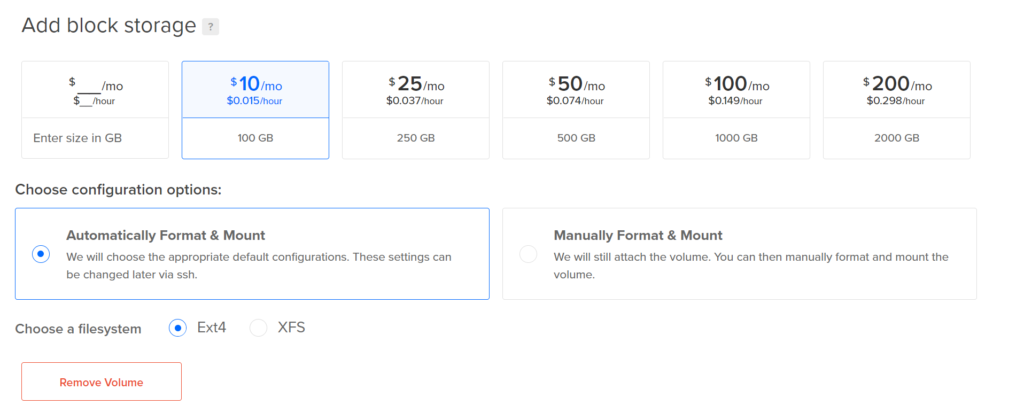
Step-3: Add block storage
This step is optional if you want extra storage then you can select this according to your choice.
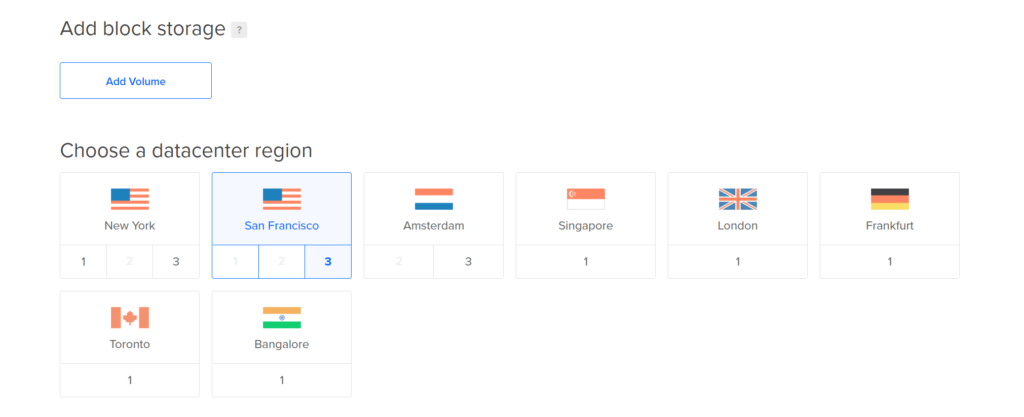
Step-4: Choose a datacenter region
In this step, you can choose a data center location or region in the following locations.
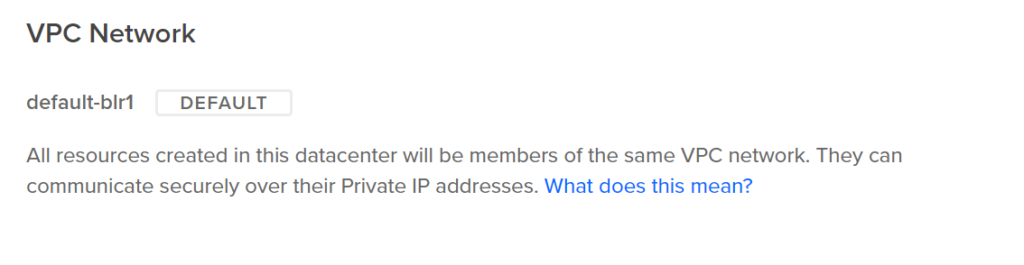
Step-5: VPC Network
In this section, you can go with default settings.
Step-6: Select additional options
Don’t select any options in this step

Step-7: Authentication
This step is very important, in the top, you can see the radio button of the SSH key and Password, choose the SSH key it is more secure. Once you select the SSH key the previously added keys are displayed on your screen you can select one or select all from here and if you don’t add a key click on the New SSH key button and add a new key.
Alternatively, if you don’t have a key or don’t want to set up key-based authentication, you can select the password option.

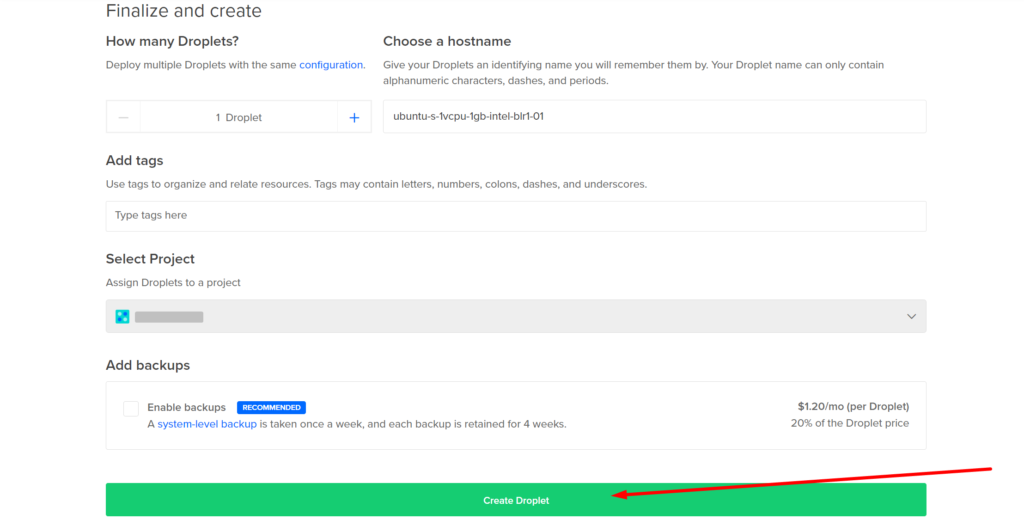
Step-8: Finalize and create
In this step, leave these options as default and click on Create Droplet button.
Once you click on the Create Droplet button you will automatically move to the dashboard where you will see a new droplet getting created. Once the process is finished you can see your server is created and listed on the Dashboard.

Please note the IP Address of your droplet as this will be needed in the next step.
Step 3: Set DNS on Cloudflare
In this step, I will show you how to set DNS, especially A record so that your domain can resolve to your server IP address.
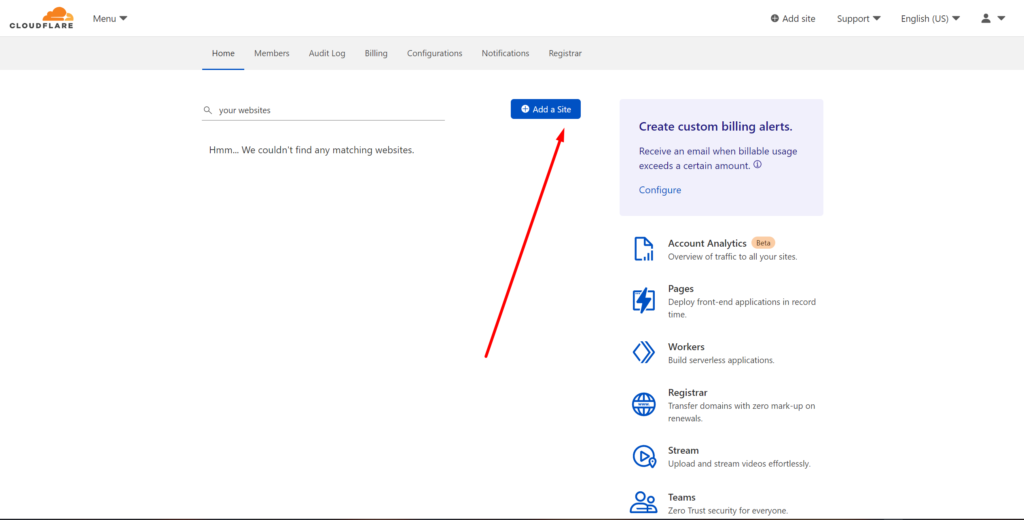
Goto the Cloudflare website, if you don’t have an account register yourself, and if you have an account provide credentials and log in.
In the dashboard, you can add your site by the clicking on Add a Site button.
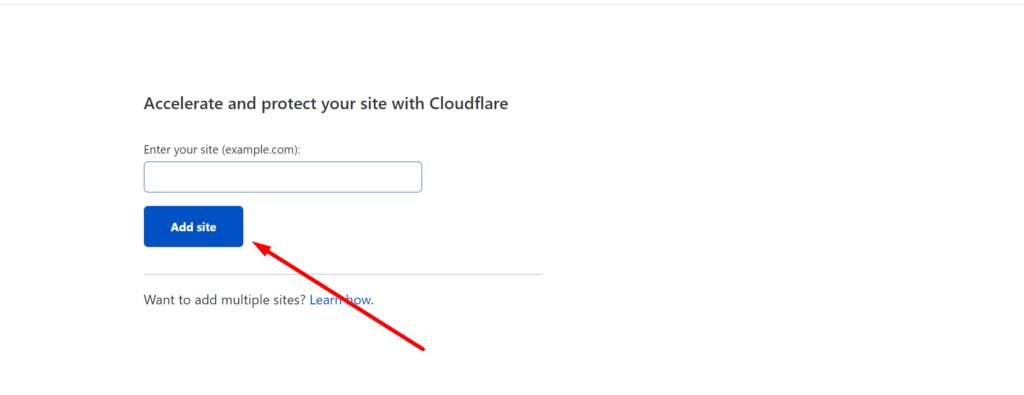
In the next step, enter your domain name (that you have purchased above) and click on Add site button.
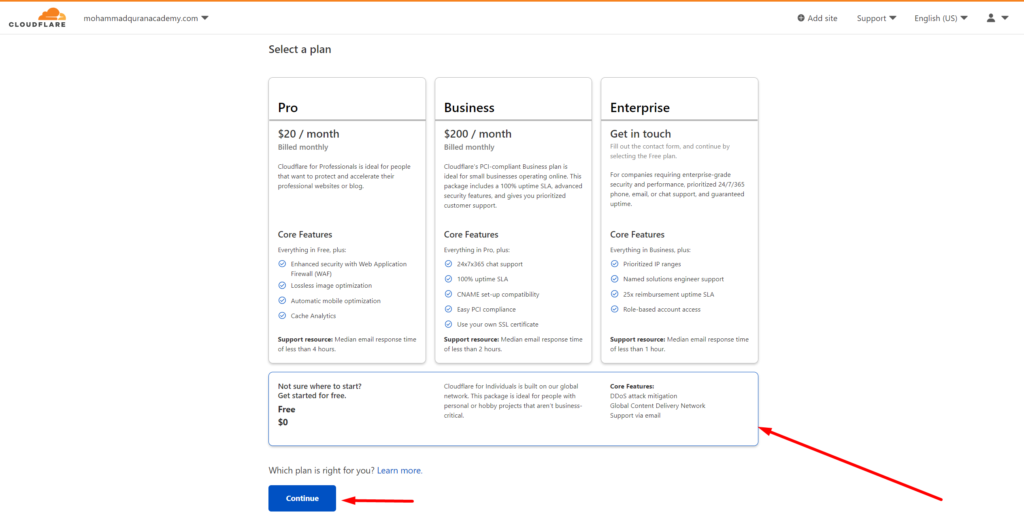
Once you add the site, the next step is to select a plan, select the last one that is free and click on Continue button.
It will show you the following screen, you can add your domain name and IP Address (of your server that you have bought above from DigitalOcean) and click on Continue button.

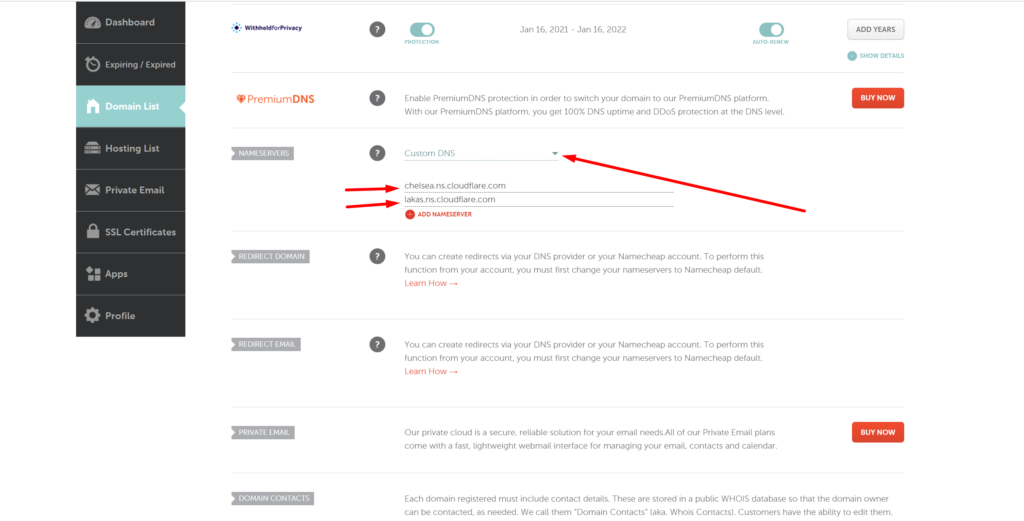
Once you add, It will give you nameservers, now copy these two nameservers.
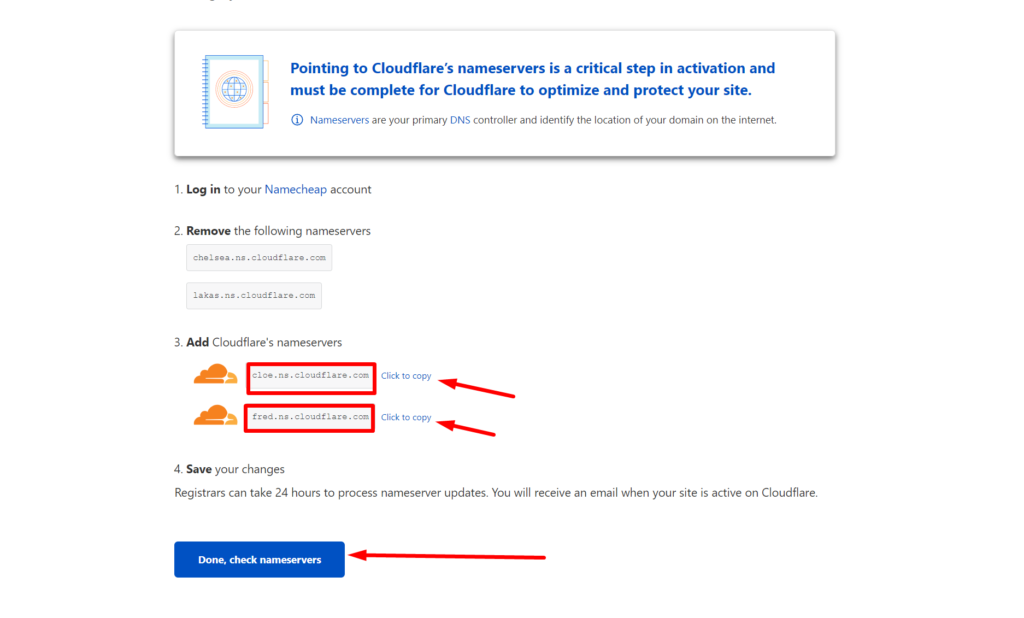
Now in this step, go to the Namecheap dashboard, here you can see the domain name, click on Manage button so that you can update its DNS records.
In this step, goto to the Nameserver option, choose the custom DNS option from the dropdown, and paste the DNS records that you copied from Cloudflare, and save.
Now your domain is purchased, DNS is set. It is time to install CloudPages on your server.
Step 4: Install CloudPages
Finally, let’s install CloudPages so that you can easily manage and deploy WordPress sites.
The first step is to go to the CloudPage panel, If you don’t have an account, then Register yourself on CloudPages, and if you have an account then go to the Login page and provide your credentials and click on the Sign In button

Once you have logged in, now follow the step-by-step procedure.
Step 4: Deploy WordPress with WooCommerce
In this Step, I will show you how to deploy WordPress with WooCommerce in CloudPages so that you can launch your eCommerce shop.
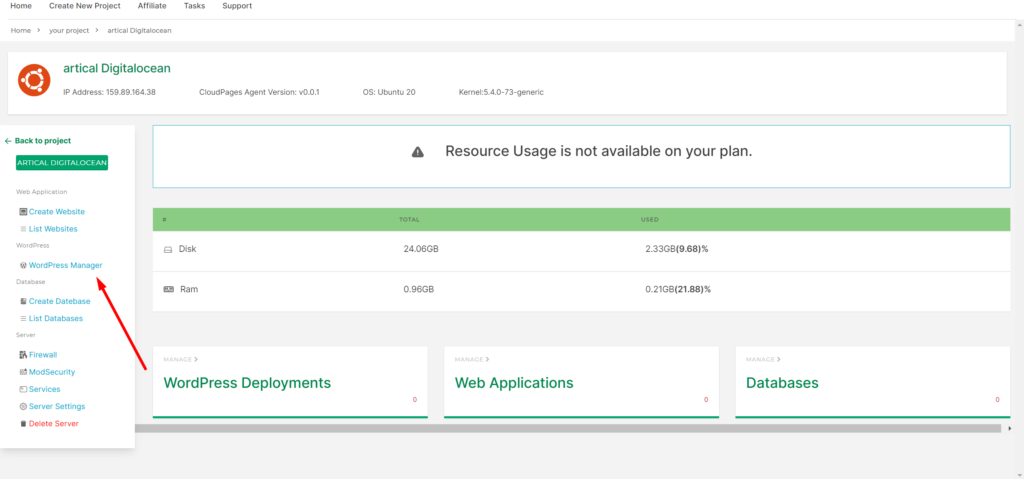
1 – Deploy WordPress
On the home page (dashboard) of the server, there is a WordPress Manager button to deploy the WordPress site using CloudPages. Press that button to deploy a WordPress site on your server.
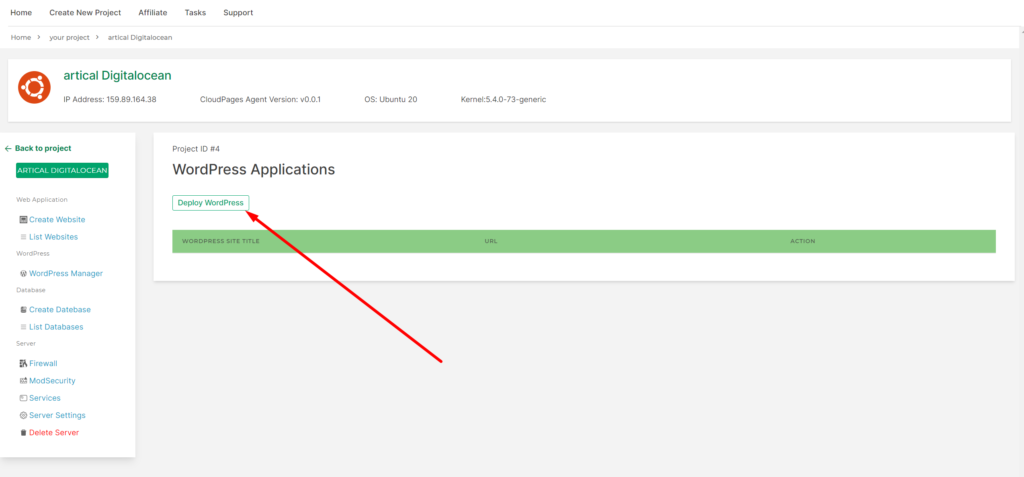
After clicking this button, you can see the following screen. Click on the Deploy WordPress button from this screen to create a new WordPress site.
2 – Installation Configurations
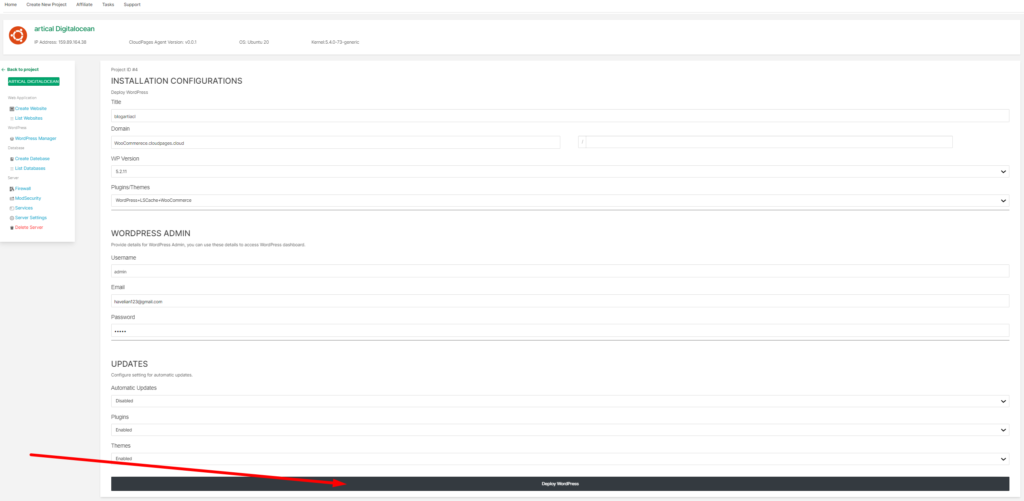
Now move towards configurations of your WordPress site. For configurations, you need to provide the following details.
2.1 INSTALLATION CONFIGURATIONS:
Title: Provide the title of your shop according to your choice.
Domain: Type the Domain name that you have bought from Namecheap.
WP Version: Select the WordPress version (any stable or latest).
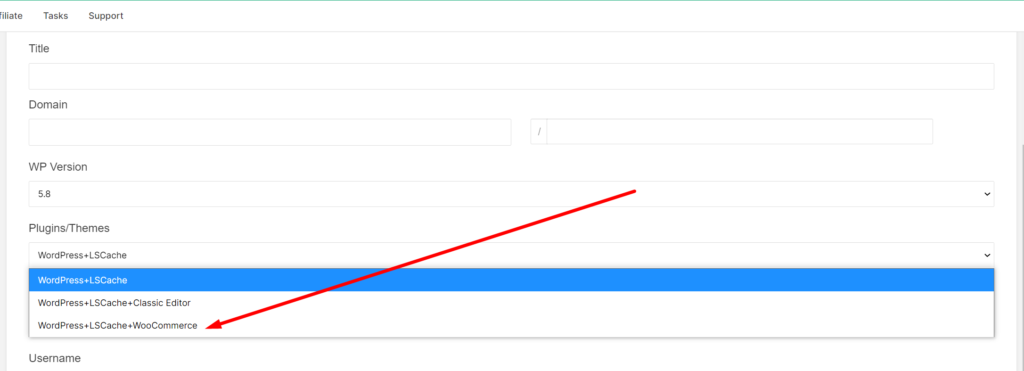
Plugins/Themes: Chose any option WordPress+LSCache+WooCommerce
2.2 WORDPRESS ADMIN:
Username: Type the username that you will use to log in to WP Admin.
Email: Type the email that you want to use, you can also use this email for WordPress login.
Password: Type the password that you will use to log in to WP Admin.
2.3 UPDATES:
Automatic Updates: You can enable or disable automatic Updates (All Updates).
Plugins: You can enable or disable automatic Updates of Plugins.
Themes: You can enable or disable automatic updates of Themes.
After providing all details click on Deploy WordPress Button.
3 – Deployed
Once you click Deploy WordPress, CloudPages will automatically deploy WordPress with WooCommerce for you along with the LSCache plugin for maximum speed.
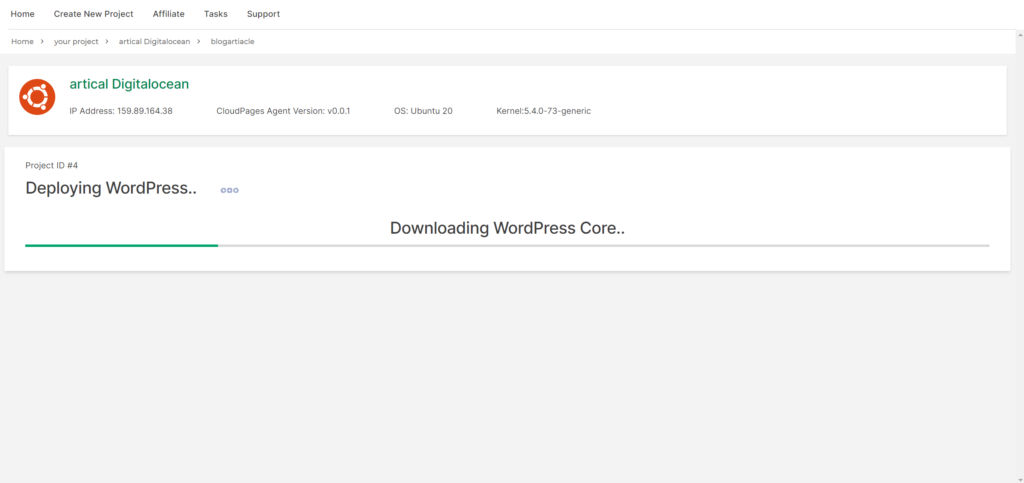
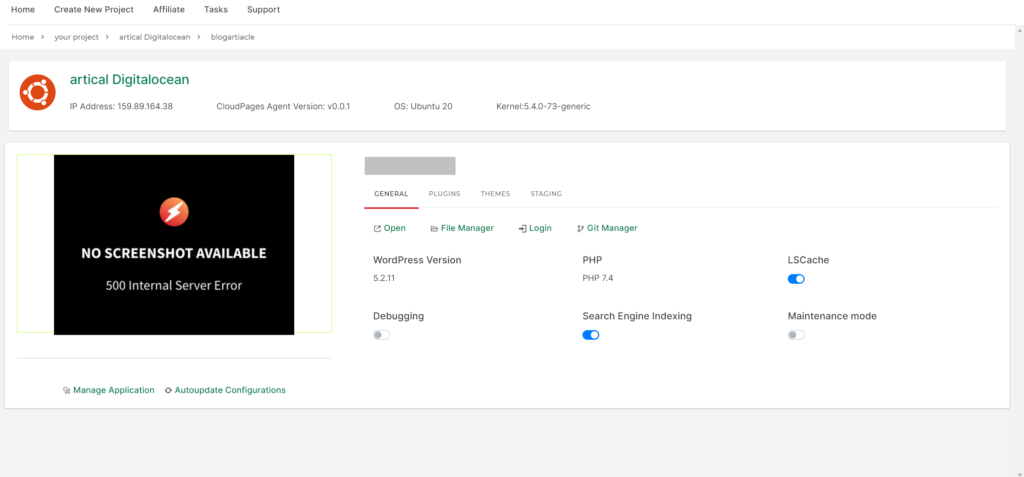
After some time you can see that the process is completed and WordPress is configured on your server.
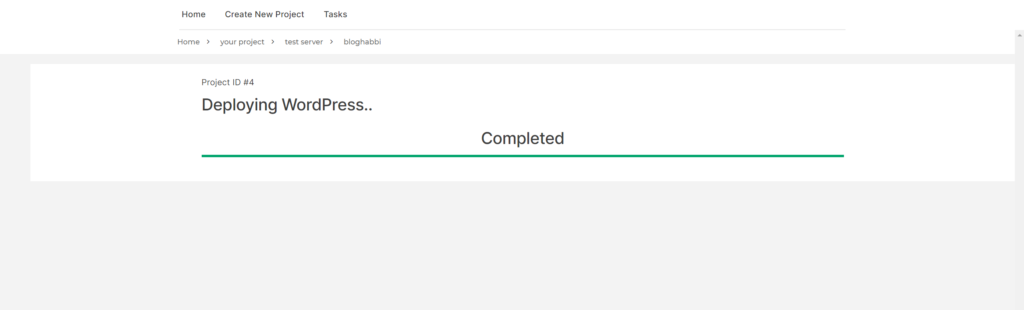
After all processes, you will automatically go to this page
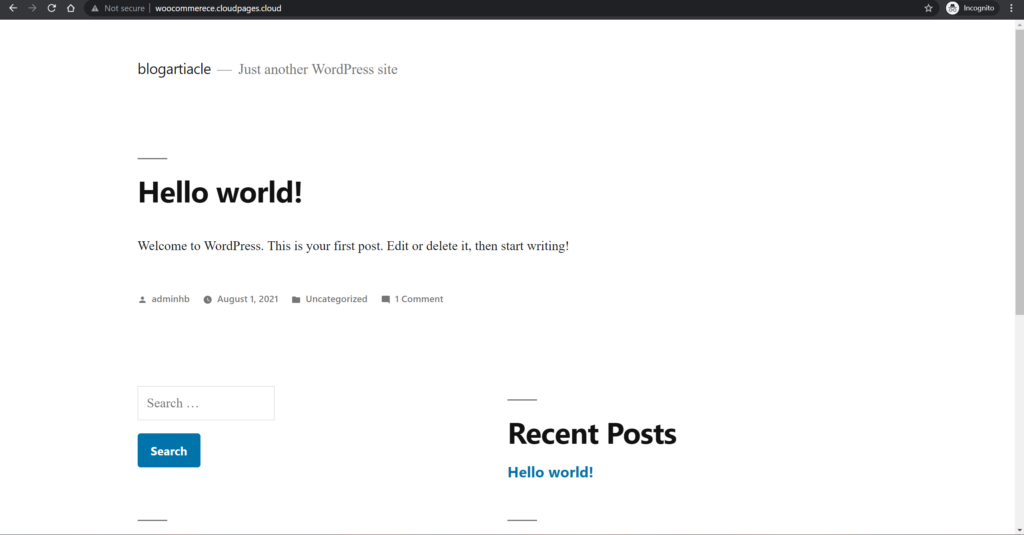
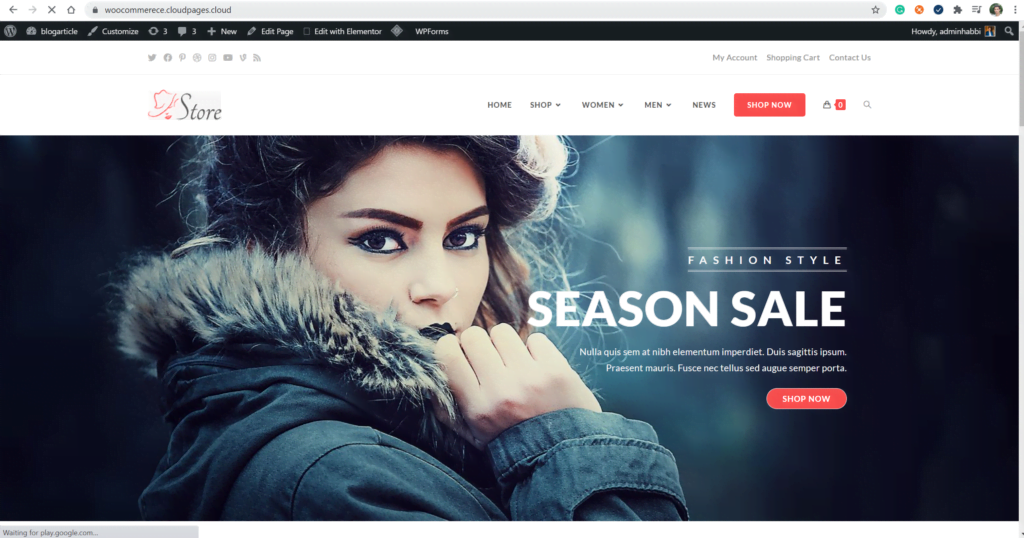
Now you can access your website in any browser it will show the following output.
Step 5: Install OceanWP to design your Shop
In this step, I will show you how to install the OceanWP theme to design your WooCommerece shop.
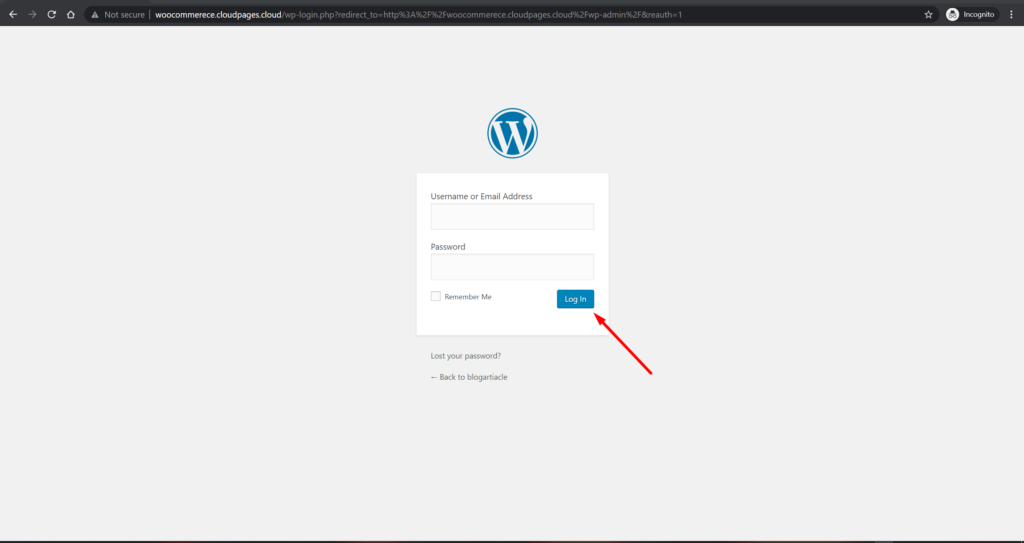
Open your website as a WordPress Administrator in any browser, you can see the following output, provide your credentials and click on the login button.
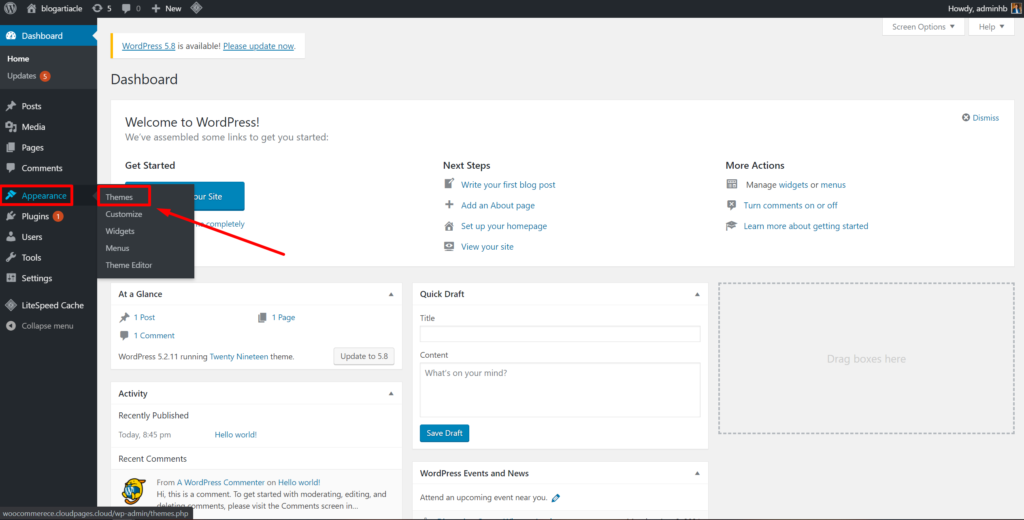
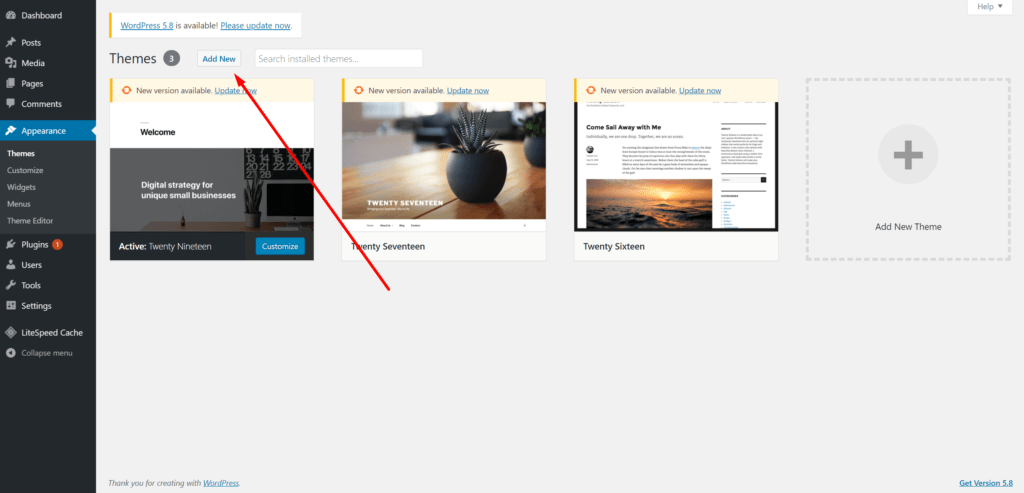
Once you log in, you can see the WordPress admin dashboard, click on Appearance from left menu and it will show you a sub list, click on Themes.
Click on Add New for adding a new theme to your website.
Enter the name in the Search box, you can see the OceanWP theme show on the search results, click on install, and then activate it.

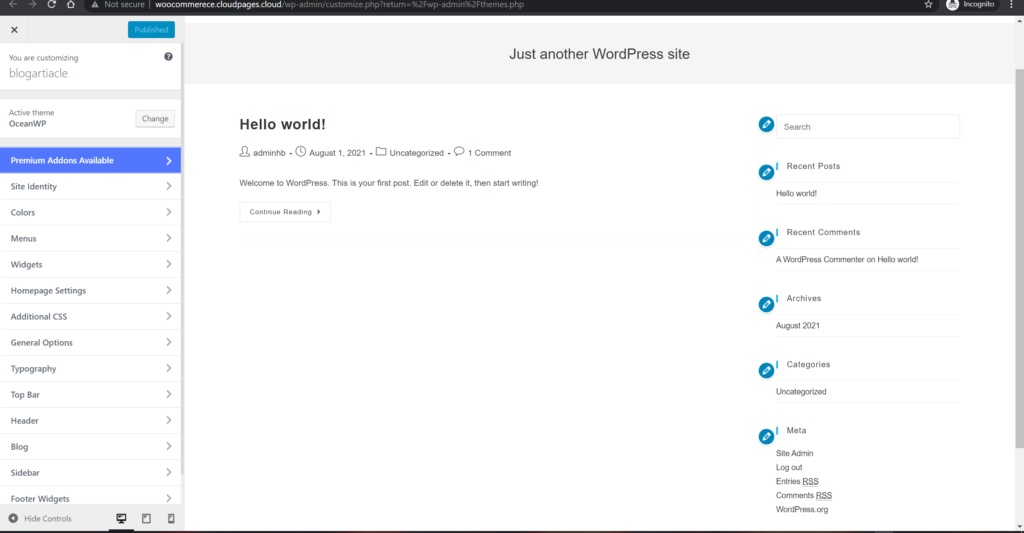
Now you can see the theme is installed and activated on your website, click on customize to set it up according to your requirments.
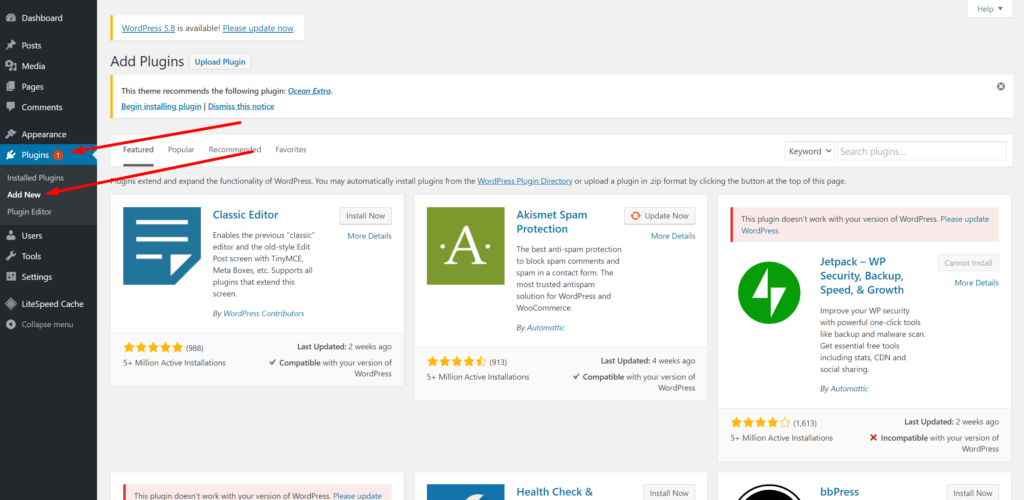
OceanWP comes with predefined demos that you can easily import to your site. You must install these recommended plugins and then you can import the OceanWP shop demo.

Install OceanWP Demo
Let see how you can use OceanWP demos to quickly set up your site.
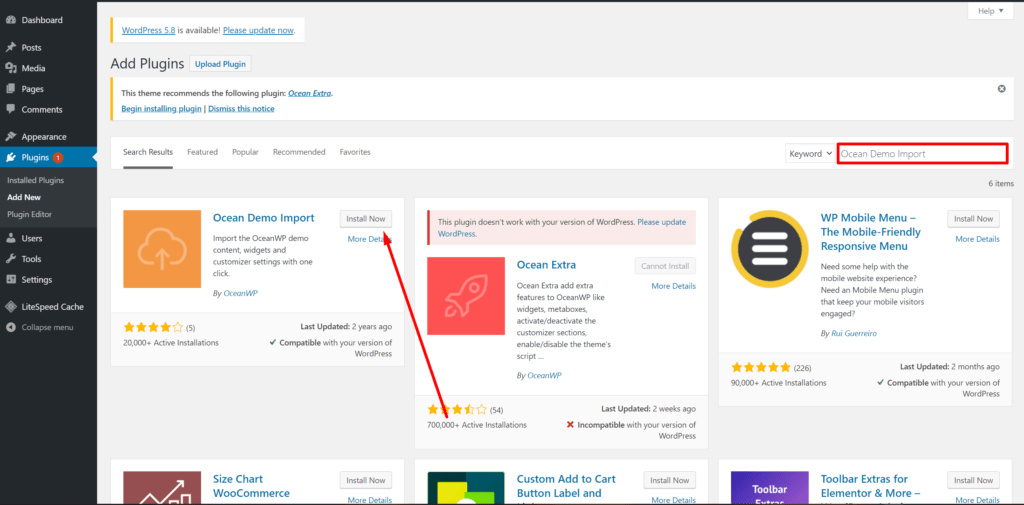
For the installation of the demo, you must install the Ocean Demo Import plugin. So follow the step-by-step procedure to install the demo.
Install Ocean Demo Import plugin
Go to the Plugin section from the dashboard of your WordPress site and click on Add New.
In the search box type Ocean Demo Import, you can see the plugin is shown on your screen click on the install button and activate it after installation.
Install Demo
Goto to ThemePanel in the left sidebar and click on the Install Demos button.
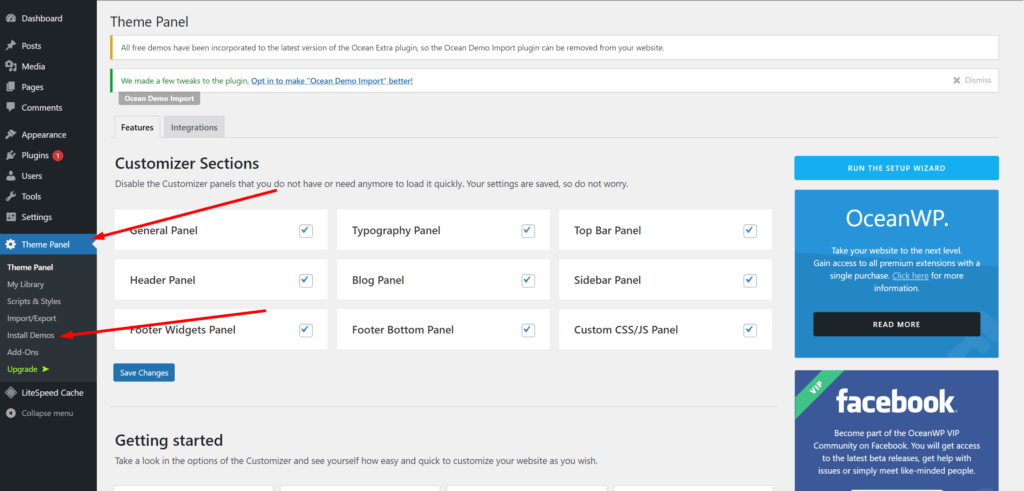
It will show you the list of the demo, you can filter according to choice. We will click on eCommerce demos as we are interested in setting up a shop.
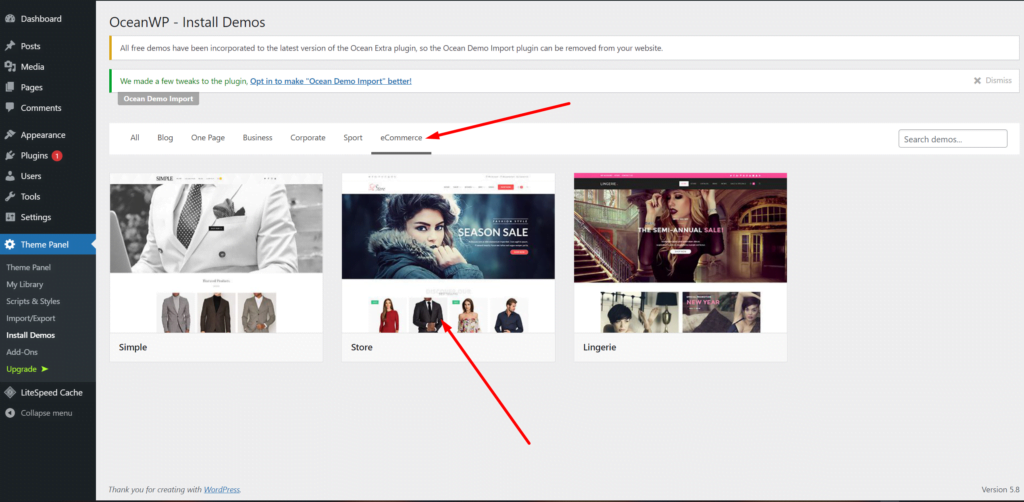
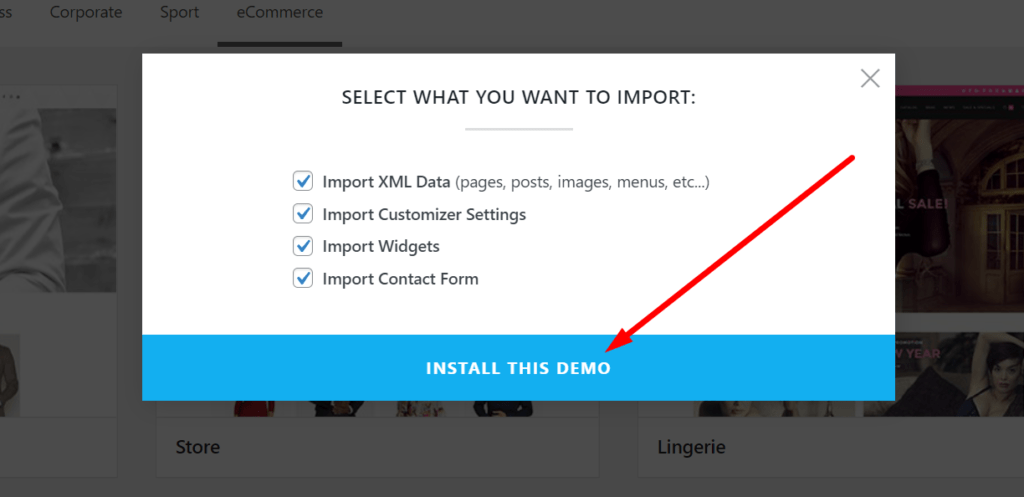
Click on the demo you want to import, a popup will appear.
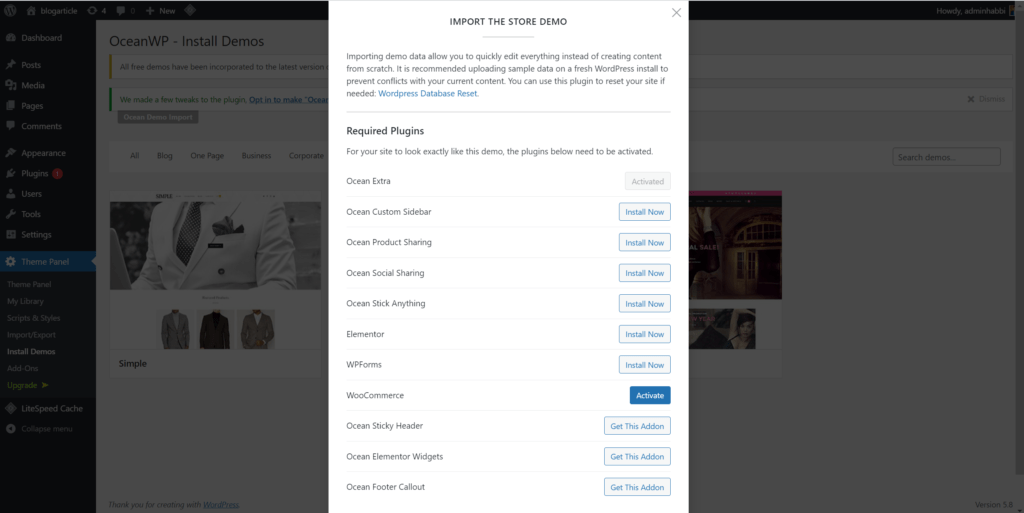
Install and activate all required plugins and click on the Next button.
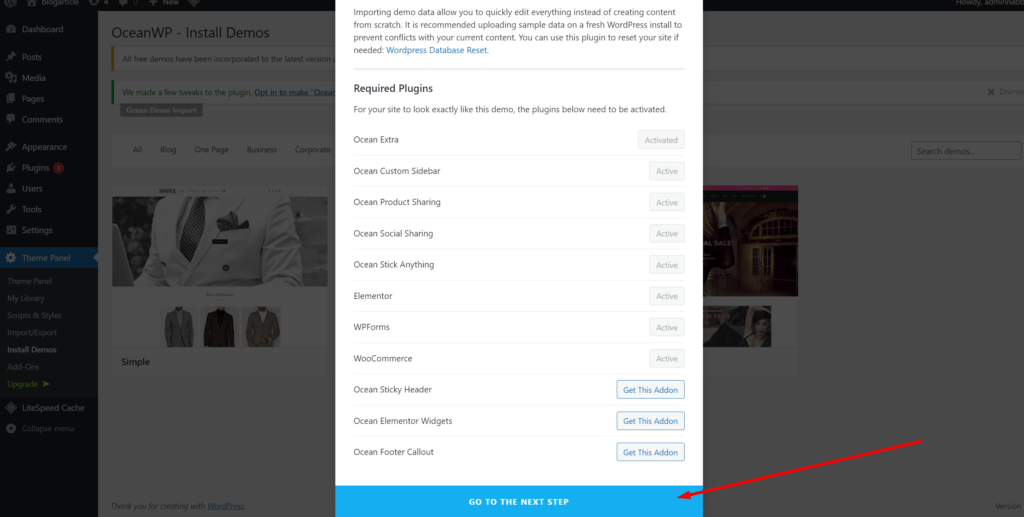
Select all options and click on the Install this Demo button.
After some time the whole data is imported and shows the following result.
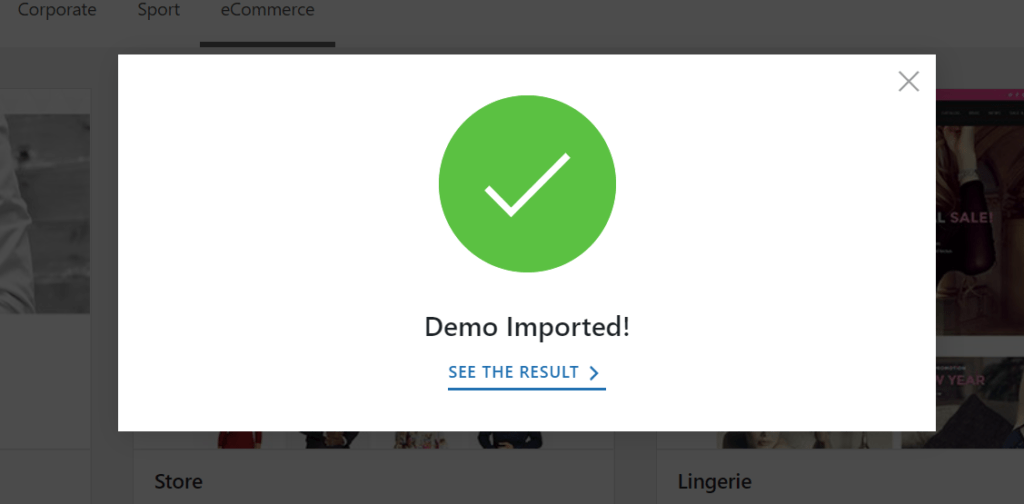
Now you can visit your website, you can see the dome is successfully imported and activated on the website.
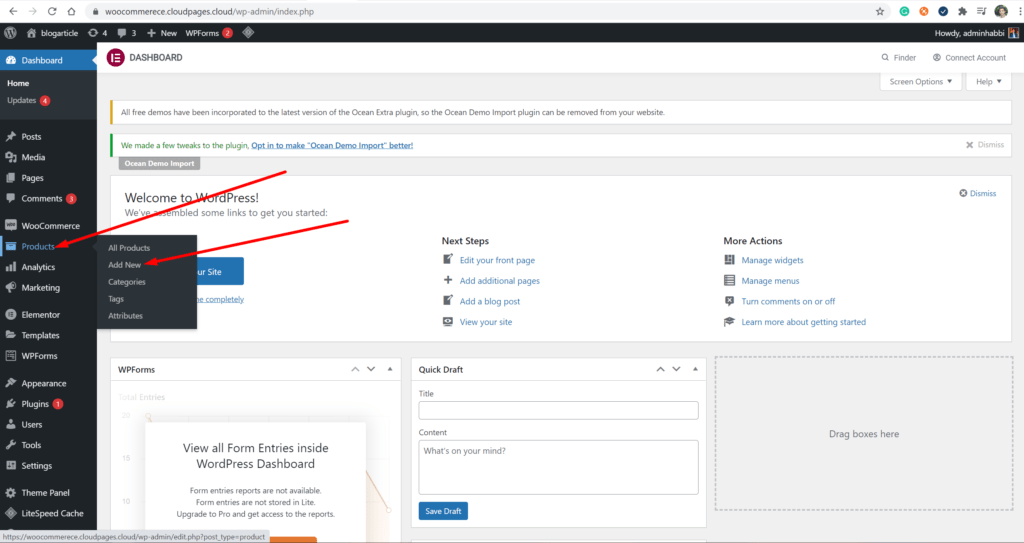
Add Product
Once your WooCommerce shop is ready it is time to add new products. The demo site comes with some default products you can either delete or directly modify.
Adding products to a WooCommerse store is simple and easy.
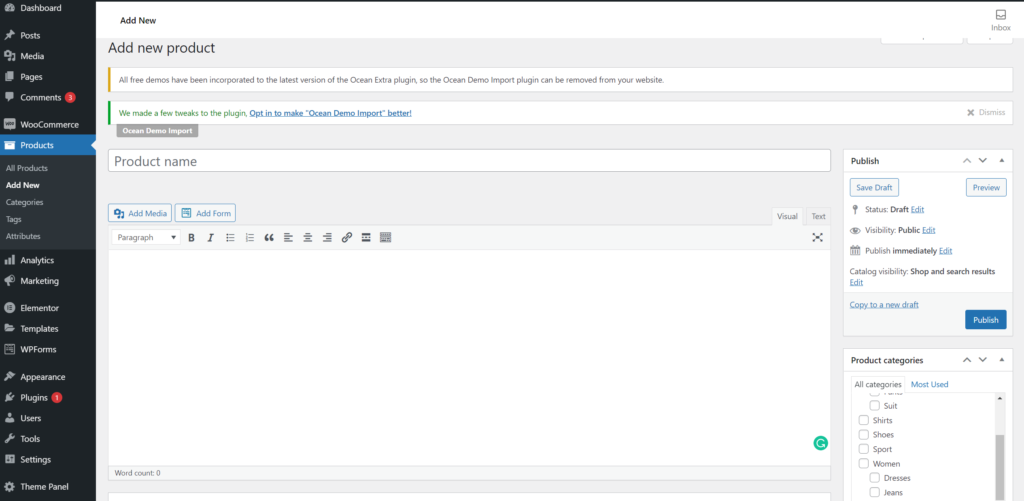
Go to the dashboard as WordPress administrator and click on Product and then click on Aad New.
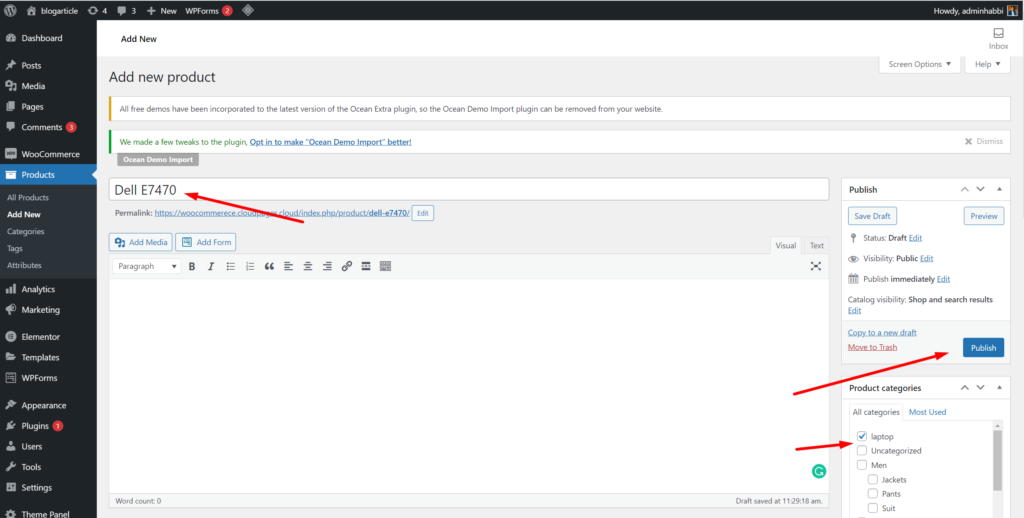
First, you can give a title to your product and after that choose the price of your product and select the category of your product and describe the product in the description.
Once you add the required data you can publish this product.
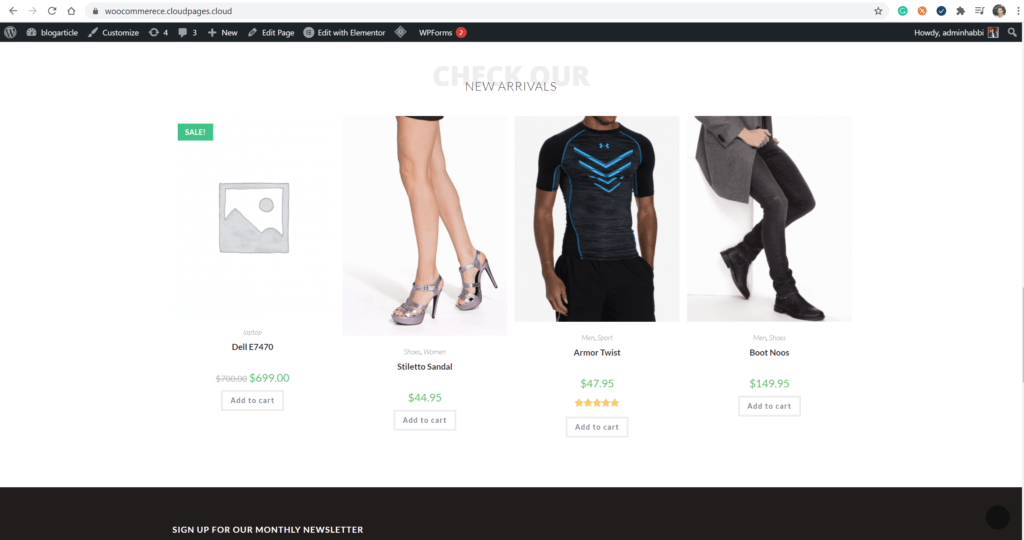
You can see on your website the product is added and displayed on your home page.
Add Payment Method
Before you start processing or accepting orders, you need to configure a way to accept payment methods in your WooCommerce store.
WooCommerce provides commonly used payment gateways that are easy to set up.
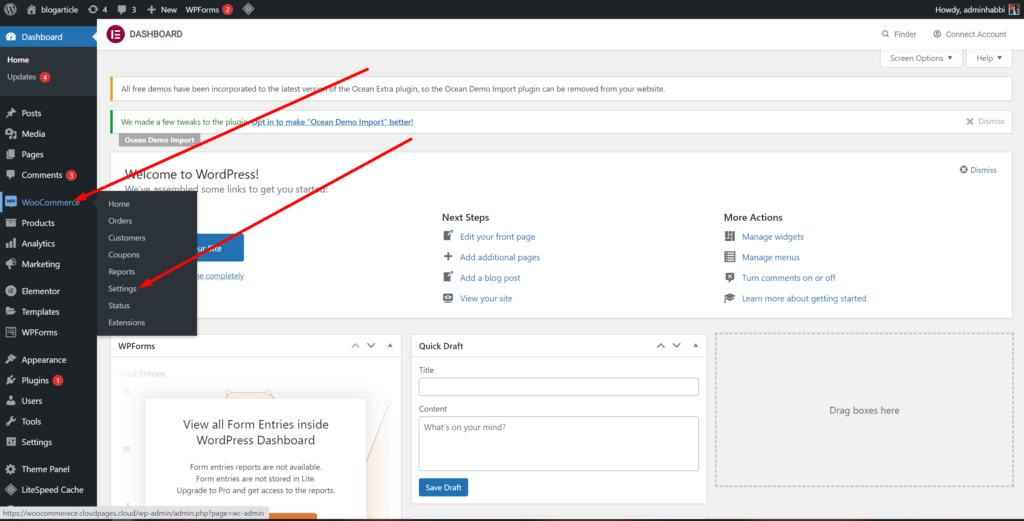
Goto to the dashboard click on WooCommerce and then click on settings.
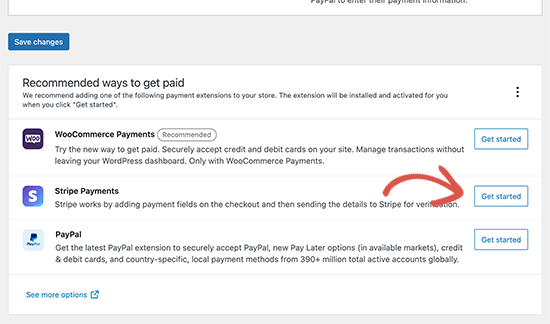
Scroll Down the Page you can see Recommended ways to get paid section. We will configure Stripe in this tutorial, however, configuring other payment methods are also easy.
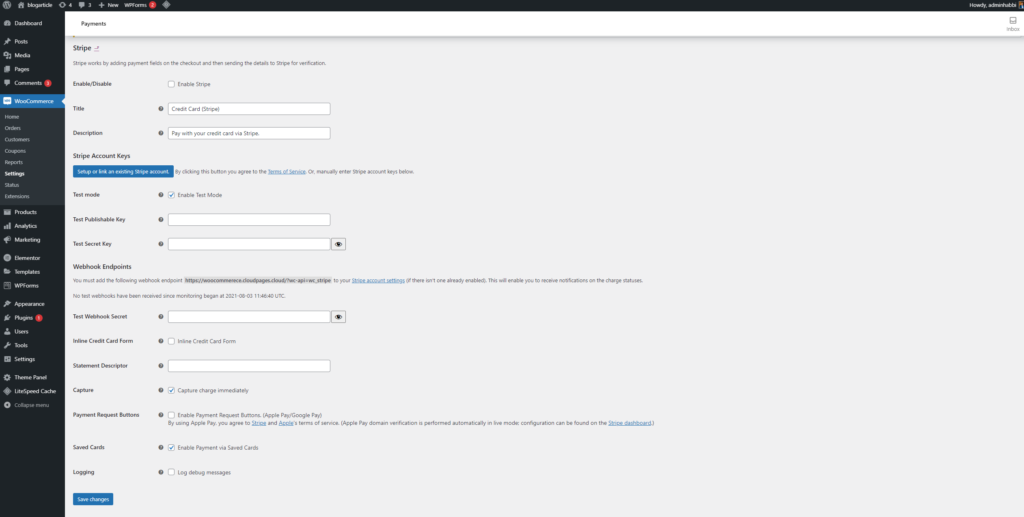
Provide the required information, and click on the Save Changes button.
Finally, you have a WooCommerce store and you are ready to sell your products online. Feel free to ask if you have any questions in the comments section.