

If you want to create an online learning course, LearnDash Plugin is the solution for you. It is a Learning management System (LMS) plugin that allows a user to design, promote and sell online courses, no matter the subject.
We will discuss what LearnDash will offer and how you can use it to make sure your project is successful.
Table of Contents
What Is LearnDash Plugin And Who Can Use It?
LearnDash is a WordPress LMS plugin and it can work with any WordPress theme. LearnDash also works with multisite. LearnDash’s responsive courses can be set up in different styles and using a variety of tools. This makes sure that every course which you create is powerful, dynamic, interesting and ensures learning remains fun.
If you want to turn your website into a learning management system then LearnDash is your answer. It is best for educational centers, companies who encourage training or for WordPress developers with clients who need online training. This plugin has a multitude of features which caters to so many LMS needs.
Top Features Of LearnDash Plugin:
- Creating Courses
LearnDash permits you to make limitless courses. For each course there are various choices to choose from, assisting you with planning courses that join a scope of tasks and styles of learning. Making multi-level courses, breaking down learning into examples, points, and classifications, as well as using different media, from recordings to audio, are some of these approaches to teaching. Each course can be enhanced with tests, grade books, lesson timers, and gatherings.
- Selling Courses
LearnDash makes the selling of courses amazingly simple. You can pick your own costs for each course, set your installment schedule, and sell straightforwardly from your site. Add a shopping basket to your site and look over a scope of installment doors. Then, a one-time cost can be charged for purchasing a course or a membership, participation plans can be made, courses can be sold in groups, and a lot more.
- Managing admin
LearnDash gives you complete command over your courses and understudies, guaranteeing that dealing with the administrator of your LMS is a simple and headache free process. Permit students to make a web-based profile and track their own learning toward the front. As well as sending automated email notices, you can also arrange groups and allow others to supervise them, as well as a lot more.
- Adding Extensions
Alongside the core features that LearnDash provides, you can also install to add advanced functionality to your LMS. LearnDash offers free, premium, and Plugins, such as integrations with WooCommerce, BuddyPress, and MemberPress.
Getting Started With LearnDash Plugin
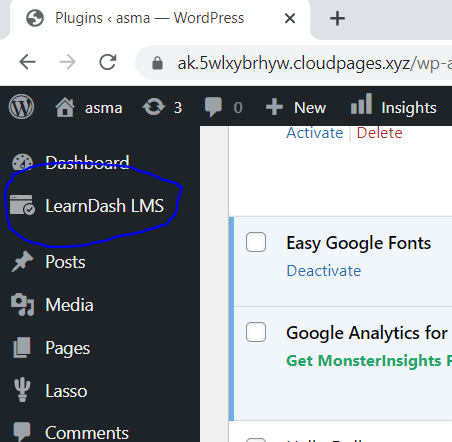
After activation of LearnDash Plugin, you will see that LearnDash LMS menu has been added to your WordPress menu
Create a New LearnDash Course
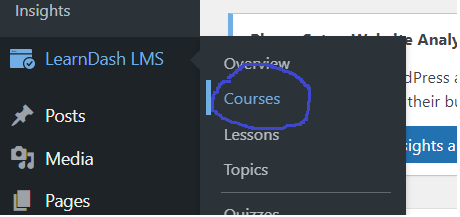
To add new online course, select LearnDash -> Courses
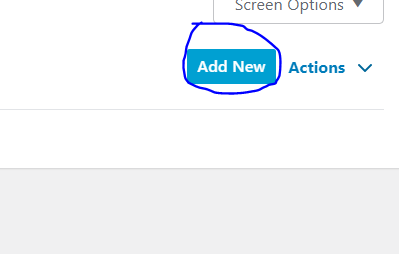
Click on “Add New”
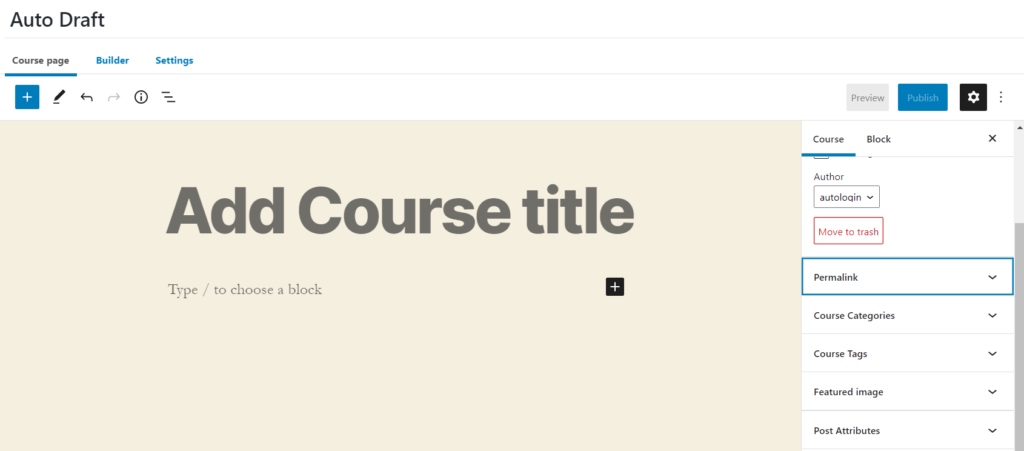
Add your course information, title, content, featured image.
Course URL
To change the course URL, to help make it more memorable for students.
From your left hand side menu, Click on Settings -> Permalinks
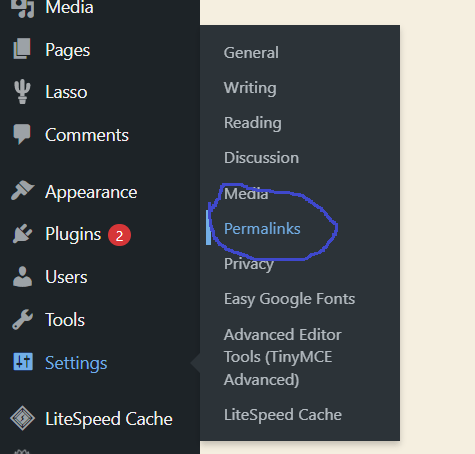
Select Post Name -> Save Changes

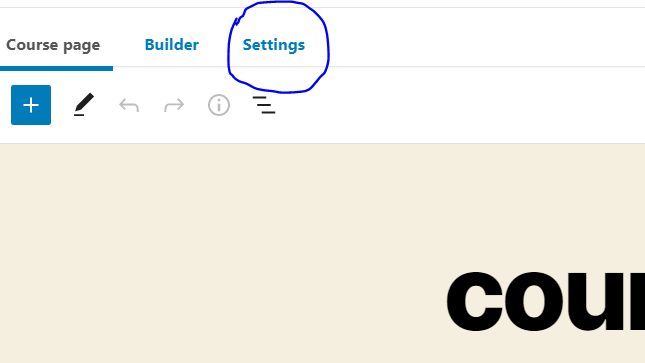
Course Settings
Course settings can be customized on the course page. This has options for adding course lessons, selecting course prerequisites or on expiration date and adding a course certificate and much more.
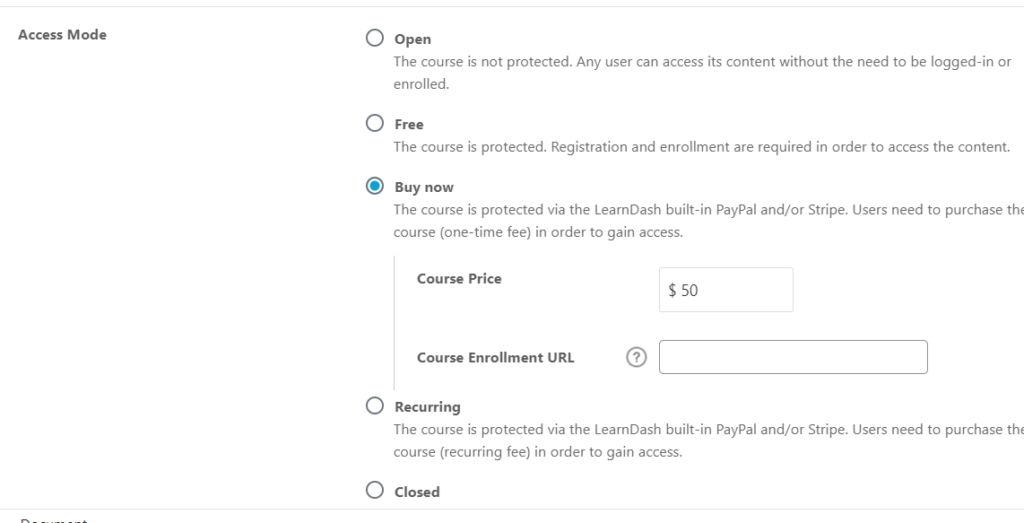
To create a paid course, scroll down to “course” and select the “Course Price Type”. Here you can choose whether your course is Open or Free or Buy Now or Recurring
Creating LearnDash Lessons
The courses that are created with LearnDash can be split into lessons. This help students to access portions of course content. This prevents students from losing interest or becoming overwhelmed by the amount of information provided.
To create your courses first lesson, select LearnDash LMS -> Lessons -> Add New

Give your lesson a title and add your lesson content you want to include. you can add media or display a YouTube video.
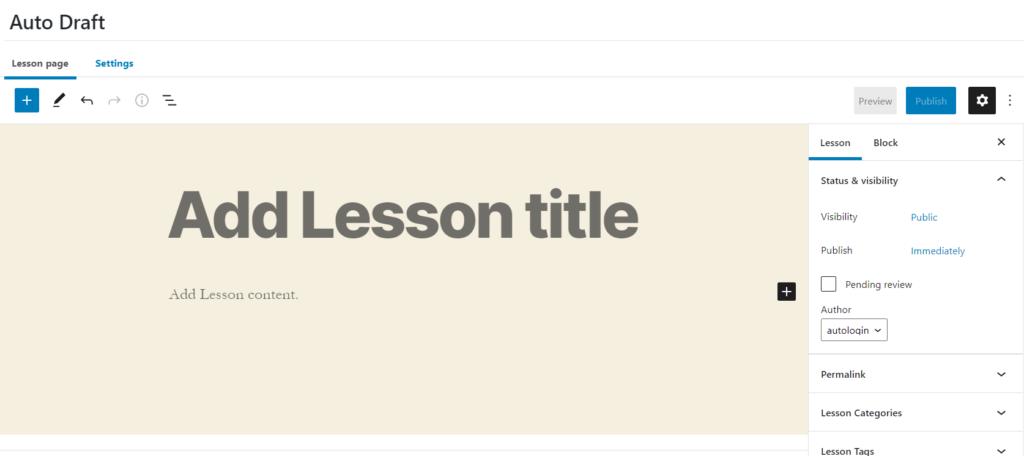
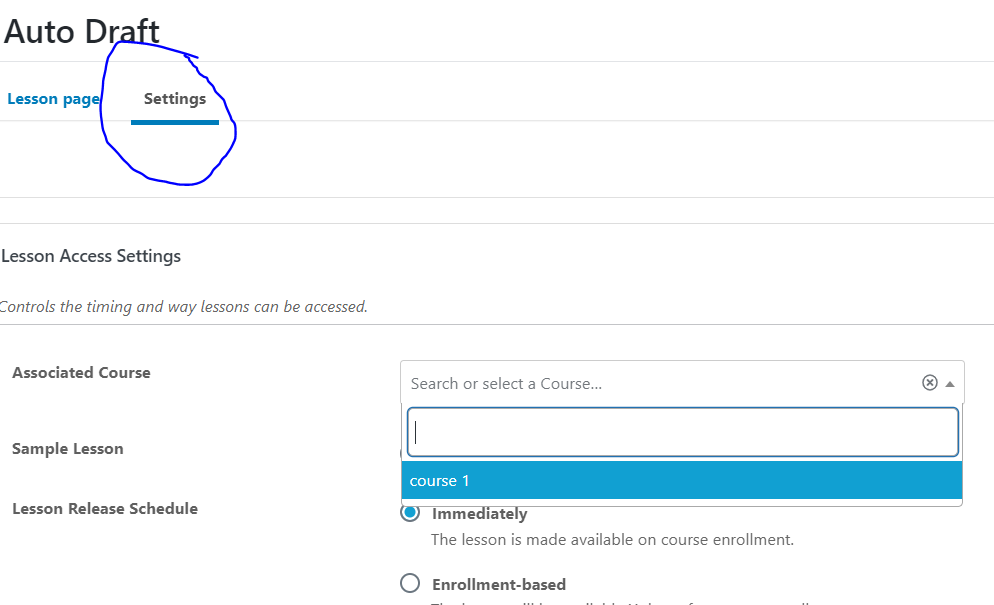
Select Settings from Top of your lesson. You need to select the course with which your lesson is associated with.
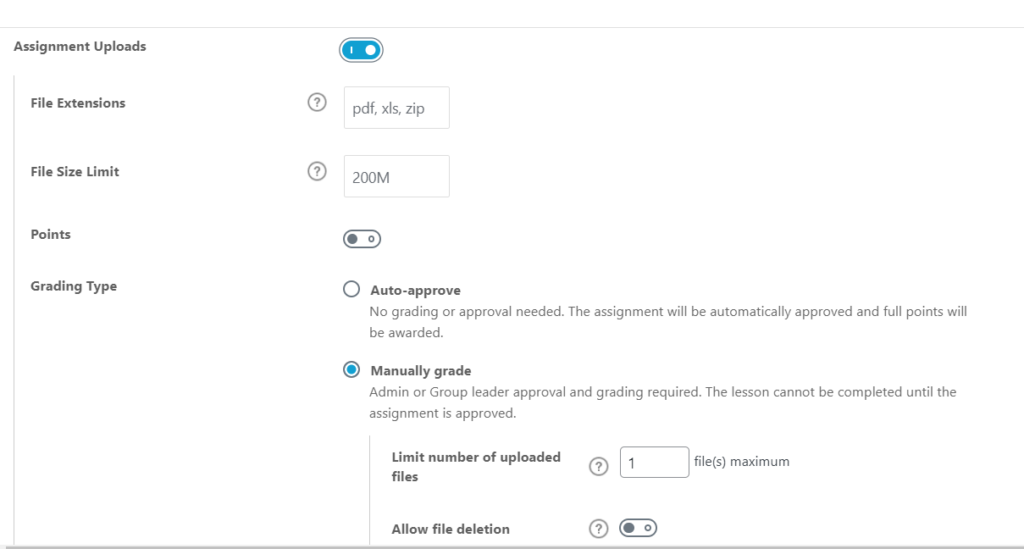
You can also choose to add a lesson timer, or more it mandatory for students to upload an assignment as part of the lesson.
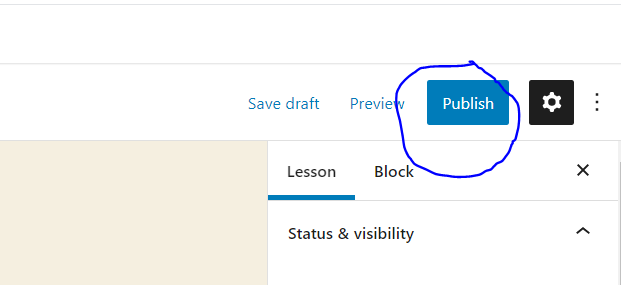
Don’t forget to publish your lesson once you are happy with it
Adding A Quiz
Adding a quiz to a course is an effective way to help your students consolidate their knowledge. To create a quiz
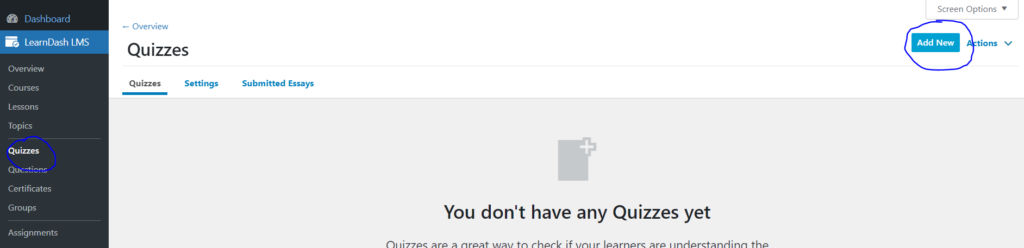
Select LearnDash LMS -> Quizzes -> Add New
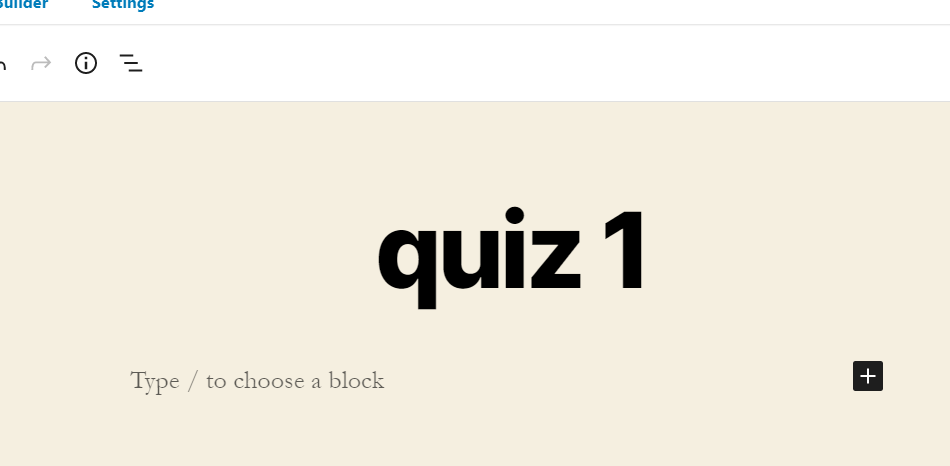
Give your quiz a title
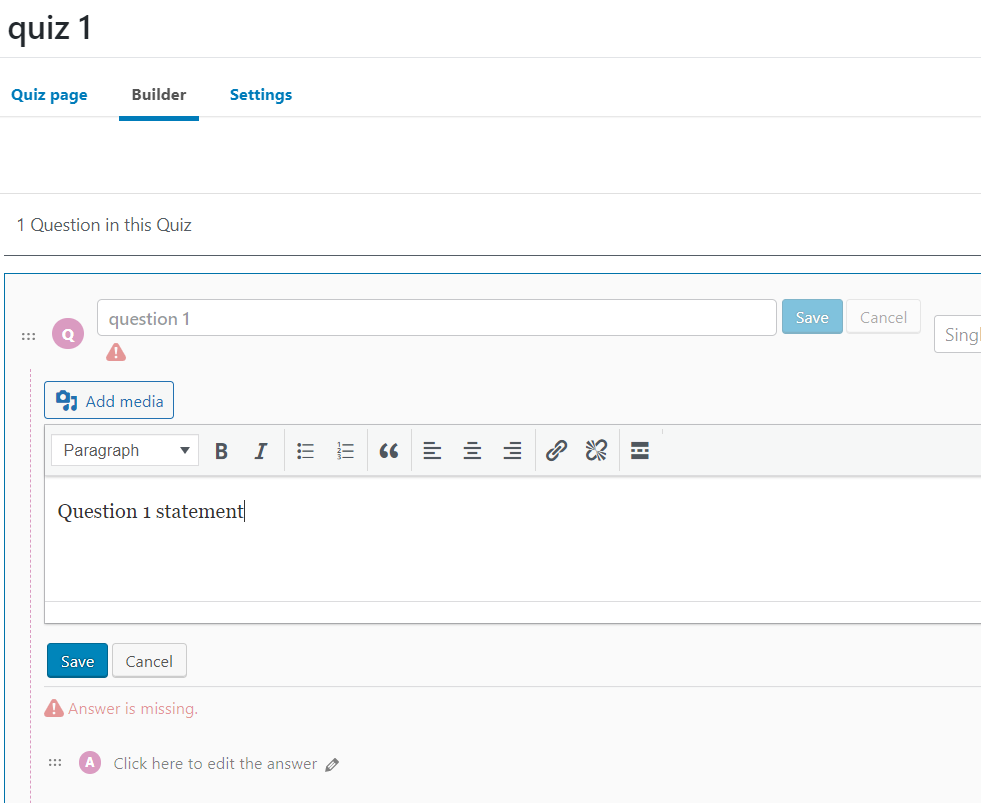
Go in Builder and add questions and its content and click on Save
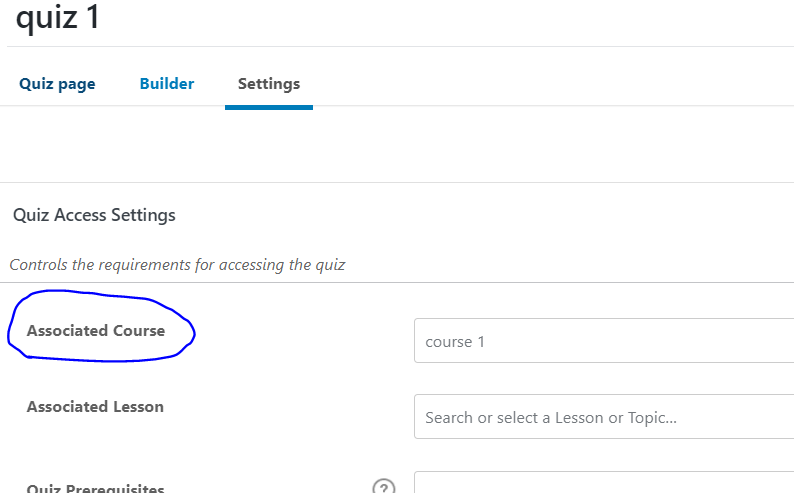
Go to Settings and associate your question with a course. Also this has numerous other settings that you can do .
LearnDash Payment Setting
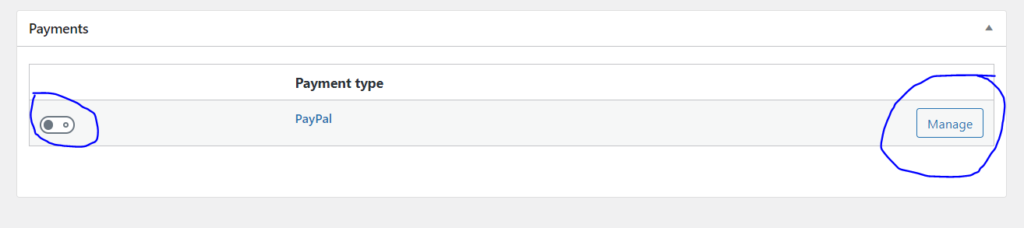
Once you have created a course, you will need to setup an online payment system on your WordPress site. To setup a payment gateway with PayPal, Click on LearnDash LMS -> Settings -> Payments

Turn on PayPal toggle and click on Manage
Finish the payment settings and click on Save
