

Memcached is a distributed memory object caching system similar to Redis. In this article, we are going to discuss how you can set up LiteSpeed Memcached daemon on your server from the command line and then install Memcache PHP extension so that you can use it with your WordPress site.
In CloudPages one-click Memcached is in the road map and it will be available in coming versions.
Personally I would recommend just to go with Redis, however, if you are still looking to use Memcached, you can continue with this article. For Redis you can follow this guide: How to set up Redis on your server?
Installing Memcached and its PHP Extension with LiteSpeed is slightly different compared to Apache or NGINX. We’ve covered everything in this guide on how to set up LiteSpeed Memcached on your server and use it with LiteSpeed Cache WordPress plugin.
Table of Contents
What is Memcached ?
Memcached is a distributed memory object caching system. Memcached is a free, open-source, high-performance, and generic in nature. Memcached is used for accelerating dynamic web applications by relieving database load. Like Redis, it is another caching system to boost up the performance.
Memcached is an in-memory key-value store, it is used to store small pieces of data like objects and strings that it gets from the API calls, database calls, and page rendering.
Setting up LiteSpeed Memcached
Step 1: Pre-requisites
- Deploy CloudPages on your server (if you don’t have any other control panel installed, if you are using any other control panel like CyberPanel, you can skip this step)
- Deploy WordPress Site
You need a WordPress site with LSCache plugin installed, because once we install LiteSpeed Memcached and its PHP Extension we need the plugin to connect WordPress with Memcached backend.
Since you need a WordPress site, that is why you need to install CloudPages using which you can easily deploy WordPress site with LSCache plugin pre-installed.
Once all of the above is done, its time to install memcaced and its LiteSpeed PHP Extension.
Step 2: Install Memcached Daemon
Once your WordPress site is ready, we first need to install memcached deamon, first upgrade your server packages using the commend below
sudo apt update && apt upgrade
These commands will update all core packages.
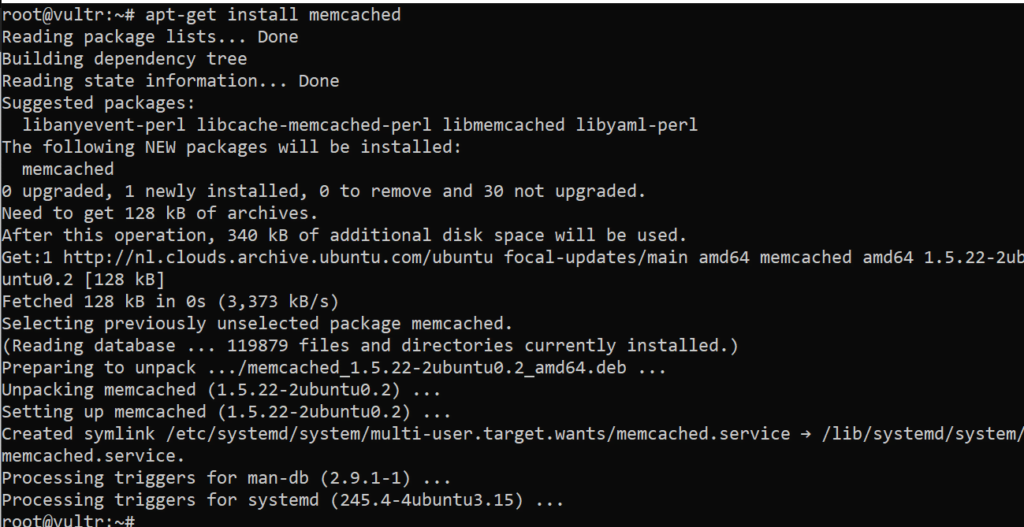
Now install memcached daemon using the command below:
sudo apt-get install memcached
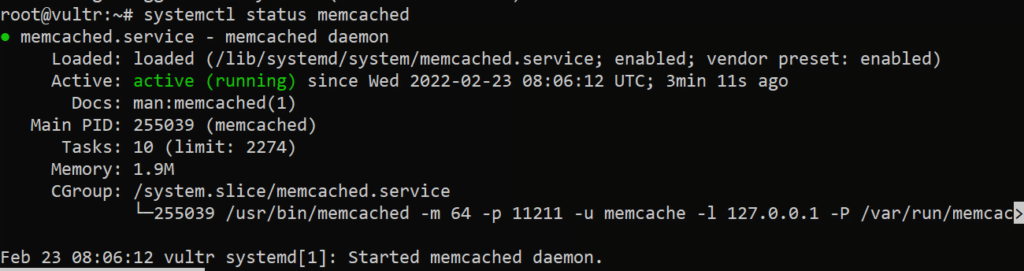
Once installation is done now you have to verify if Memcached is active and enabled or not. To check the status run the following command.
systemctl status memcached
If status or the service is disabled or inactive or failed use these commands.
To active the Memcached demon run:
sudo systemctl start memcached
To enable the Memcached demon to run:
sudo systemctl enable memcached
Memcached deamon is installed, we only need the required PHP extension to start using it with our WordPress website.
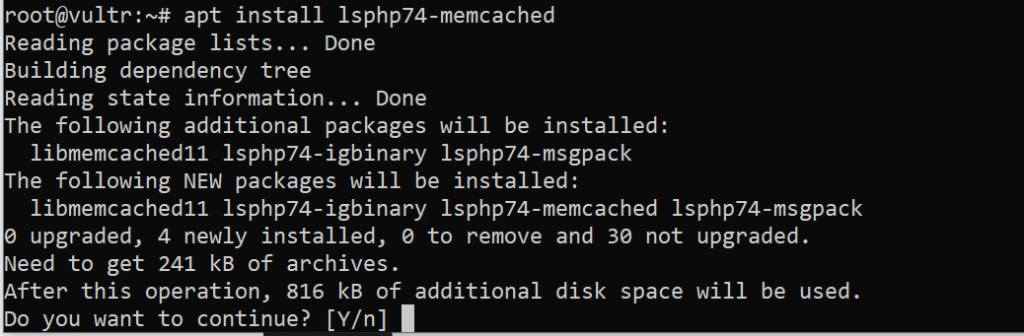
Step 3: Install LiteSpeed Memcached PHP extension:
PHP extension is important to connect your WordPress site with memcached deamon that we’ve just installed. If you are using some other control
LiteSpeed comes with its own PHP packages, you can search for memcached extension name using the command below
sudo apt list lsphp* | grep memcache
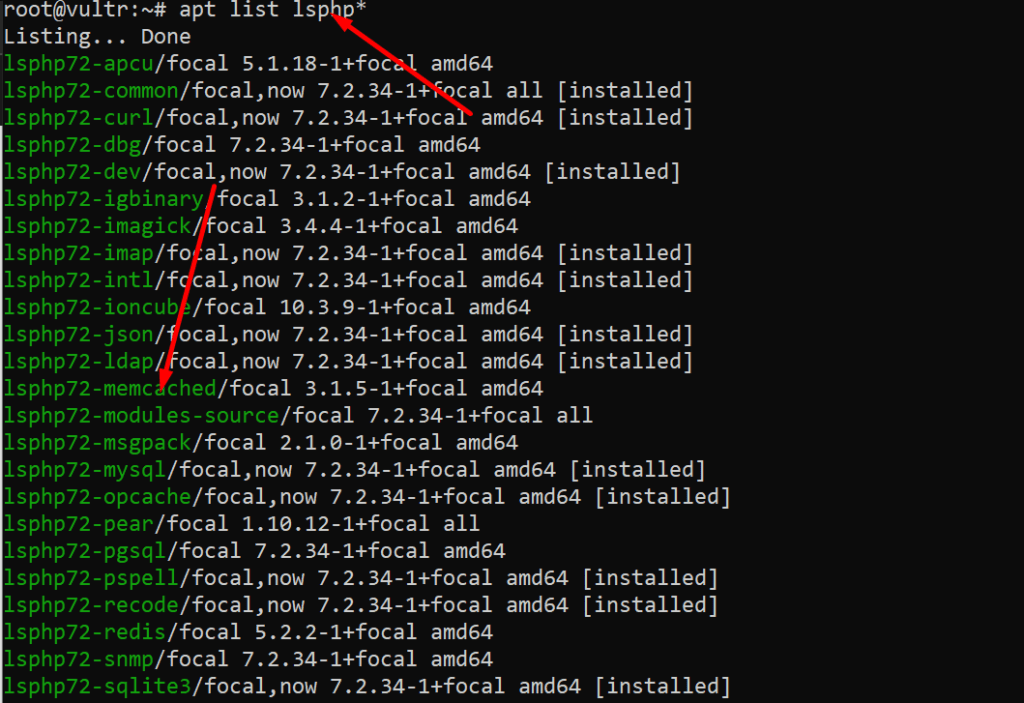
As you can see that LSPHP memcached extension is available for install. Here is the command to install the PHP extension.
sudo apt install lsphp7X-memcached

Note: You can replace 7X with any of your required versions of the PHP for example 74 or 80.
Now that everything has been done from the server side, it’s time to test and verify from the LSCache plugin side.
Step 4: Verify Memcached setup with LiteSpeed Cache
Open your WordPress admin dashboard and navigate to LiteSpeed Cache -> Cache -> Object Cache
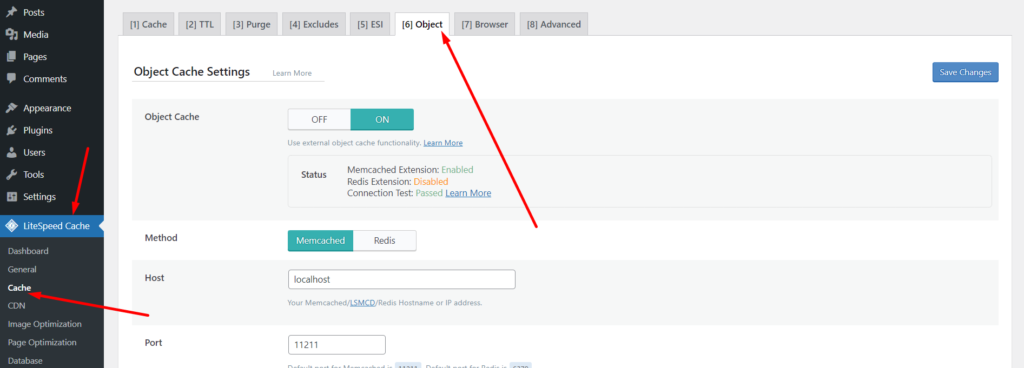
You can see that the object cache is disabled by default. Press the Object Cache button and keep the default Memcached port (11211) as is. Press the Save button when you’re finished.
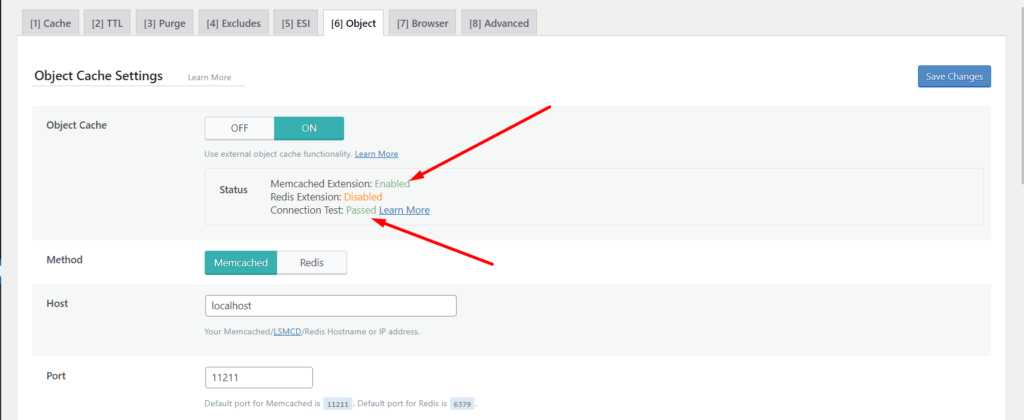
You can see these things:
Memcached Extension: Enabled
Connection Test: Passed
It means that Memcached is configured correctly and is in use. If you have any questions, feel free to ask in the comments section.