For CloudPages installation or to perform any task with the server you often need server SSH access. The service provider may provide you the SSH access at the time of creating the server. You may know about different types of SSH clients and their use. SSH clients are software or application which are used to access server terminals to perform different types of functions. Here we will learn to configure public key authentication with the Bitvise SSH Client.
In this article, we are going to write about a popular SSH client that is Bitvise. Bitvise is one of the popular and easy-to-use SSH clients. Thousands of users are using it. Bitvise allows you easy access to the server terminal and SFTP. You can install, remove, update packages and perform other operations using it.
In this article, our main focus will be about the SSH key generation, how to import or export it, and its use. Basically, some providers allow public-key access methods and some allow password access methods. Both have their own importance and use but in this article, our focus is only on the key authentication method.
Table of Contents
What is SSH?
As we know computers need to communicate with each other. And for the communication, they need a way or path or a network protocol. And we always focus to have a secure protocol to access and communicate between computers. For this purpose, a protocol is used between computers and one of them is SSH. SSH is a secured network protocol to access remote computers in a network.
Secure Shell or Secure Shell or Secure Socket Shell, this protocol enables secure communication and access to remote computers. You can connect to another machine using SSH without having physical access to it; the connection is made over the internet.
What is Bitvise SSH Client?
Bitvise is a software or application that is used to access your remote server using its credentials. Bitvise SSH Client is a free program Using this tool, you can establish an SSH connection. A user typically launches the program interactively, so it runs only when it is launched by the user. Additionally, it can be run unattended for performing scripted commands or transferring files, as well as maintaining a port forwarding configuration.
Bitvise SSH client is supported by all the desktop and server versions of windows both 32 and 64 bit. It supports Windows XP, Windows 7, Windows 8, Windows 10, server 2003, to server 2019, and all.
Download Bitvise
To download the Bitvise client just click on the Download Now button present below.
Downloading Bitvise is very easy and a few click process. Just click on this button and download the stable version of Bitvise now.

Install Bitvise Client
Once the download process is done now it’s time to install Bitvise Client on your system.
To install Bitvise just open the Bitvise file and then follow the instructions.
- Run and Accept to terms and you can add some information there.
- Check desktop icon button if you need it to create a desktop shortcut.
- Finally the installation has begun. The black screen is displaying the installation process.
How to use Bitvise?
As explained Bitvise is used for the remote server SSH access. You can access Bitvise using a password. To use Bitvise what you need is:
- Server IP
- Server user (SSH username)
- Password or Public key
If you have these things you can log in to your remote server SSH and you can do the following things.
- Use terminal (Install, remove, update any packages etc)
- Transfer files
- Download and upload files
If you access your server using Bitvise means you have access to your system and you can do anything you want.
How to generate a Bitvise SSH key?
If you want to generate a new SSH key for your Bitvise SSH client to use it for the communication between servers you just have to open Bitvise client and follow these steps.
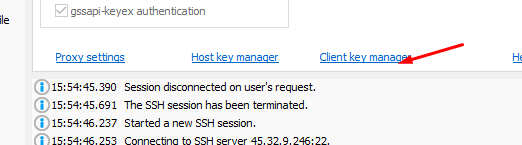
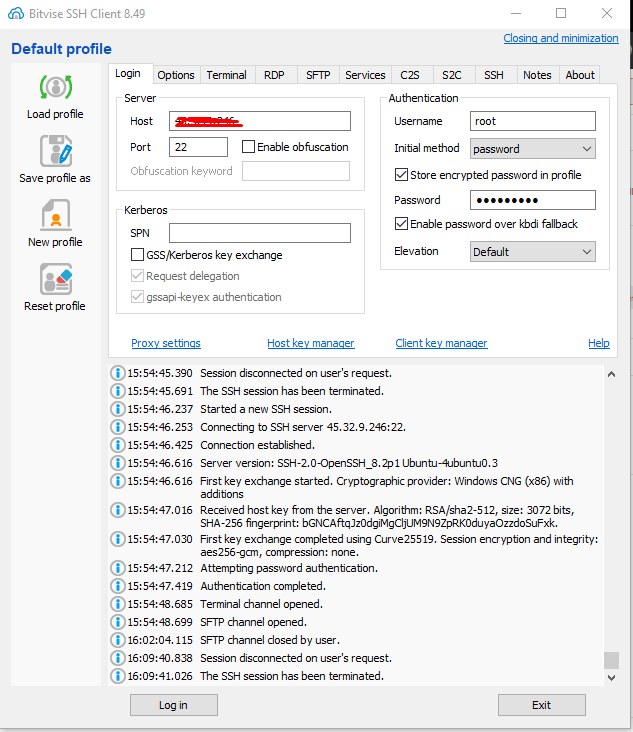
On the dashboard of Bitvise SSH client, you can see a Client Key Manager button click there and it will open a pop-up window for you
Here you can see a Generate New button click on that.
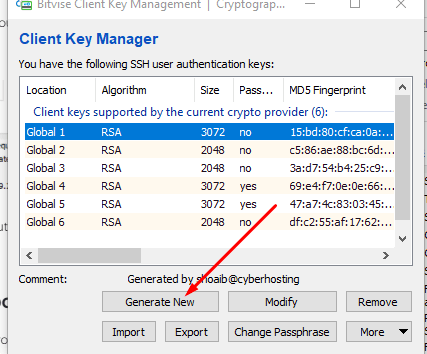
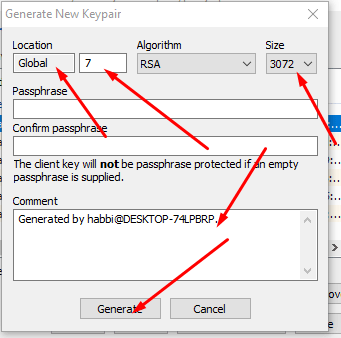
It will ask you for the following information provide that and click on the generate button.
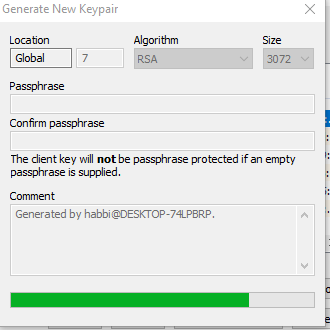
It will take some time to generate, you can see the process while the key is getting generated:
Once generated you can see the key in the list in your key manager.
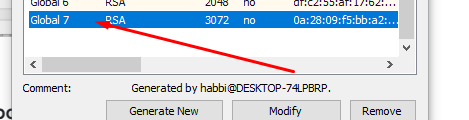
You can use this key to access any server. Read below about import and export.
How to import and export SSH from Bitvise?
Often you need to import or export your public or private SSH keys. Bitvise has this option and you can do it if you need to share your key with anyone or someone send you their key you can also import that.
Import Public Key:
To import a key in Bitvise SSH client you just need to have the key in your system and after that go to Bitvise.
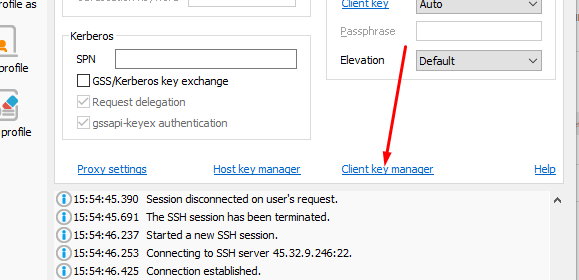
Here you can see a Client Key manager button click on that. A keys popup screen will appear.
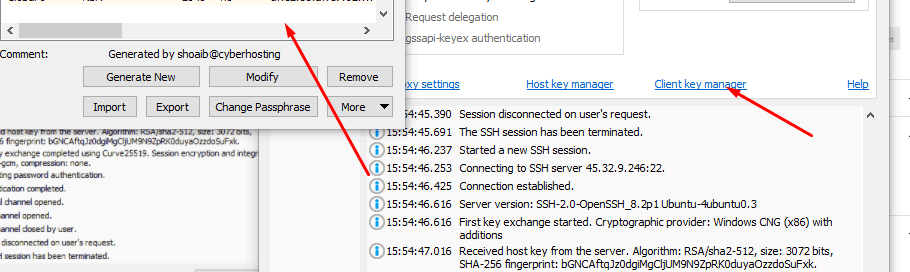
On the pop-up screen, you can see the import-export and all options click on the import option to import the key to your SSH client.
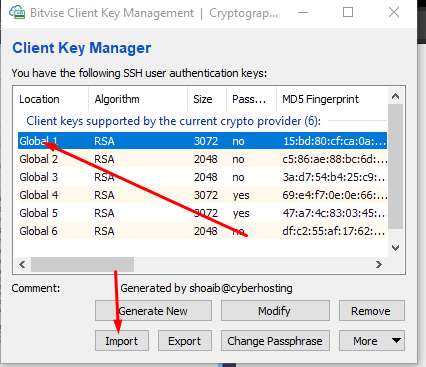
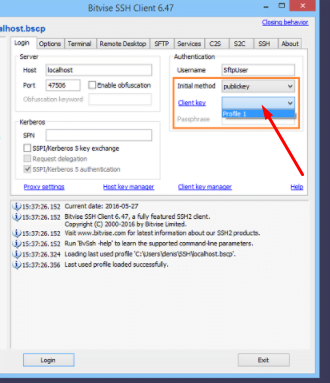
Select the key from your computer and import it, it will show like this in your Bitvise. From the Client keys, you can select the key using which you want to log in.
Export Public Key:
You can also export your public or the private key from the Bitvise. Usually you need to export public keys so that you can add them to your remote server for password less authentication.
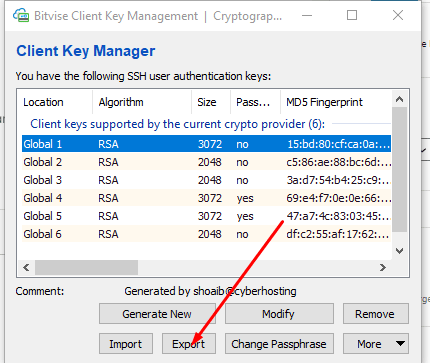
Go to the Bitvise SSH client and click on the Client Key Manager.
Then on this page, you can see an export button select any key from the list, and then click on the Export button
This will ask you for the selection of key format. For this will select the second option that is the Open SSH format.
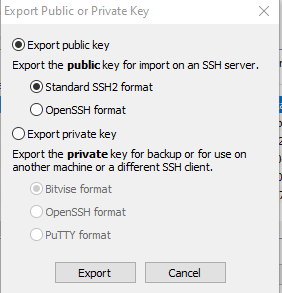
After doing all this just click on the export button and it will ask for the location to save, confirm that and save.

Add Public Key in CloudPages for password less authentication:
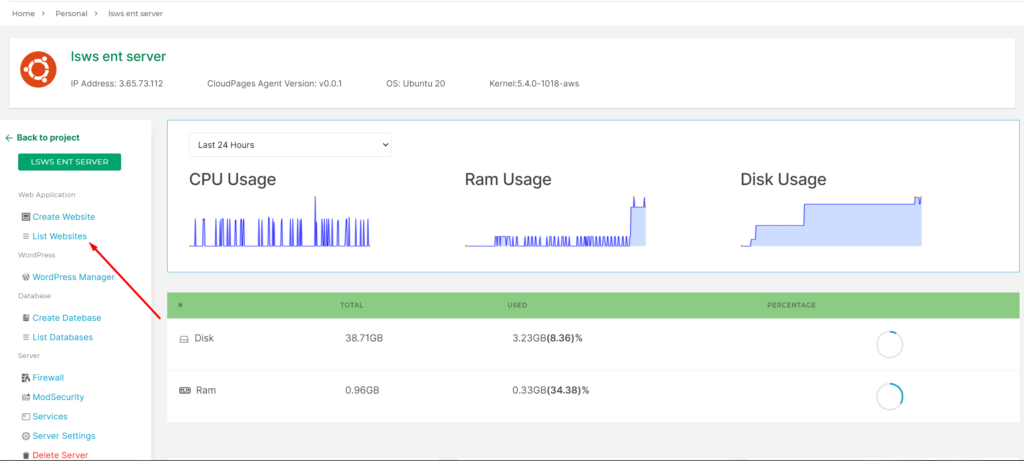
Go to the server Dashboard and click on List Websites on the sidebar.
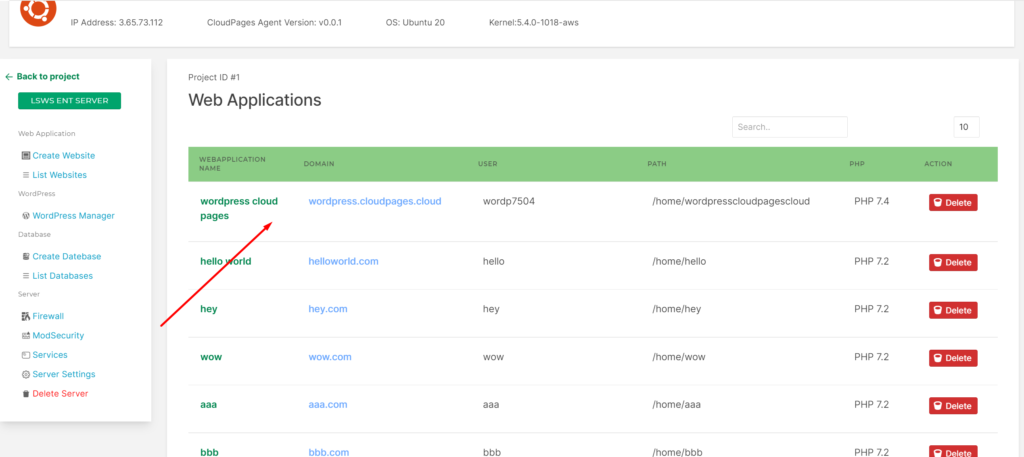
Select Website
Select the website that you want to add a public key to:
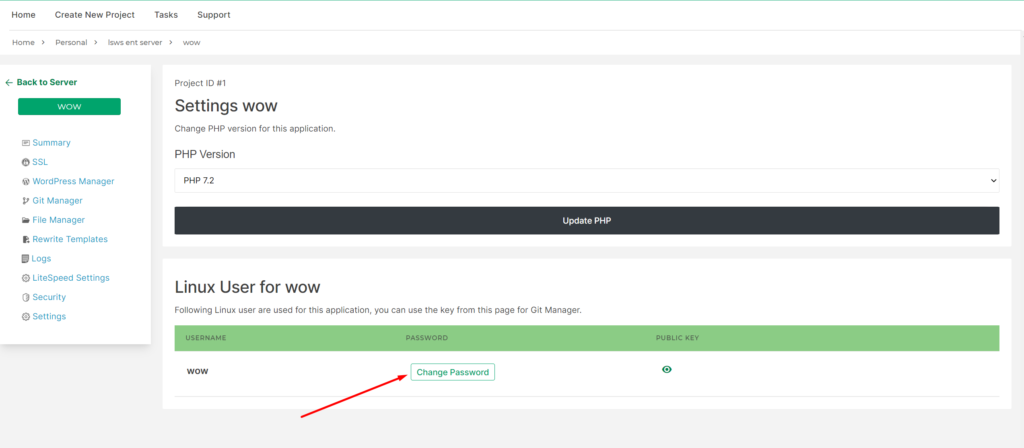
Click on Settings in the sidebar of the website

Click on the Change password for adding new key.
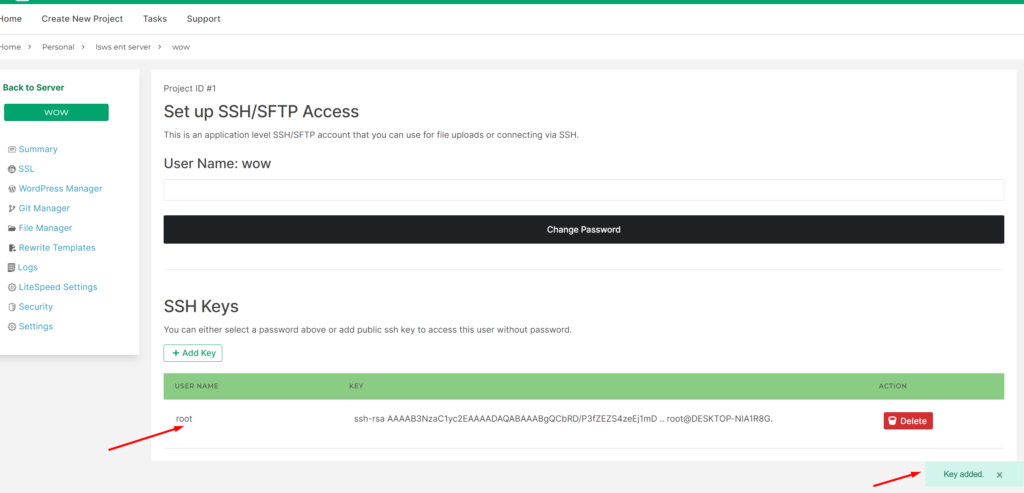
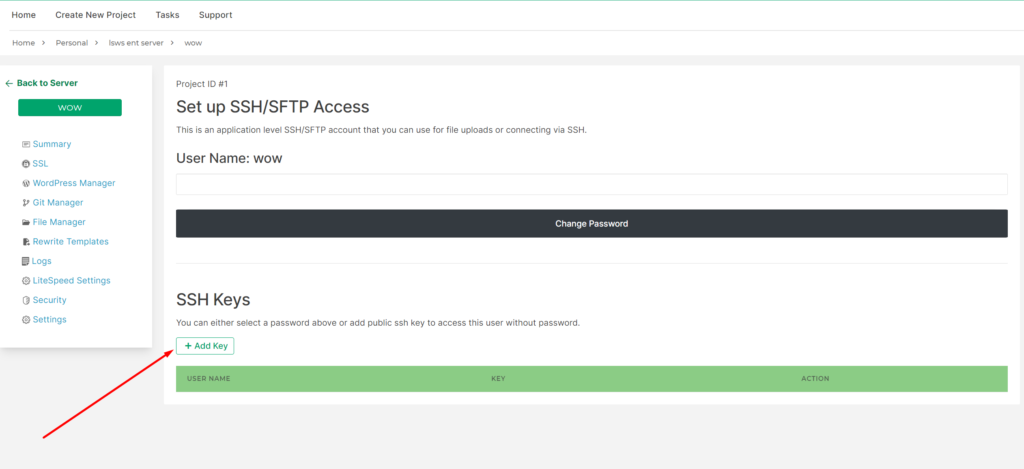
Add public key
Click on + Add Key button
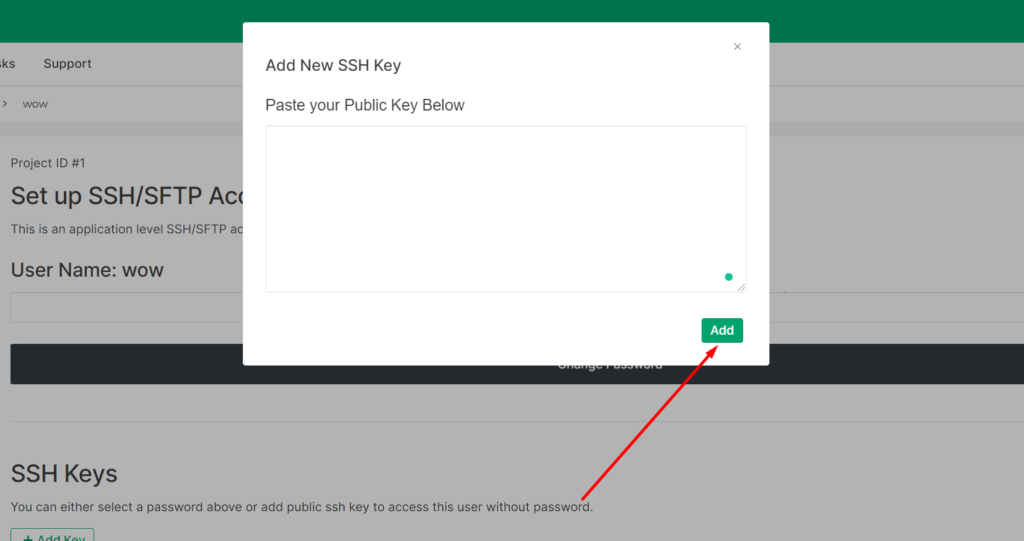
A pop-up will appear on your screen enter your public key (that you have exported from Bitvise) in this box and press add button
You can see that key is added to your website linux user. If you use key based login, you need not set password for this linux user.