
Email is a crucial part of every online business. In order to communicate with customers, everyone relies on email, be it an e-commerce store or a corporate website. This article explains how to configure WordPress SMTP to send emails using Mailgun and FluentSMTP.
We also have some articles to set up your email on different platforms other than Mailgun and FluentSMTP :
- How To Setup WordPress SMTP For Sending Emails using FluentSMTP | Amazon SES?
- How To Create Business Email Address Using Zoho Mail?
- How to use Amazon SES to send Emails?
Table of Contents
Pre-Requisites to setup Mailgun and FluentSMTP:
- WordPress SIte
- Domain Name
- Cloudflare Account
The first thing you need is a domain name and a Cloudflare account. There’s a tutorial and video here on setting up your domain with Cloudflare after purchasing it from NameCheap. Using this documentation, you can set up a WordPress site on CloudPages.
Setup FluentSMTP On WordPress:
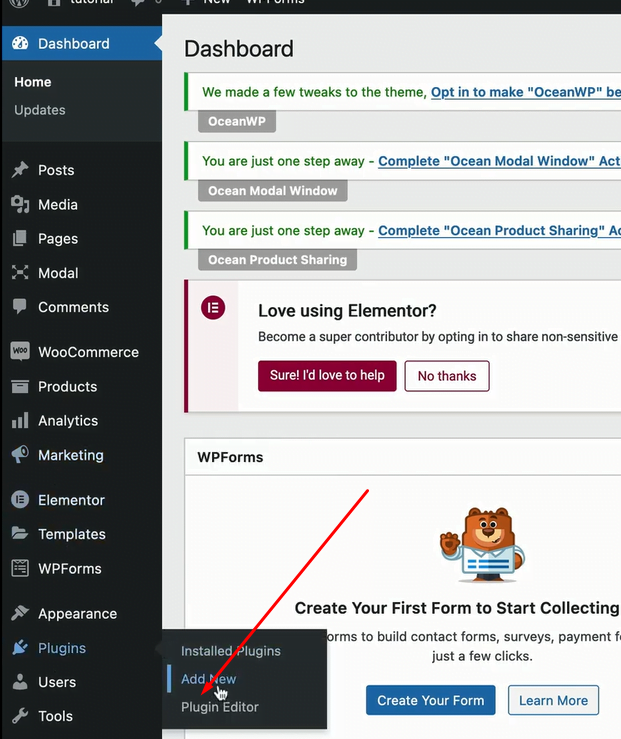
Log in to your WordPress admin dashboard to set up FluentSMTP. From the left menu, select Plugins -> Add New Plugin.
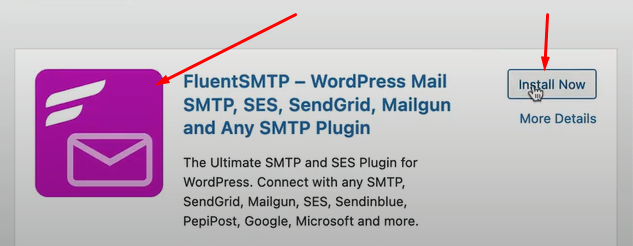
Type FluentSMTP into the search bar of the plugin section to get results and install the FluentSMTP plugin. When you search, the first result you see is the required plugin. To install it, click on the install button.
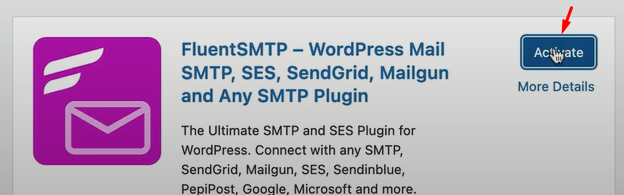
Once the plugin is installed now activate this plugin.
Once activated the message to configure the plugin can be found on the top bar.

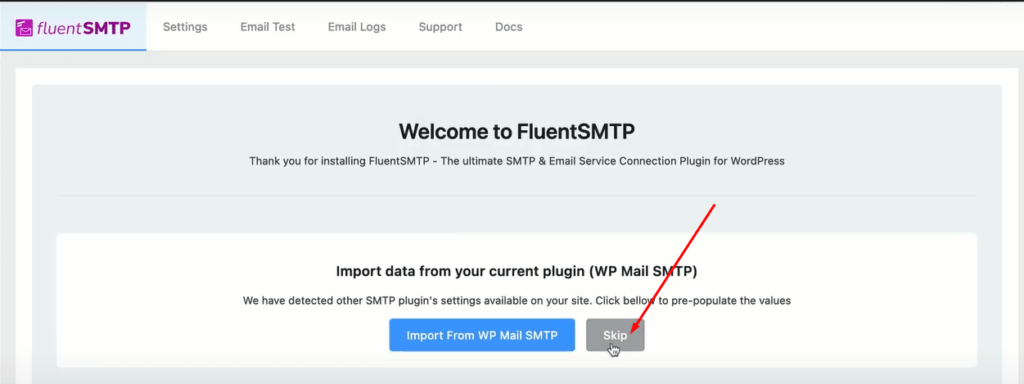
Click Configure FluentSMTP to set up FluentSMTP and use the plugin for email services. You can skip the first step.
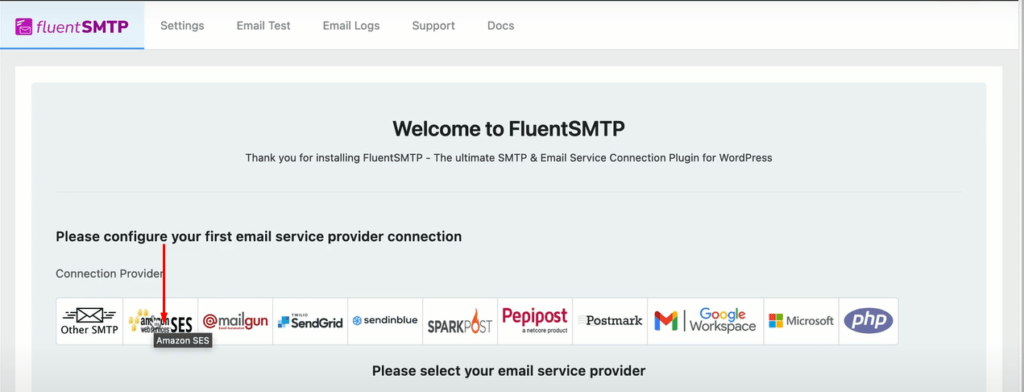
You can see all the email services available to integrate with.
We are going with Mailgun so let’s click on MailGun from the above options.
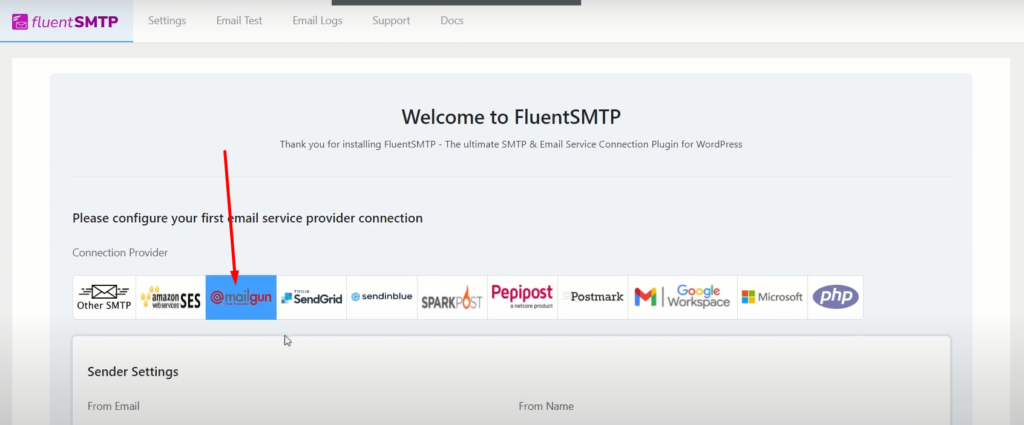
Now you can see a new form asking for all required information.
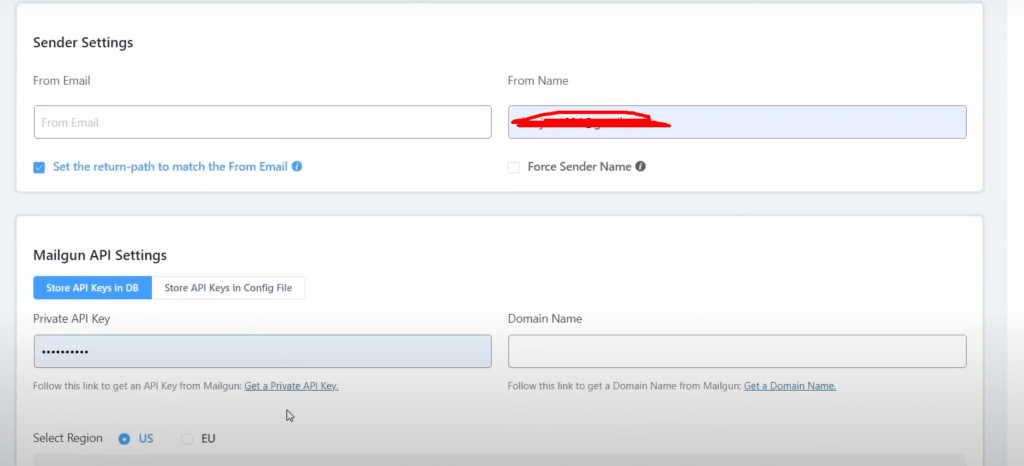
From all these first, let’s go with a Domain Name section to do so just click on the Get a Domain Name button in the right corner.

Add Domain to Mailgun:
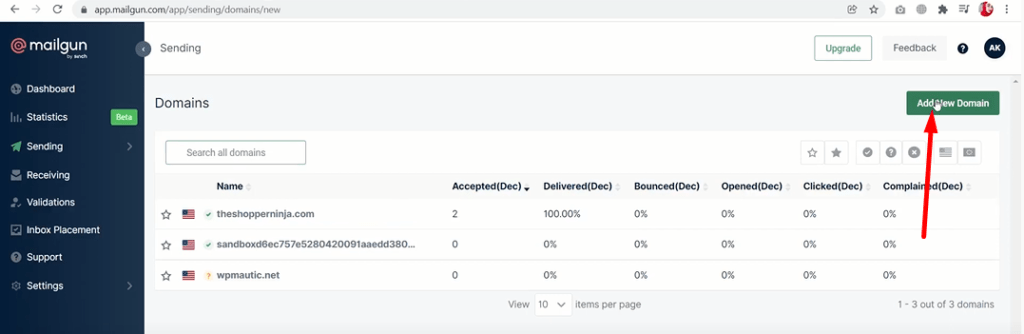
Clicking on this button will take you to the Mailgun account page, where you can configure your domain. If you are logged in with your Mailgun account you can see already added domains. You can add a new domain by clicking on the Add New Domain button in the right top corner.
Now here you have to provide all information like your domain name and the region (choose the region carefully an your data will be stored in this region) for the domain name.
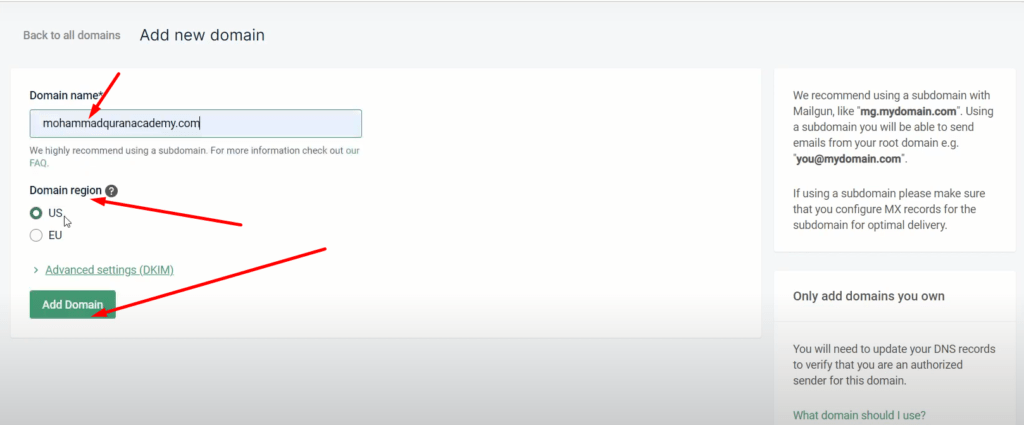
After providing all information just click on the Add Domain button. Once the domain is added to Mailgun you have to verify it by adding some DNS records to your DNS manager (in our case our DNS manager is Cloudflare)
Verify Domain Name:
Once you click on the Add Domain button Mailgun will give you some DNS records to add in your DNS manager (these records will make sure that you own the domain and Mailgun is authorized to send emails using this domain)
Mailgun will give you TXT, MX, and CNAME records that you need to add to your DNS Manager. You have to copy all these records and after copying these records you need to add these records in Cloudflare we have a complete article on Cloudflare you can check here. In this article, you can see how you can add any record in Cloudflare.
For this article, we only want to send an email so we just copied TXT records (SPF and DKIM) and CNAME (mail domain record) for tracking. If you want to send and receive the email then you can add MX as well. After adding all records your Cloudflare will look like this.
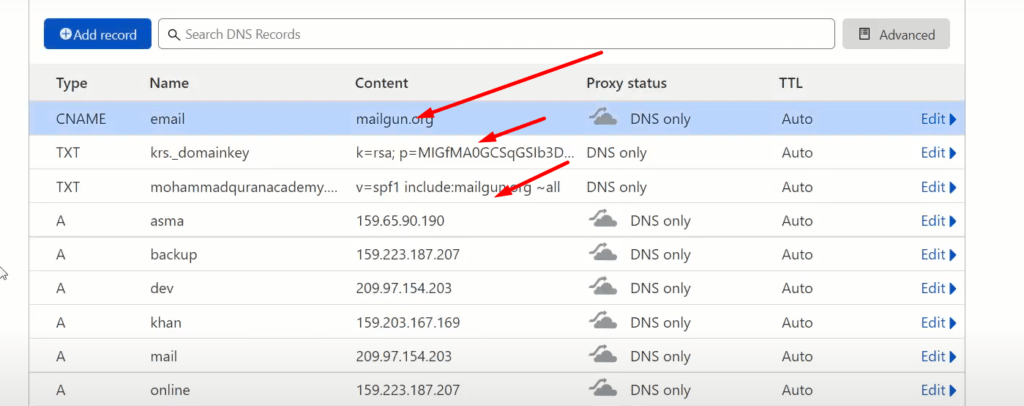
Note: Always turn off proxy for mail domain
Verify DNS records:
Now go back to the Mailgun and click on Verify DNS settings button.

You should see this screen if your DNS settings are correct.
Setup Mailgun in WordPress:
Now come back to your WordPress Dashboard and go to the FluentSMTP page add the domain name at the required place.
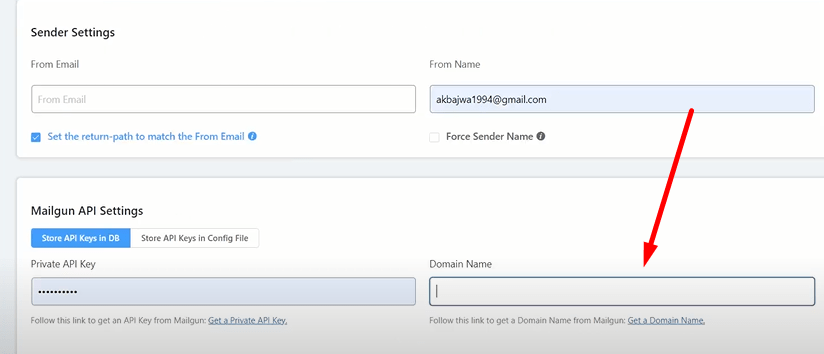
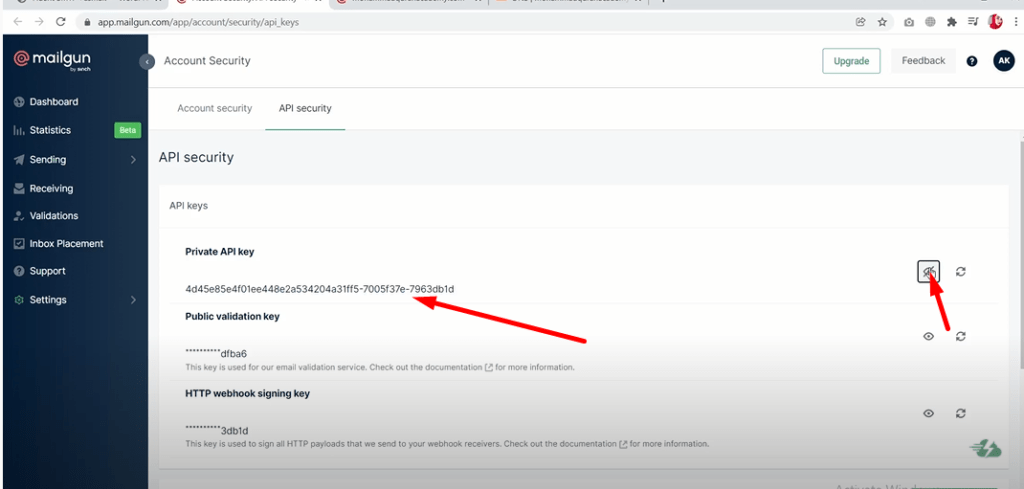
Now we also want an API key just click on the Get a Private API key and it will navigate you to the API page and get a key for you.
FluentSMTP also requires Mailgun Private API key click on Get a Private API key and it will navigate you to the API page where you can get the private key.
Copy the key from here and add it to WordPress. And also provide all information in the boxes.

Note: The From Email should belong to the domain you verified above and From Name can be anything.
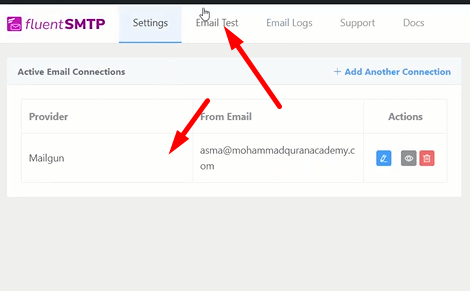
After adding all details just click on the Save and you are ready to send your first test email.
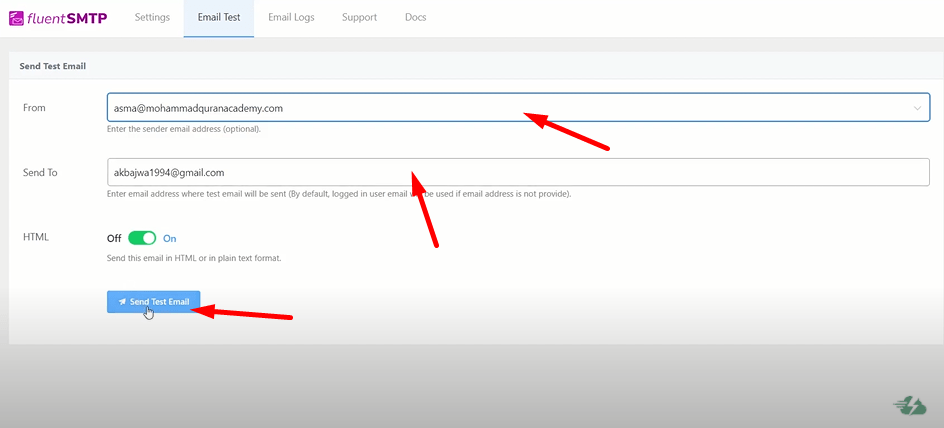
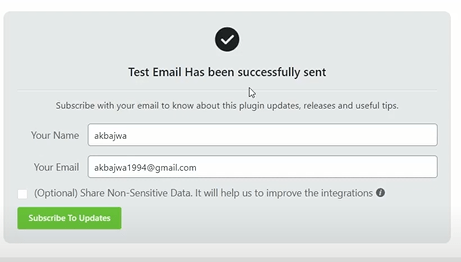
To perform the Test just add all information and click on Send Test Email button.
If all is good you can see a successful message like this.
If you have any questions, feel free to ask in the comments section below.