One of the most common problems, when you try to market a WordPress site, is when you want to access some content and get a page not found error instead.
The WP 301 Redirects plugin makes sure that your visitors land on relevant content, even when the page no longer exists rather than giving your end-user a bad experience. If you have old, expired content or links, or typos in your URLs, you could be losing traffic, users, and conversions.
Table of Contents
What Is WP 301 Redirects Plugin and how it can solve your SEO Errors?
WP 301 Redirects is a plugin that helps with some of the most critical SEO issues, including redirects and 404 errors. It only takes moments to set up and it works with any WordPress theme.
The plugin will replace a 404 error with a redirect to an existing page and show visitors the content they want to see.
What is a Redirect in WordPress or in general?
Using a redirect is a way to tell the web browser where the page they are looking for has been moved to, so they can automatically be taken there. Some common types of redirects:
- 301 redirects.
- 302 redirects.
- 307 redirects
A 301 redirect tells the browser that we won’t be moving the page back to its original location and that it should instead load the page from the new location in the future.
When Do You Need a 301 Redirect in WordPress?
There are two situations when you need to create a 301 redirect: when you’re planning to delete a post or page in favor of new content when you’re planning to change the permalinks of your post or page.
If you don’t have a proper redirection in place, then you will have a bad impact on your search engine rankings and it will also affect your end-user experience.
Install WP 301 Redirects
Let’s solve all of the above-mentioned problems by installing WP 301 Redirects.
In this article, I’m telling you 2 methods, how to install the WP 301 Redirects plugin on WordPress and the installation of the WP 301 Redirects pro version.
How to install the WP 301 Redirects Plugin on WordPress
To get any plugIn installed on your WordPress website, you can follow the following steps:
1 -Open your site as WP admin
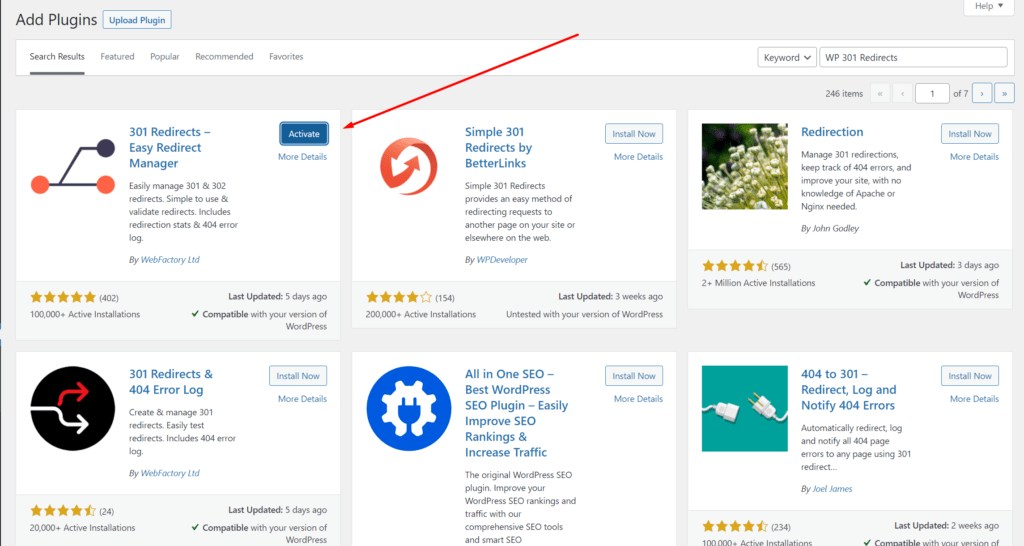
2 – Once you log in to your site, visit the Plugins page (which is available from the left sidebar of your Dashboard) and click on Add New.
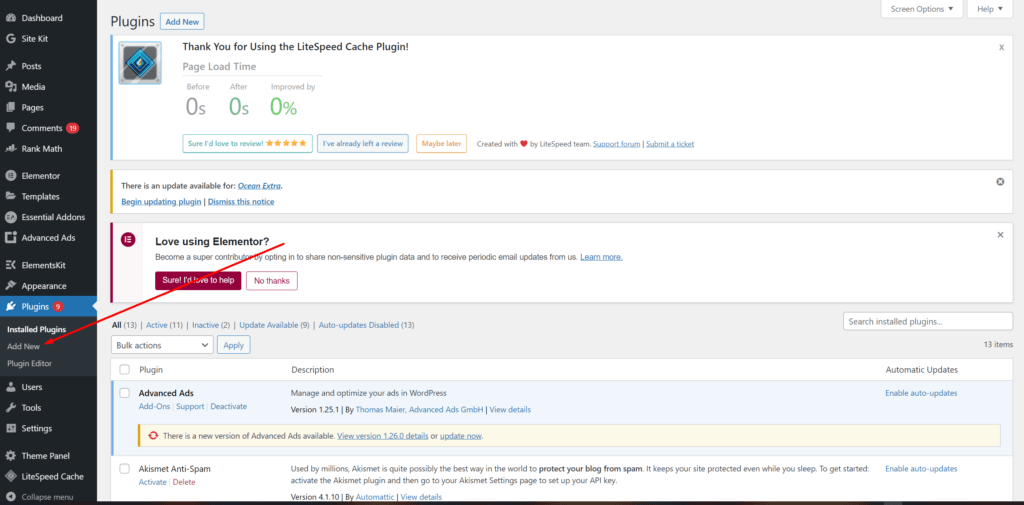
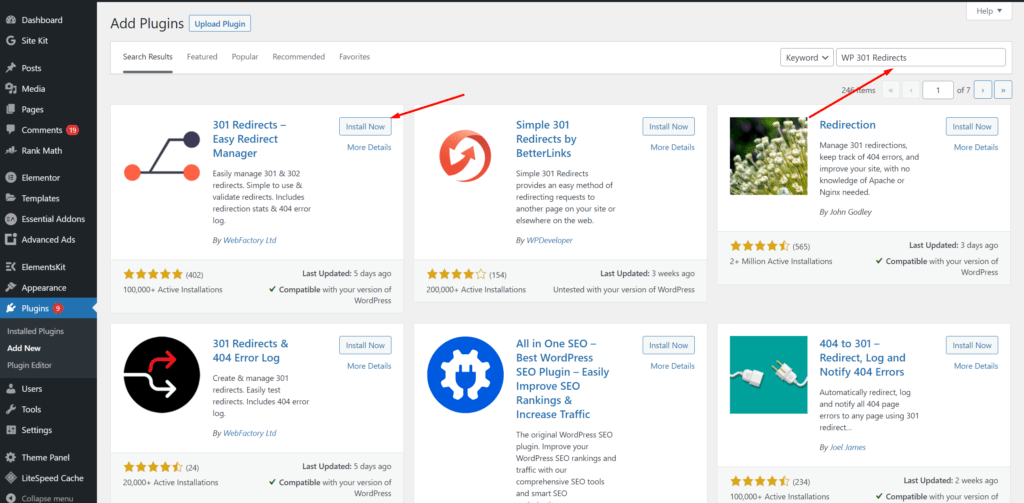
3 – In the right corner type the Plugin Name that you want to install, it shows all results in the center of the screen, click on Install Now button.
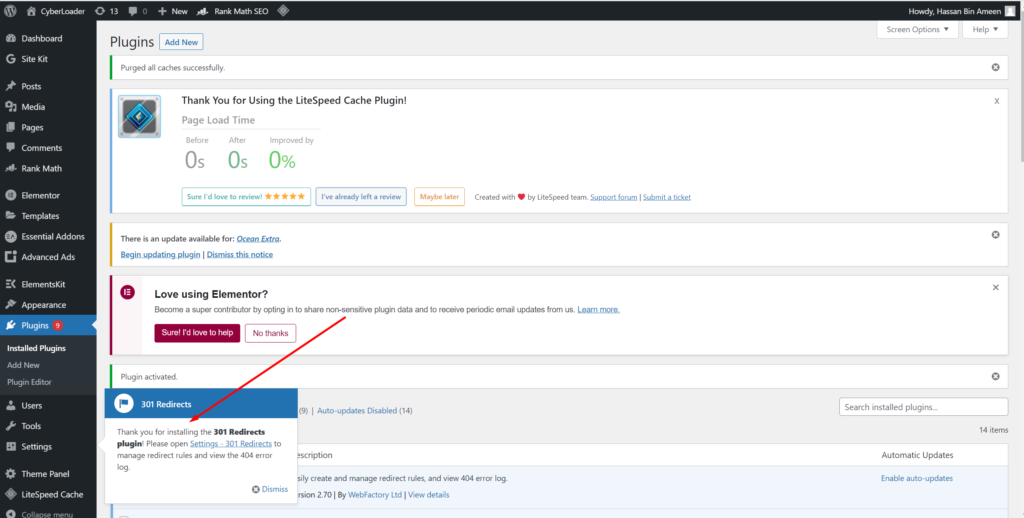
4 – The installation takes some time, but the setup process is relatively simple. After the installation is complete, the following screen is shown on your screen, click on Activate button.
5 – After installation, a message shows on your screen informing you that the installation is complete.
Installation of the WP 301 Redirects Pro version
For the pro version of WP 301 Redirects first, you want to download, then Upload from WordPress, then install, and then active. So follow this procedure:
1 – First, you want to download the pro version of WP 301 Redirects so download from here.
2 – Now login to your website as WPadmin as shown above. Click the Plugins button, and then click on Add New button in the sidebar.
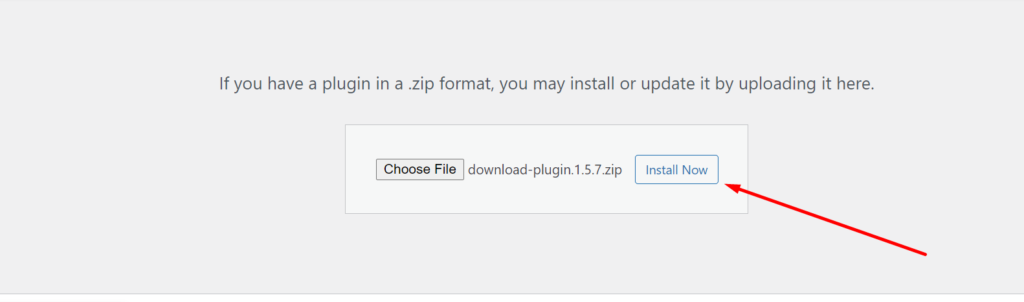
3 – Click on the Upload Plugins button, and then click on Choose File button, the file browser is open in front of you select and pick the plugin that you downloaded

5 – Once you picked the file the following screen opens in front of you, Click on Install Now button.
6 – Once you Upload and install the plugin, the next step is to Activate the Plugin click on Activate Plugin button.

After all processes, the Plugin is properly downloaded install, and activation of WP 301 Redirects plugin.
How to Use WP 301 Redirects plugin
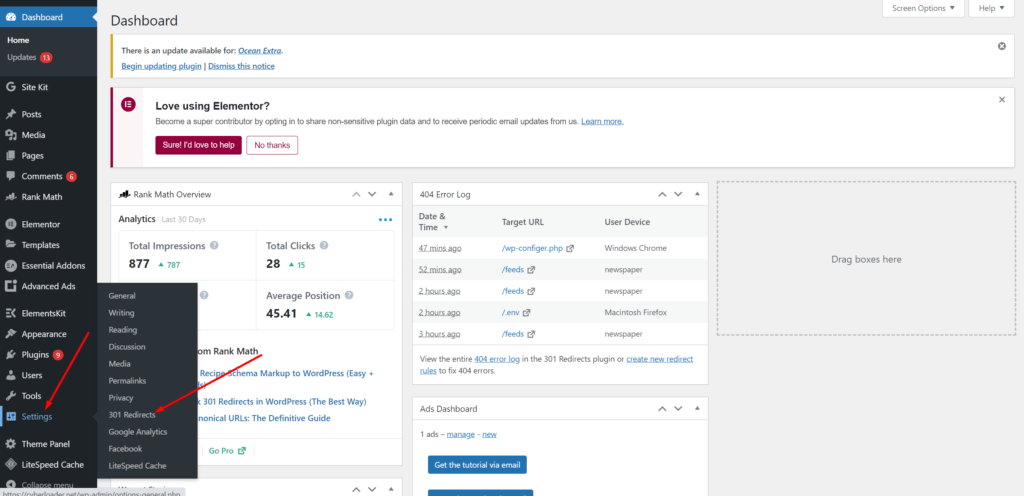
You can access the WP 301 Redirects plugin from your WordPress dashboard, click on the Settings button and then click on the 301 Redirect button on the sidebar of Dashboard.
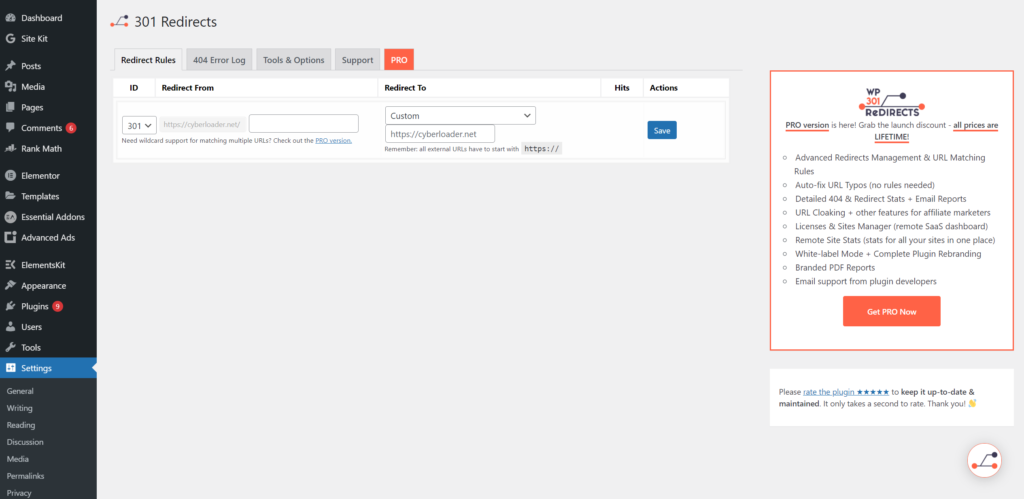
Once you clicked on the 301 Redirects button you can access the WP 301 Redirect plugin and the following output display on your screen
The 301 Redirect plugin is a must-have for any WordPress site. This free version has some features too, but if you want to take your website’s SEO game up a notch then you can upgrade to Pro version.
In this article, we will only discuss the free features of the plugin.
- Redirect Rules
- Auto Redirect 404 Feature (Pro Feature)
- 404 Error log
- Tools & options
These features are explained as follows:
Redirect Rules
With this tool, you can redirect any 404 URL to any other URL. You can perform the following redirects:
- 301
- 302
- 307
Redirect From: Input the source URL ( which you want to redirect ) example hello.com/hello.php
Redirect To: Input destination URL, where you want your above URL to be redirected to such as hello.com/hi.php
Once you click save, anyone visiting hello.com/hello.php will be redirected to hello.com/hi.php

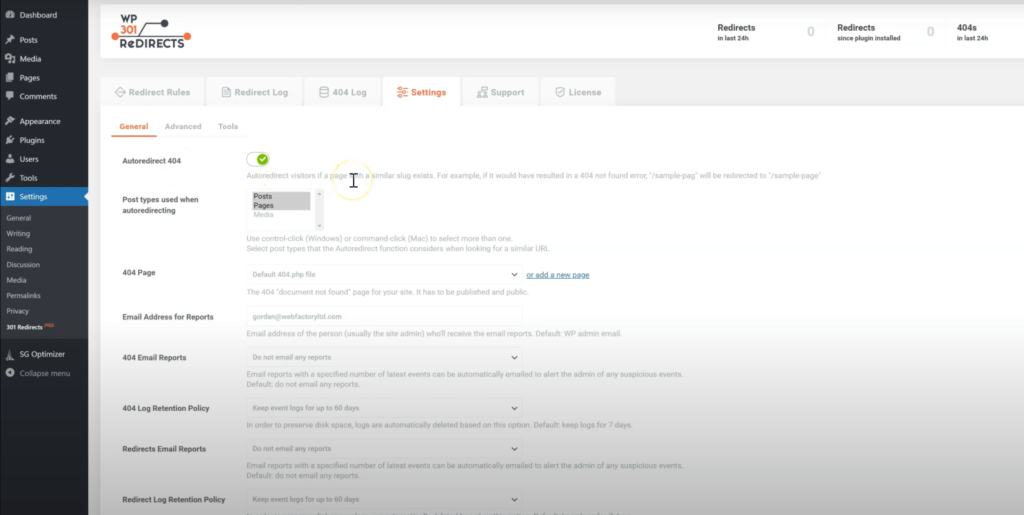
Auto Redirect 404 Feature (Pro Feature)
Auto Redirect 404 is one of the best features of the WP 301 ReDirect plugin. This feature is in the pro version of the plugin.
You can access and enable the feature from the Settings of WP 301 ReDirect.
What this feature does is redirect any non-existent page on your website to a specified page (that you have set from the settings page).
For example, you visit example.com/hello and this page does not exist it will redirect your user to a predefined page. This basically improves user experience and increases your traffic.
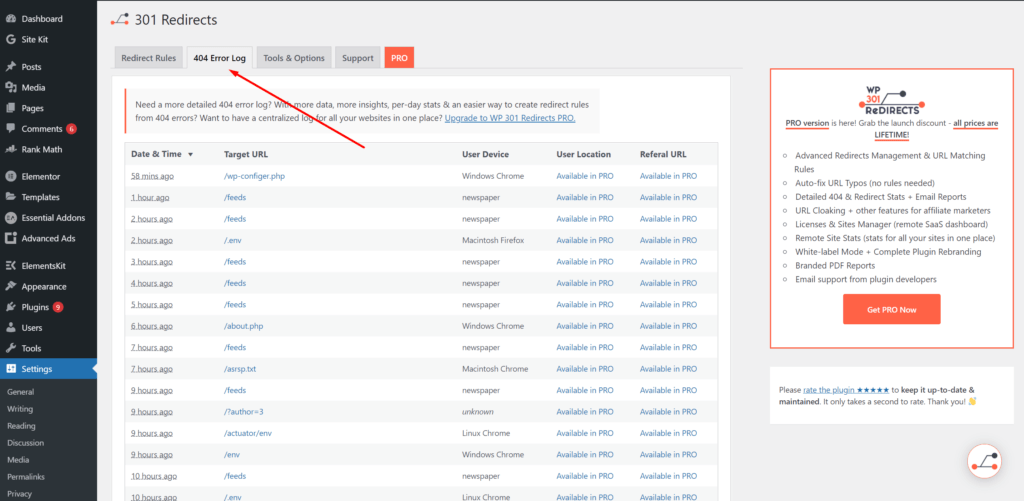
404 Error log
404 log shows where 404 pages restriction happen. By default, in the free version, you can see only 50 404 happenings. By upgrading to pro you can see hundreds and thousands of happenings per day.
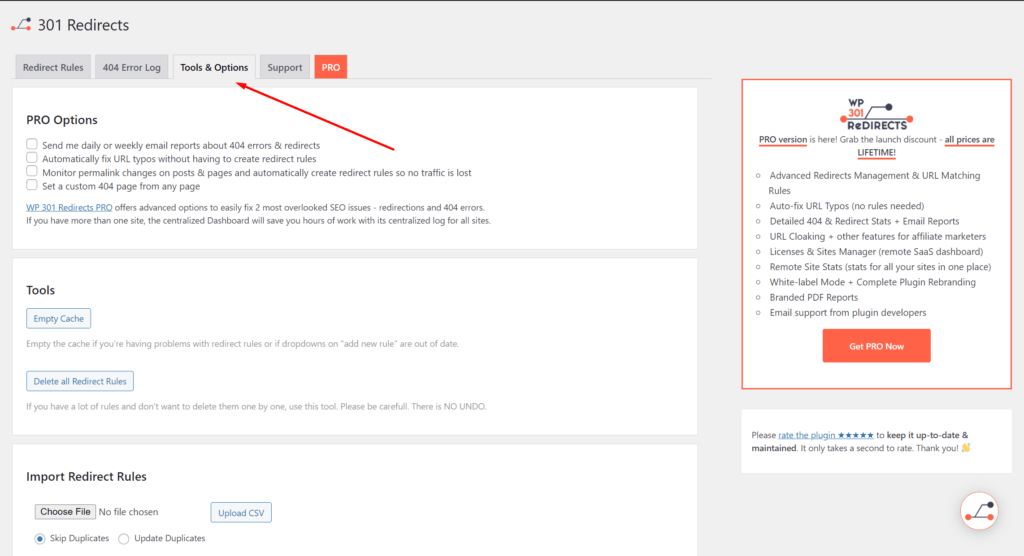
Tools & options
In the tool tab of the free version of the plugin, you have the following features.
Empty Cache:
You can Empty the cache if you’re having problems with redirect rules or if dropdowns on “add new rule” are out of date.
Delete all Redirect Rules:
If you have a lot of rules and don’t want to delete them one by one, use this tool. Please be careful. There is NO-UNDO.
Import Redirect Rules:
You can upload the redirect rule from your computer.
Export Redirect Rules:
You can export a backup copy of your redirects.