1 – Create New Project
Creating New project is the first step towards managing your servers with CloudPages. Everything is managed under projects such as billing, server, teams etc.
A big note: For every client, upon creating first project they get 7 days trial of Agency plan without adding any payment method or billing details.
1- Create New Project
To create a new project visit our platform at:
https://platform.cloudpages.cloud/
After login, in you will be redirected to the dashboard. Click on Create New Project button on the top bar.

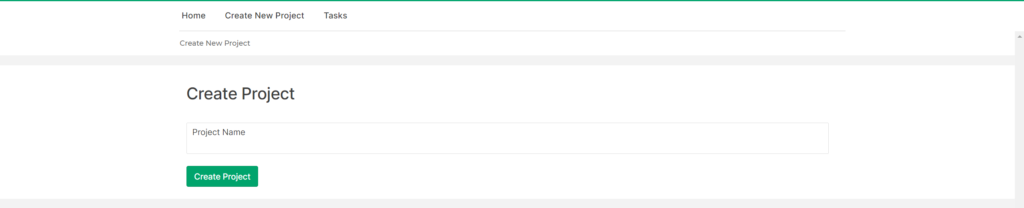
2 – Provide Name
After clicking the Create New Project button you will be redirected to the page where an input box asks for Project Name.
Provide a name according to your choice and click on Create Project button to move next.
If this is your first project, you will automatically get 7 days free trial, you can continue to deploy servers or move forward with this article to complete the pending project tasks.
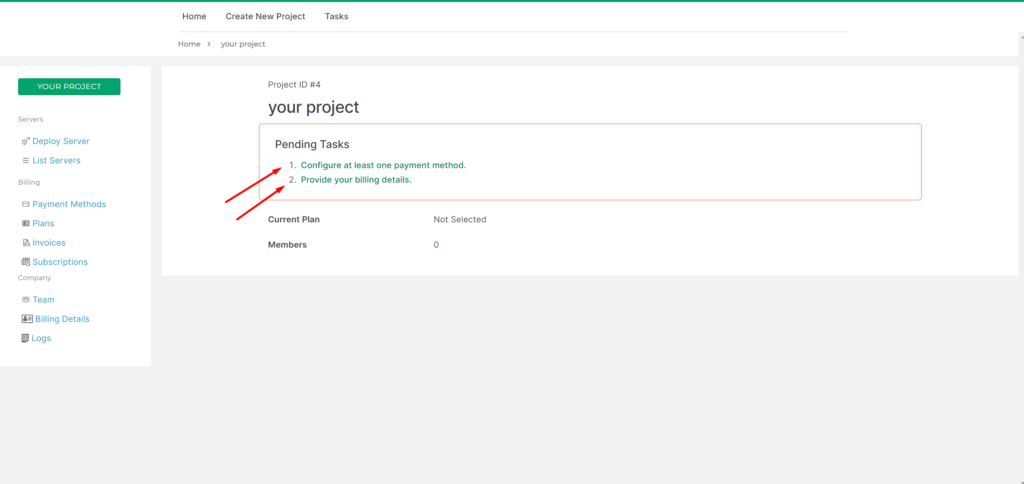
3 – Complete Pending Tasks
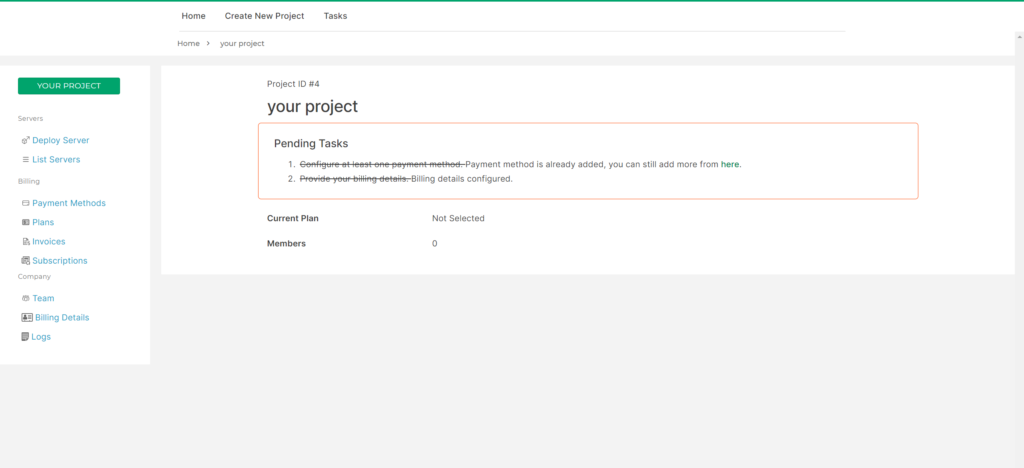
Once you created the project you automatically move to this page where you have to perform these pending tasks Configure at least the payment method and Provide billing details.
Note: Payment method is require for paying your invoices, you can also skip this step and pay invoices manually. Please note that we do not store your card details on our servers, they are stored with our payment provider (Stripe)
Note
: First add
Billing Details
and then do Configuration of paymet method.
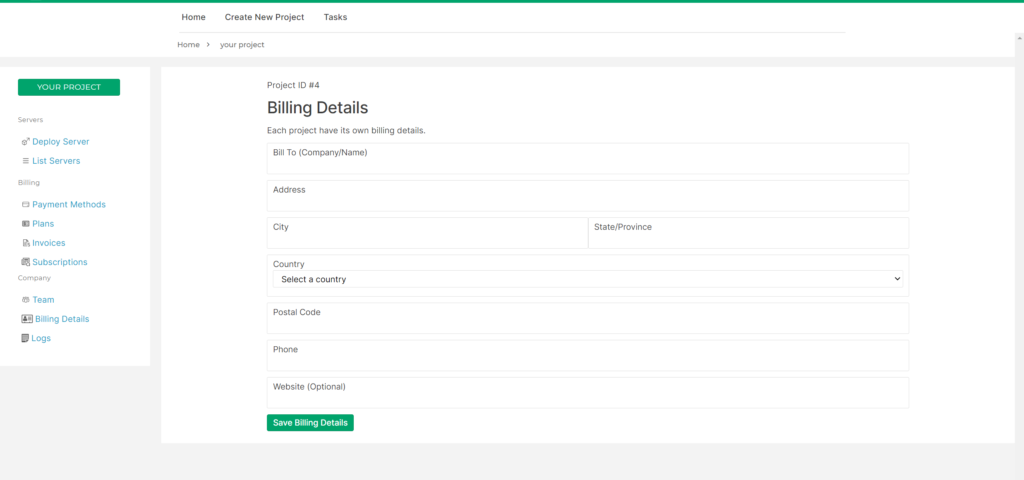
4 – Provide billing details
The first step is to add Billing details, these details are needed for invoicing.
- Company Name/Client Name
- Address
- City
- State/Province
- Country
- Postal Code
- Website
And after providing these press the Save Billing Details button.
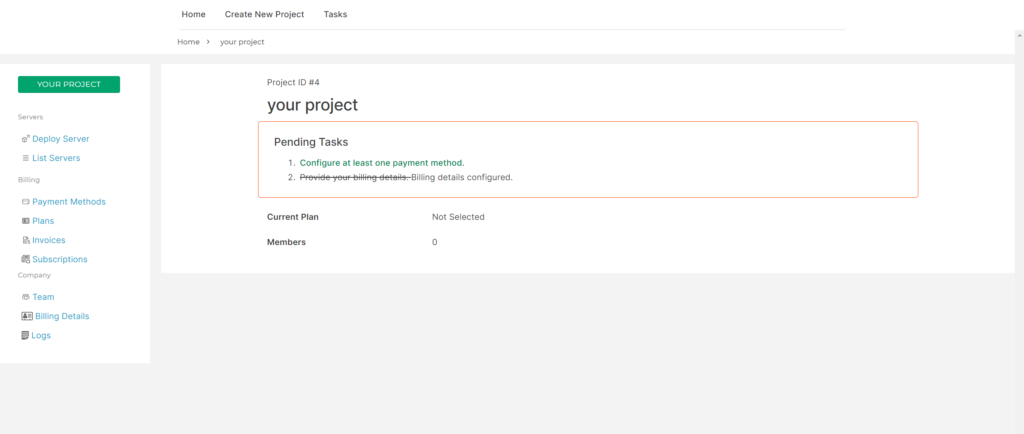
After adding the billing details click on the green button with your project name which will take you back to the project page where you complete remaining pending tasks.
5 – Configure payment method
For this Configuration you must add billing details first and then move to this step.
Once you click on Configure at least the payment method this page appears in front of you click on Add New Payment Method button.
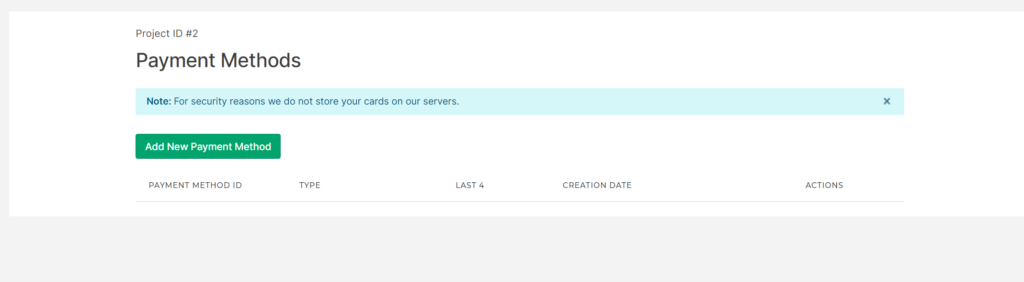
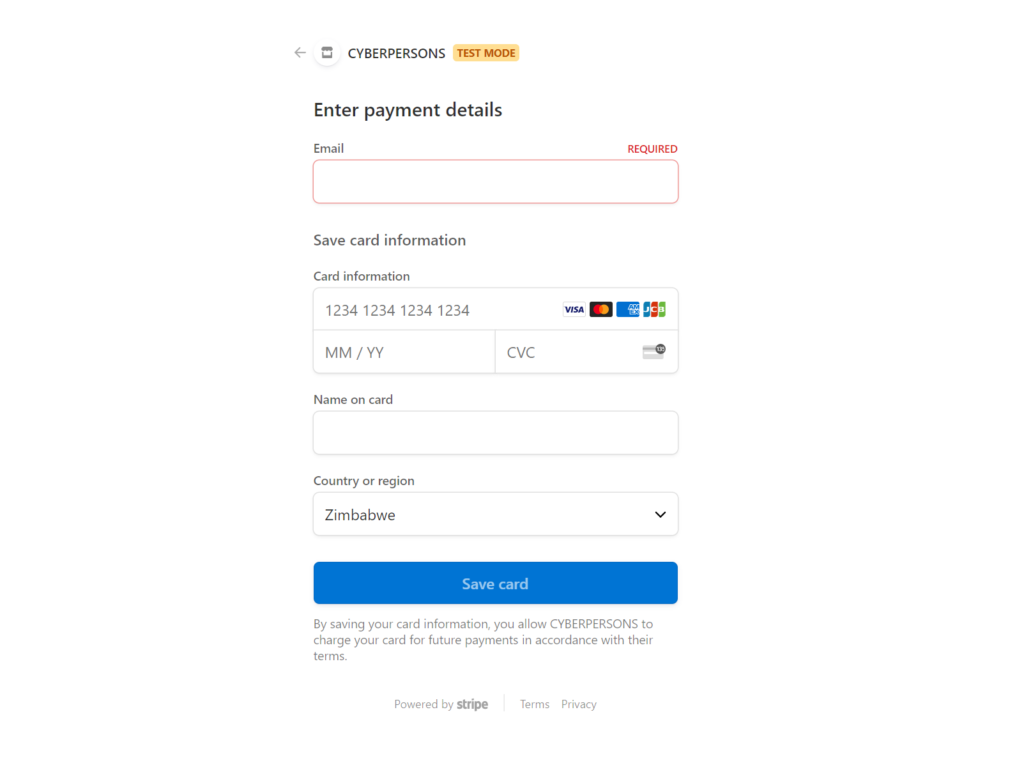
After clicking on Add New Payment Method you will migrate to the stripe page for the configuration of the payment method. Provide the required details and click on the Save Card button.
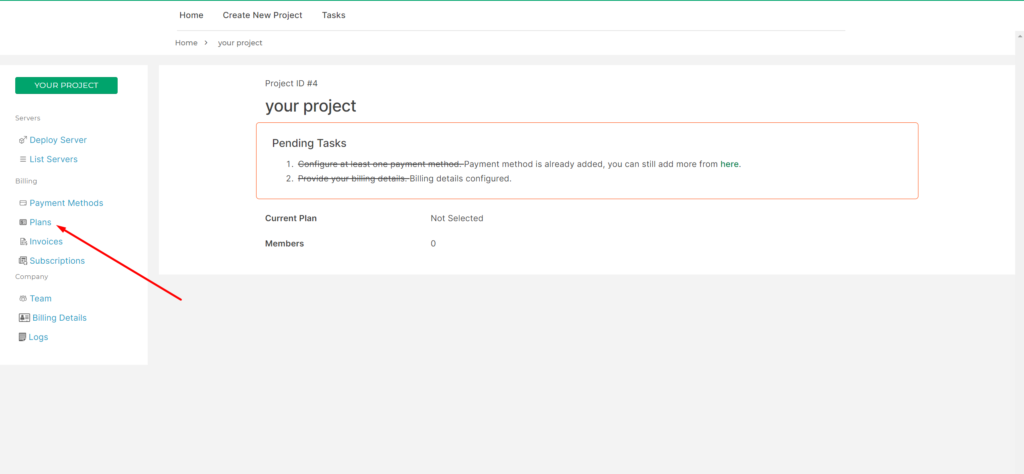
You can see here no plan is selected now goto the next step is to Select Plan.
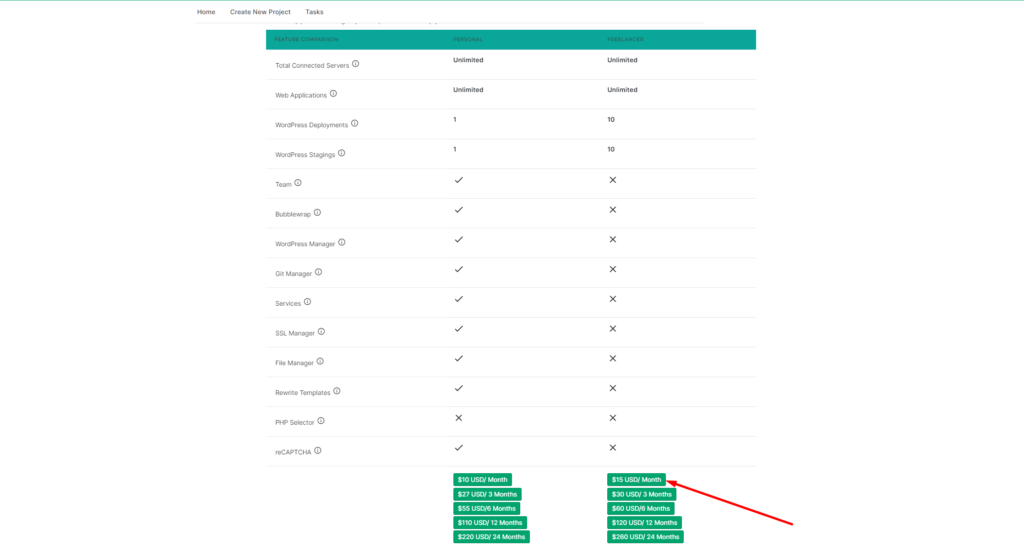
6 – Select Plan
Goto Sidebar and click on Plan for chose your plan
To select one plan according to your choice
A popup appears to confirm the selected plan by the clicking on Continue button.
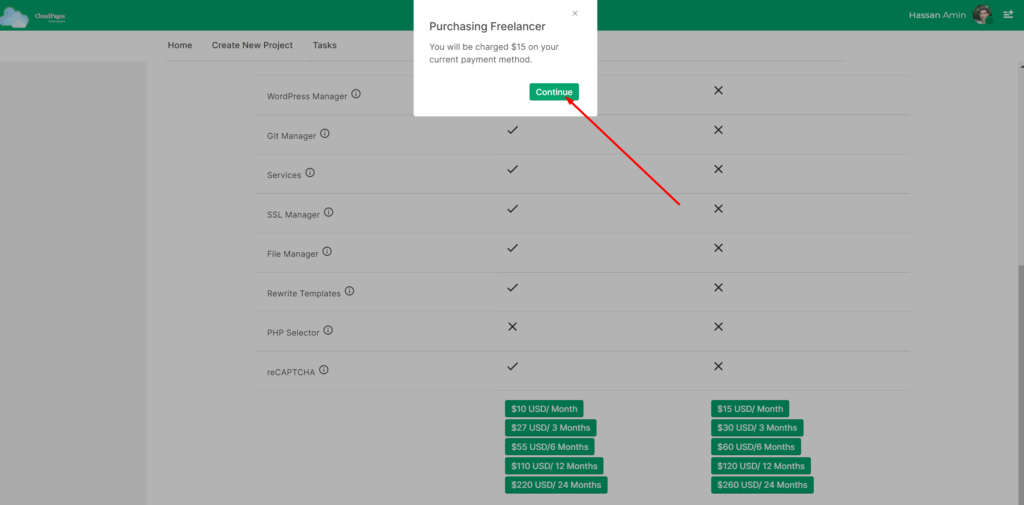
Payment is automaticly done by your already added method if you click Pay through already added method.

If you do not want to pay from the already added method click the Pay Menuly method and add payment.
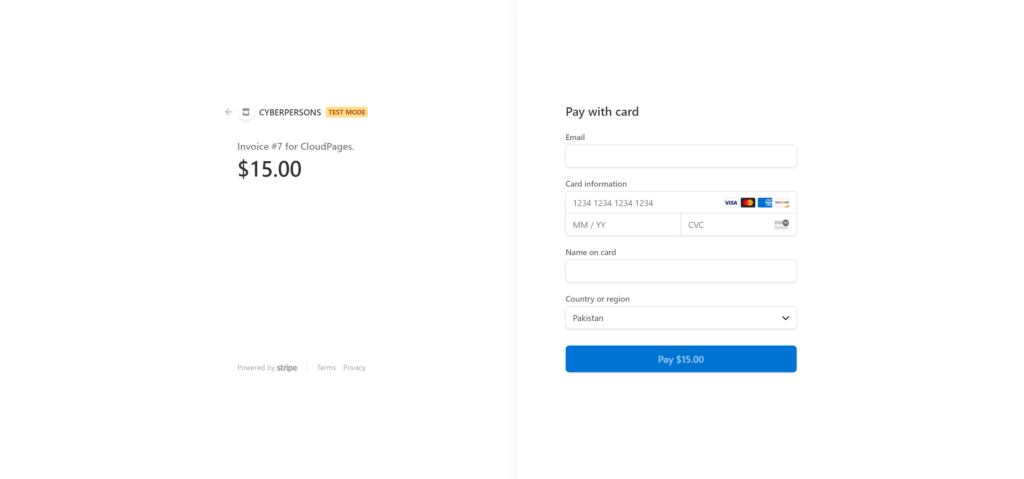
After paying for the plan according you can see the plan you selected on the dashboard.
