How to Deploy CloudPages on Vultr?
The CloudPages provider integration enables simple deployment of CloudPages on Vultr.
Follow the steps given below to Deploy CloudPages on Vultr.
Step 1: Create CloudPages Account
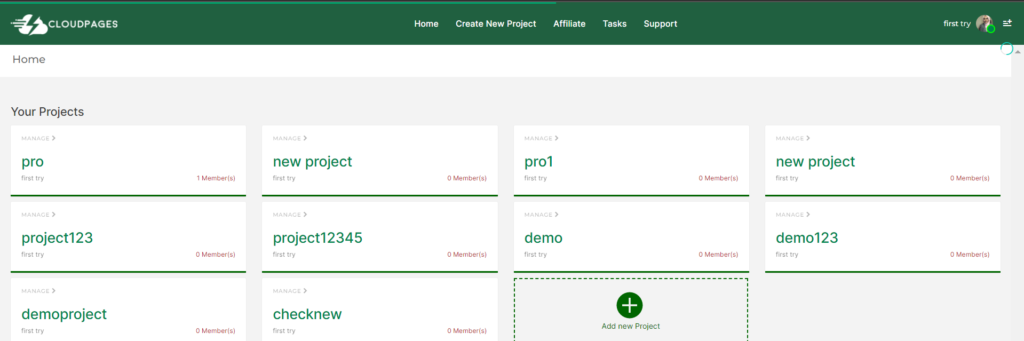
Login to your CloudPages account on platfrom.cloudpage.cloud and then on your dashboard you can see all of your projects. Click on the name of your project under which you want to deploy CloudPages.
Step 2: Add Vultr Key
In the Project dashboard, click on the Vultr box.
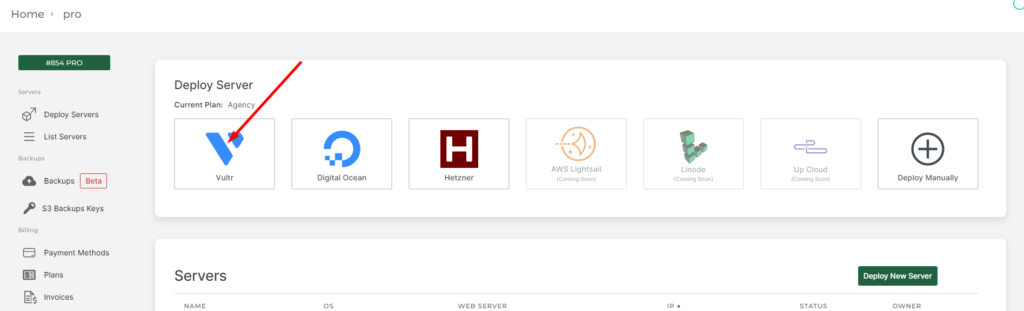
In your first attempt when you click on the Vultr box it will take you to the Add key page.
If you don’t have a Vultr account then you need to register on Vultr and get an API key.
Step 3: Get Vultr Key from your Vultr Account
As soon as you have created your account, log in to the Vultr account on the top right side you can see your account name.

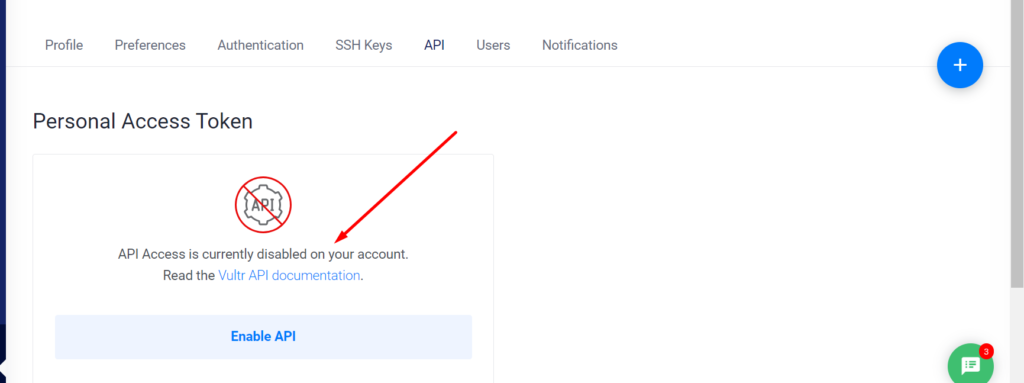
Click on it and it will show you the API option like below in the picture.
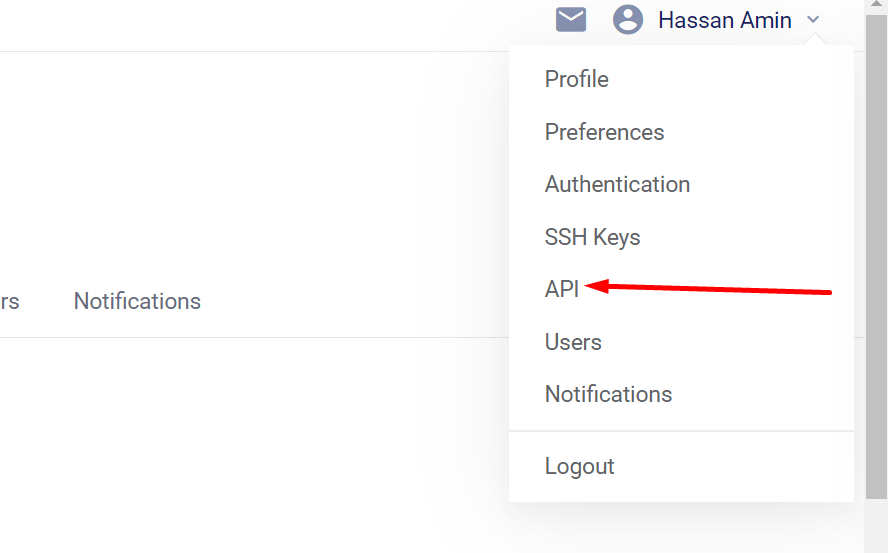
Click on the API button and it will navigate you to the API key access page. If API key access is disabled (by default it is) first enable it.
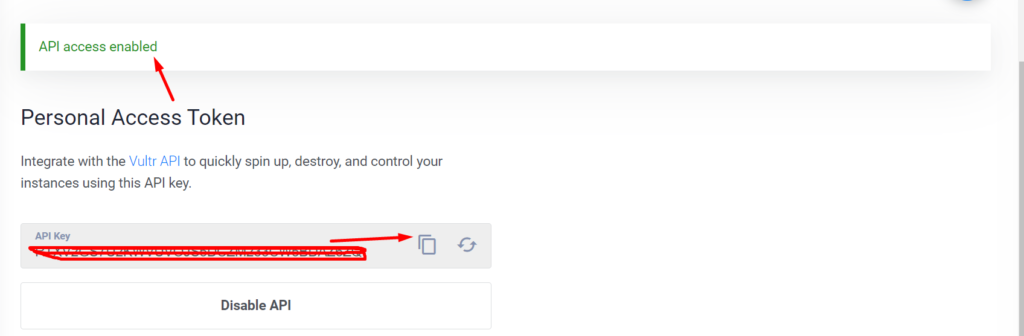
Press the Enable API button and it will be enabled. Once it is enabled, you will be able to copy the key
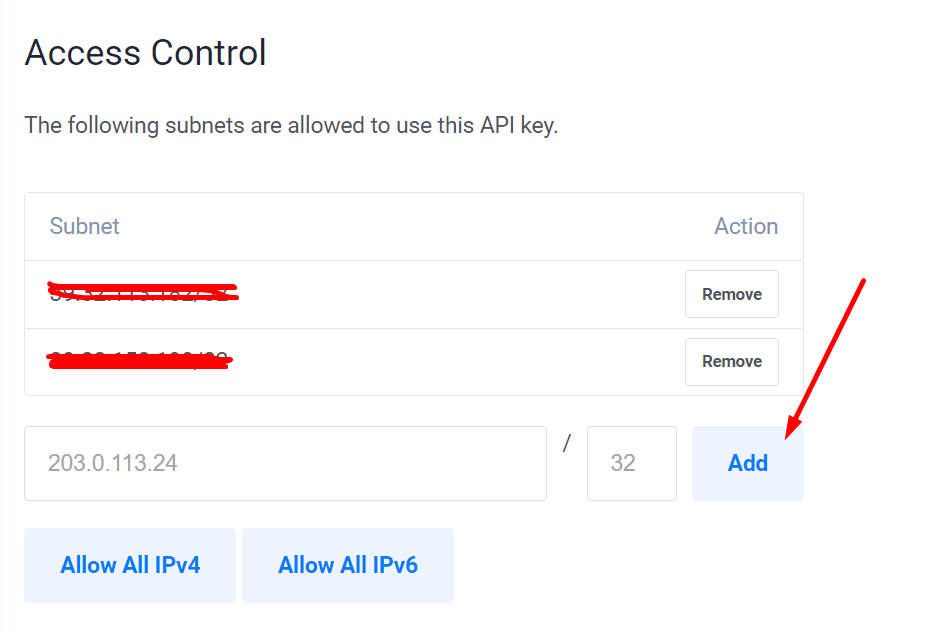
Once the API is enabled, there is one more step. You need to enter CloudPages IP so that your API can be accessed from CloudPages, without whitelisting our IP, you won’t be able to use CloudPages.
Scroll down to Access Control to open API access for CloudPages API
Enter CloudPages IP in the first box, which is 3.66.15.168 and in the next box add 32 and then click Add.
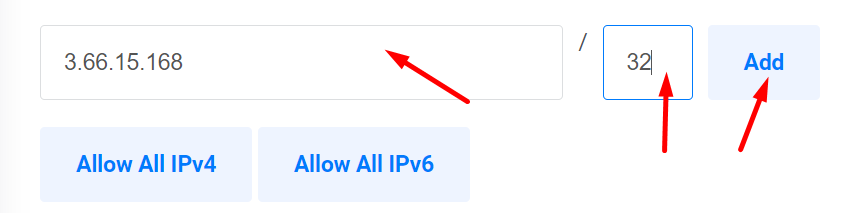
NOTE: This is a mandatory process if you do not add the IP of CloudPages you cant deploy the server using API integrations.
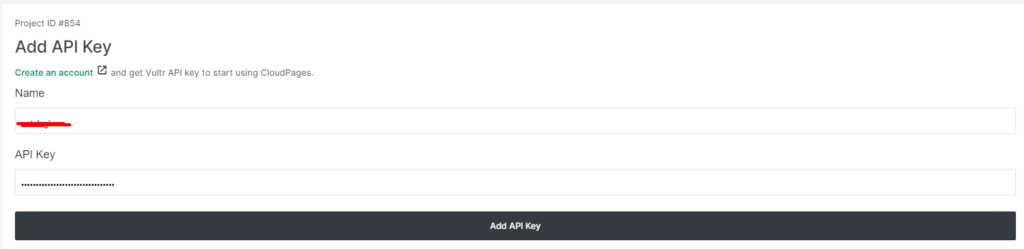
After getting a key from Vultr we can move on to CloudPages. On CloudPages side, paste the key that you have gotten from Vultr and give it any name.
After providing information just click on the Add Key button and your key is saved in your account.
NOTE: You can add as many keys as you want.
Now go back to your project dashboard again.
Step 4: Deploy CloudPages on Vultr
Once on the project dashboard, click on the Vultr box and it will ask you to select the key of your Vultr account on which you want to deploy CloudPages.
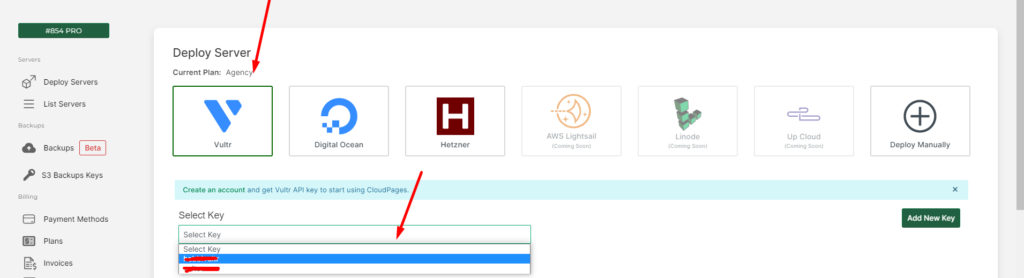
Note: if you want to add more keys there is an Add Key button on this screen.
Now after selecting the key provide the server name and select the Location.
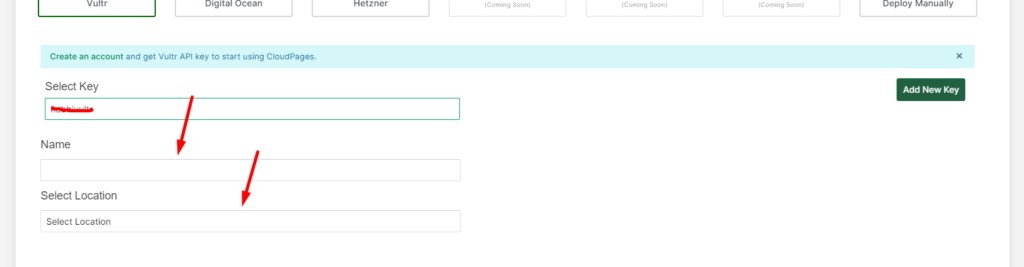
Name: Anything you want
Location: All available locations are there, select the one you want for your server.
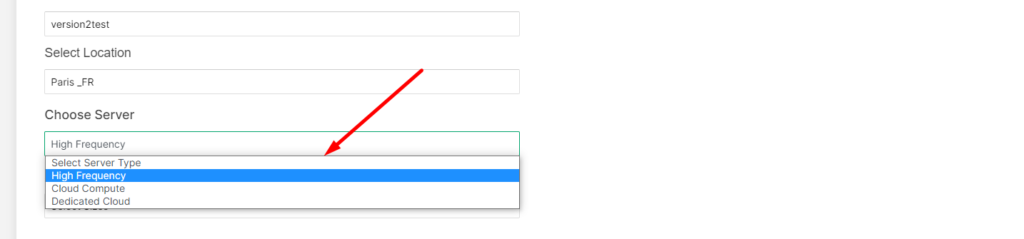
Vultr offer various types of cloud servers that includes
- High Frequency
- Cloud Computer
- Dedicated Cloud.
Usually High Frequency and Dedicated cloud performs better, however, you can choose as you wish
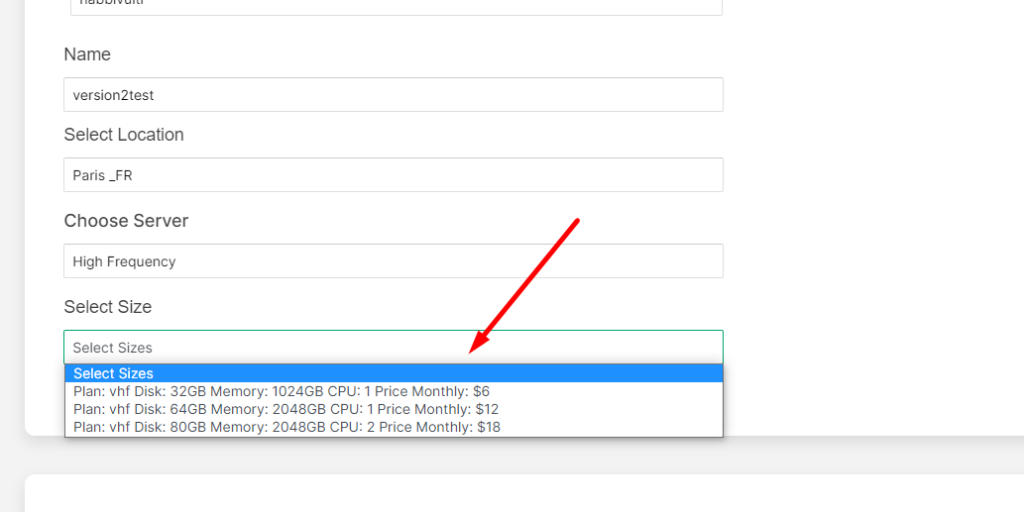
Once you have selected the location, you will be asked to choose plan
After that provide all other information.
Server Type: OpenLiteSpeed/ LiteSpeed Ent (If you have a license you can go with LiteSpeed Enterprise otherwise OpenLiteSpeed)
Back up: Check it if you want to go with Vultr Backups (Must have some extra charges from Vultr side)
Finally just click Create Server button.

Now you don’t have to do anything else manually. CloudPages with take care of all setups and it will create a server on the Vultr and also deploy CloudPages server-side agent on it.
Once CloudPages is installed, you can deploy the WordPress site and follow all the other instructions in our Knowledge Base.