
In the ever-evolving landscape of e-commerce, businesses seek to provide seamless online experiences for their customers. One critical aspect of achieving this goal is the integration of robust web hosting and content delivery solutions. Cloudflare and WooCommerce, when combined, form a powerful duo that not only enhances the performance of an online store but also fortifies its security.
Table of Contents
Understanding Cloudflare
Cloudflare is a globally distributed content delivery network (CDN) and web security provider. Its primary purpose is to optimize the delivery of web content, ensuring faster page load times by caching and serving static resources from servers located strategically around the world.
Key Features
- Content Delivery: Cloudflare’s CDN distributes website content across multiple servers worldwide, reducing latency and improving load times for users across different geographic locations.
- DDoS Protection: Cloudflare offers robust Distributed Denial of Service (DDoS) protection, safeguarding websites from malicious traffic and ensuring uninterrupted service.
- Web Application Firewall (WAF): Cloudflare’s WAF helps protect websites from various online threats, such as SQL injection, cross-site scripting (XSS), and other common vulnerabilities.
- SSL/TLS Encryption: Cloudflare provides free SSL/TLS certificates, enabling secure data transmission between the user’s browser and the server, boosting customer trust and satisfaction.
Integrating Cloudflare andWooCommerce
Setting Up Cloudflare
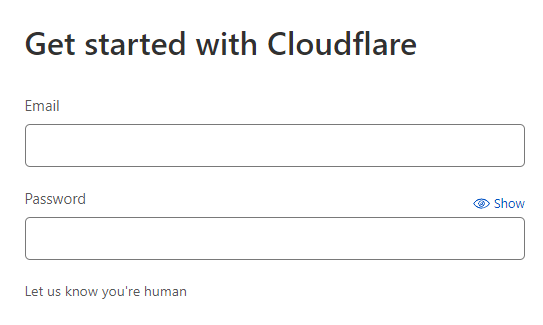
- Account Creation: To get started, sign up for a Cloudflare account and add your domain to the platform.
- DNS Configuration: Cloudflare replaces your domain’s authoritative DNS, and you’ll need to update your domain’s nameservers to those provided by Cloudflare.
- Cloudflare Dashboard: Navigate through the Cloudflare dashboard, configure settings, and customize performance and security features according to your website’s needs.
How to Set Up Cloudflare CDN
Below are the steps to set up Cloudflare.
- Signup on Cloudflare
2. Add the Site’s URL.
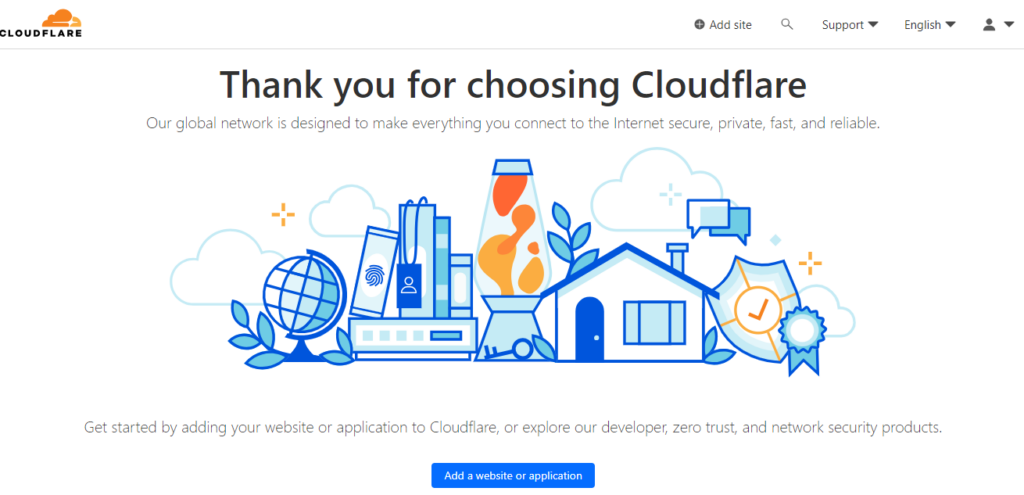
Upon registering with Cloudflare, a new screen will appear, displaying a welcome message. To proceed, click on the “Add a website or application” button located at the bottom of the screen.
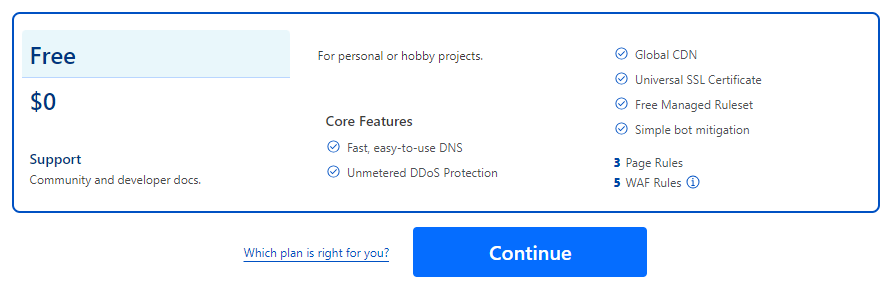
3. Now among the plans choose the Free Plan.
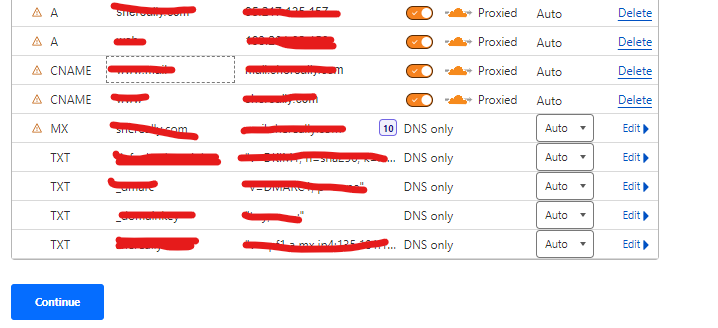
4. Review DNS records.
Proceed by examining your DNS records to verify their correct configuration. Cloudflare will retrieve all DNS configurations from your domain registrar. Assess your records and then proceed by clicking on Continue.
5. Change Your Nameserver. As depicted in the image below, it is necessary to update the nameservers of your domain registrar. Substitute them with the ones furnished by Cloudflare.
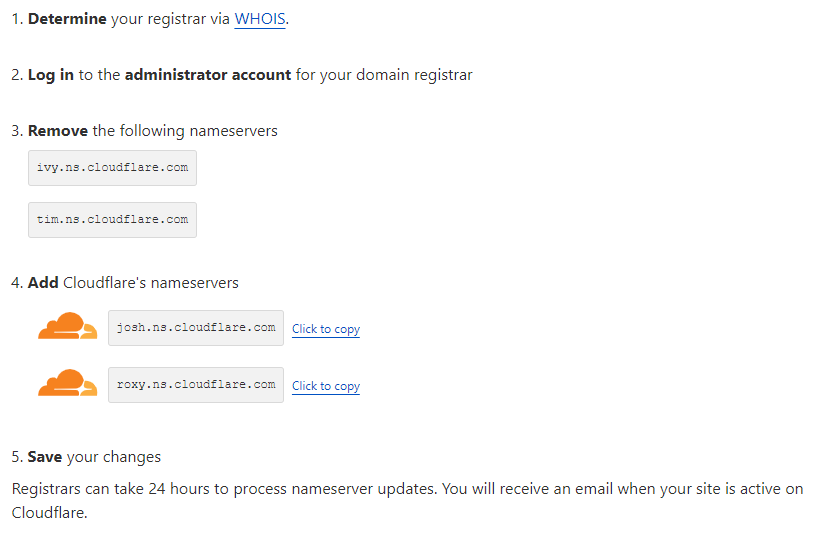
6. Alter your Nameserver through the Domain Registrar. Next, access your domain registrar and modify the name servers. Duplicate the Nameservers provided by Cloudflare. Insert them into the Nameserver option of your domain registrar. In my case, with Namecheap, I have effectively updated the nameservers.
7. After updating the nameservers at your domain registrar, return to Cloudflare. Select the “Check nameservers” button.
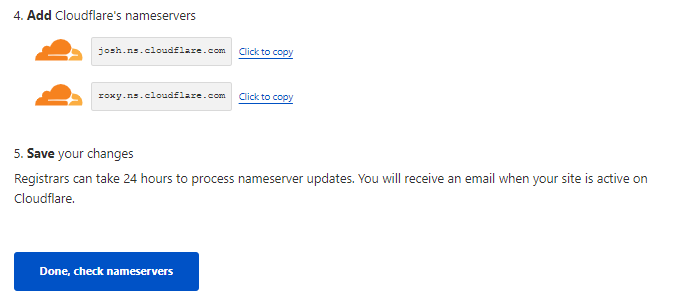
You will additionally receive an email from Cloudflare confirming the activation of your Cloudflare status.
8. Now, click on the Get Started button.
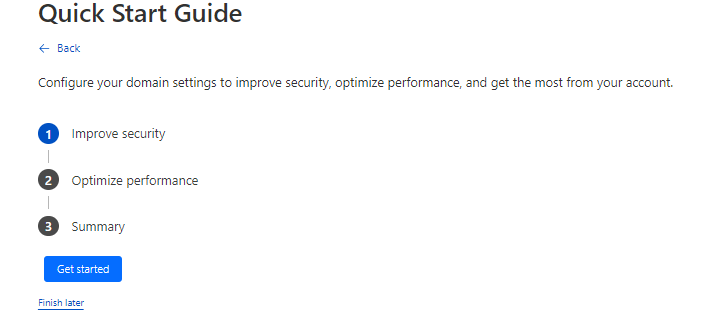
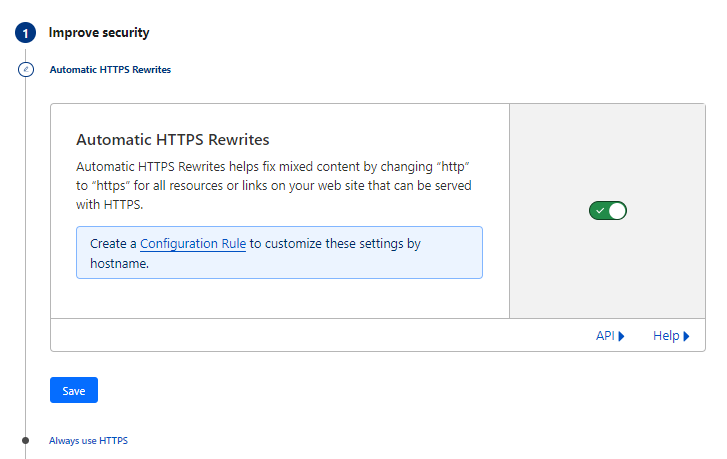
Now, activate both Automatic HTTPS Rewrites and the Always Use HTTPS feature.
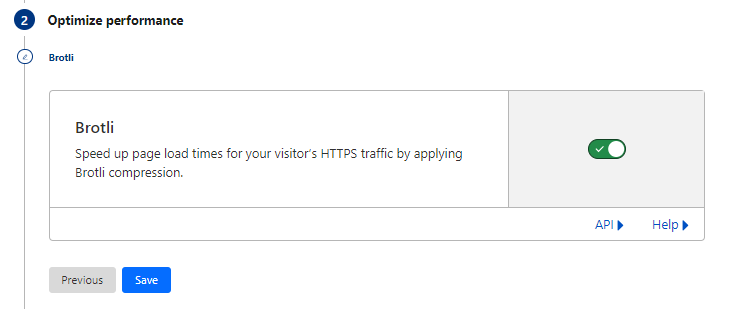
Proceed to enable Brotli and then click on the Save button.
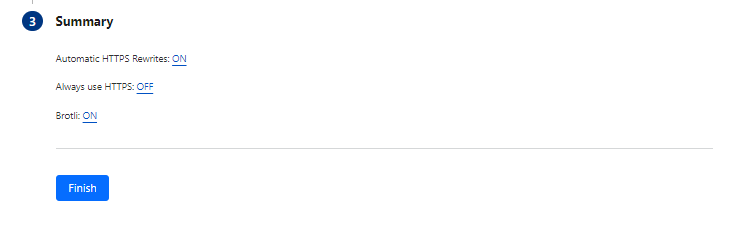
Once you have examined the summary, proceed by clicking the Finish button.
9. Follow the steps below to verify that your Cloudflare CDN is functioning correctly on your WordPress site.
- Open your WordPress site in a web browser.
- Right-click on the site and select Inspect.
- Navigate to the Network tab in the Inspect console.
- Click on any JS or CSS file located in the left corner.
- If your cf-cache-status displays HIT, it indicates that your CDN is operating properly.
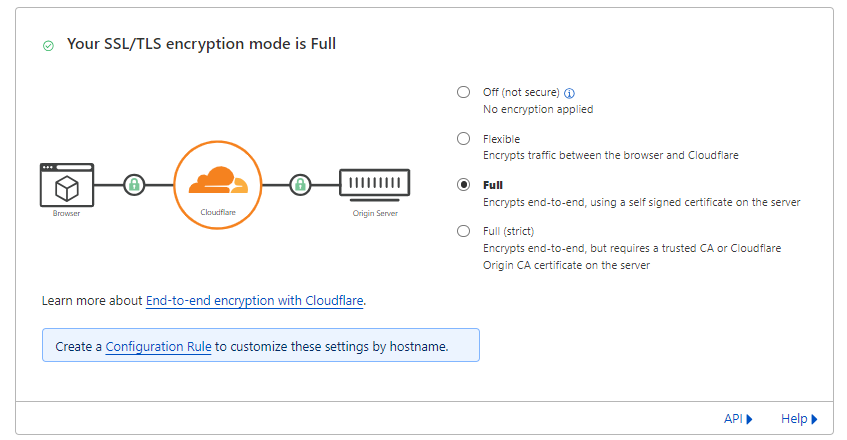
10. Configure SSL Certificate Settings. Navigate to the SSL certificate settings within the “SSL/TLS” menu located on the left. If you are already utilizing SSL, opt for the “Full” radio button. Once these configurations are applied, Cloudflare will present a green padlock in the address bar of your visitors, signifying that your website is secure.
Integrating Cloudflare with WooCommerce
Optimizing WooCommerce for Cloudflare
- Page Rules: Leverage Cloudflare’s Page Rules to fine-tune caching settings for specific WooCommerce pages, ensuring dynamic content is served efficiently.
- Image Optimization: Use Cloudflare’s image optimization features to compress and serve images in a way that balances quality and speed.
- Always Online: Enable Cloudflare’s “Always Online” feature to serve a cached version of your site in case your server experiences downtime.
After configuring SSL, proceed to activate caching within Cloudflare. This accelerates the performance of your WooCommerce site by storing static files such as images and CSS files on Cloudflare’s servers. While you have the option to cache dynamic files, it’s not recommended for WooCommerce sites. Congratulations! You have now completed the successful setup of Cloudflare with WooCommerce
Leveraging the Benefits
Improved Performance
- Faster Page Load Times: Cloudflare’s global CDN accelerates content delivery, resulting in faster page load times and an enhanced user experience.
- Reduced Server Load: Caching static resources at Cloudflare’s edge servers reduces the load on your WooCommerce hosting server, improving overall site performance.
Enhanced Security
- DDoS Mitigation: Cloudflare’s DDoS protection shields your WooCommerce store from malicious traffic, ensuring uninterrupted service during potential attacks.
- Web Application Firewall: Protect your online store from common web vulnerabilities by configuring Cloudflare’s WAF to filter and block malicious requests.
FAQs
How do I integrate Cloudflare with WooCommerce?
To integrate Cloudflare with WooCommerce, sign up for a Cloudflare account, add your domain, and update your domain’s nameservers. Configure settings on the Cloudflare dashboard, and optimize WooCommerce by adjusting caching settings, image optimization, and other performance features.
Can I use Cloudflare with any hosting provider for my WooCommerce site?
Yes, Cloudflare is compatible with various hosting providers. You can integrate Cloudflare with your WooCommerce site regardless of your hosting provider to benefit from its CDN, security, and performance optimization features.
What are the key performance benefits of using Cloudflare with WooCommerce?
Cloudflare improves performance by caching static resources globally, reducing page load times. It also helps in offloading server resources, reducing the load on your hosting server, and enhancing the overall responsiveness of your WooCommerce site.
Does Cloudflare support SSL/TLS encryption for WooCommerce sites?
Yes, Cloudflare provides free SSL/TLS certificates, ensuring secure data transmission between users and your WooCommerce server. This encryption not only enhances security but also instills trust in your customers
Are there any specific settings or optimizations recommended for WooCommerce sites on Cloudflare?
Yes, tailor your Cloudflare settings to optimize WooCommerce by configuring caching, enabling image optimization, and adjusting performance settings. Customizing these settings ensures an optimal balance between performance and functionality for your online store.
Conclusion
The integration of Cloudflare with WooCommerce is a strategic move for e-commerce businesses looking to optimize performance and fortify security. By harnessing the power of Cloudflare’s global network and advanced features, online retailers can provide a seamless and secure shopping experience, ultimately boosting customer satisfaction and trust in their brand.