

CloudPages users often request a One-Click Redis installation feature. Our team is working hard and fast to release this feature as soon as possible. In this tutorial, we will teach you how to configure and use Redis manually, until the release is available.
The process of installing Redis on Ubuntu 20.04 is quite simple. Litespeed web servers require different steps if you are installing Redis smoothly on your server so that it should function properly.
Table of Contents
1. What is Redis?
Basically, Redis comes from “REmote DIctionary Server”. The Redis system is an open-source (BSD licensed) data structure store that stores data and routed messages in memory. Among the types of data Redis can store are strings, hashes, lists, sets, and sorted sets, as well as bitmaps, hyperlog logs, geospatial indices, and streams. With Redis, you can replicate, script, evict LRUs, perform transactions, as well as provide multiple levels of on-disk persistence, as well as have high availability via Redis Sentinel and automatically partition your data with Redis Cluster.
Redis’s data structures are the most similar to those typically used by software developers to implement applications and algorithms inside native data structures. Because the core data structures can easily be shared between processes and services, it is ideal for rapid development and fast applications.
2. Setup CloudPages for your server:
let’s install CloudPages so that you can easily manage and deploy WordPress sites.
The first step is to go to the CloudPage panel, If you don’t have an account, then Register yourself on CloudPages, and if you have an account then go to the Login page and provide your credentials and click on the Sign In button

Once you have logged in, now follow the step-by-step procedure.
3. How to deploy WordPress on CloudPages?
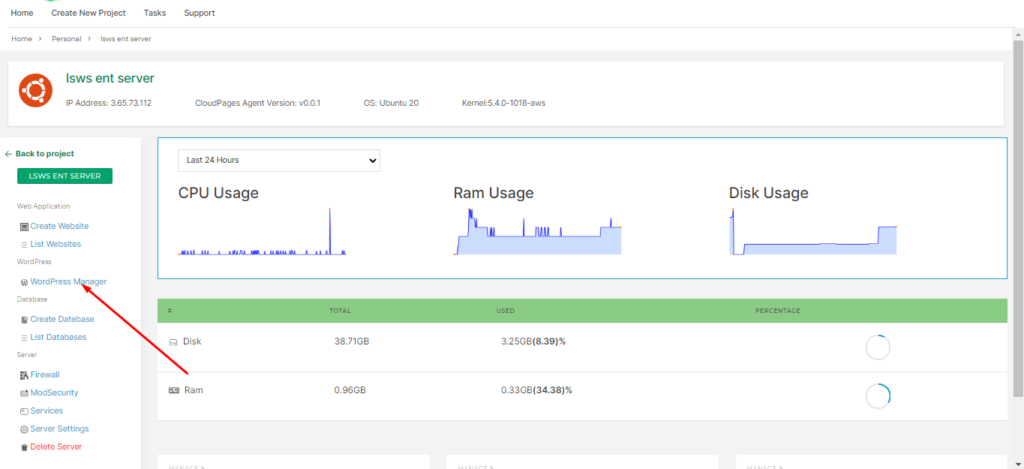
On the home page (dashboard) of the server, there is a WordPress Manager button to deploy the WordPress site using CloudPages. Press that button to deploy a WordPress site on your server.
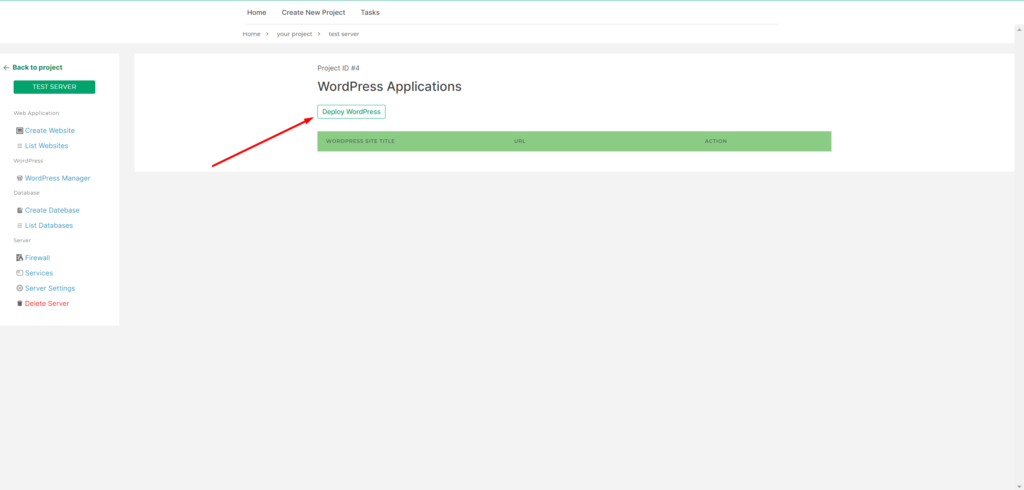
After clicking this button, you can see the following screen. Click on the Deploy WordPress button from this screen to create a new WordPress site.
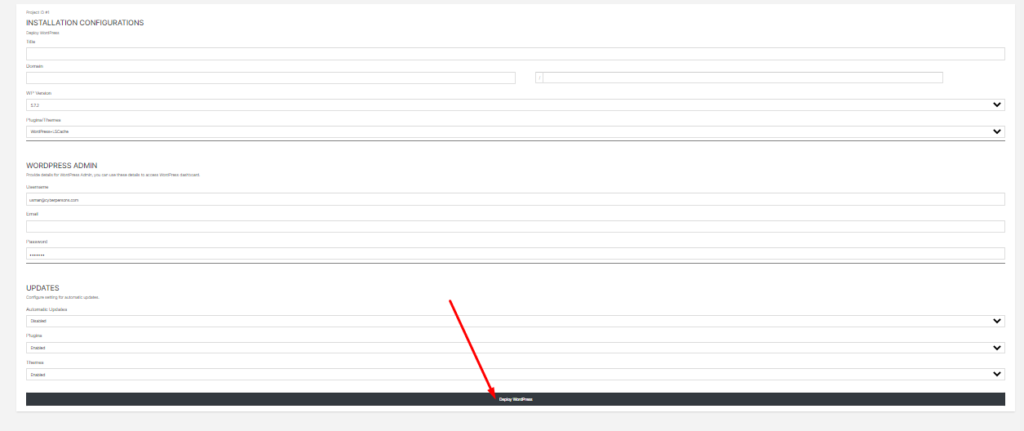
3.1 – Installation Configurations
Now move towards configurations of your WordPress site. For configurations, you need to provide the following details.
3.1.1 INSTALLATION CONFIGURATIONS:
Title: Provide the title of a blog according to your choice.
Domain: Type the Domain name on which you want to install the WordPress site.
WP Version: Select the WordPress version (any stable or latest).
Plugins/Themes: Chose any option with which plugin you want to install WordPress.
- WordPress + LS Cache.
- WordPress + LS Cache + Classical Editor.
- WordPress + LS Cache + Woocommerce
3.1.2 WORDPRESS ADMIN:
Username: Type the username that you will use to log in to WP Admin.
Email: Typer the email that you want to use for login users.
Password: Type the password that you will use to log in to WP Admin.
3.1.3 UPDATES:
Automatic Updates: You can enable or disable automatic Updates (All Updates).
Plugins: You can enable or disable automatic Updates of Plugins.
Themes: You can enable or disable automatic updates of Themes.
After providing all details click on Deploy WordPress Button.
3.2– Deployed
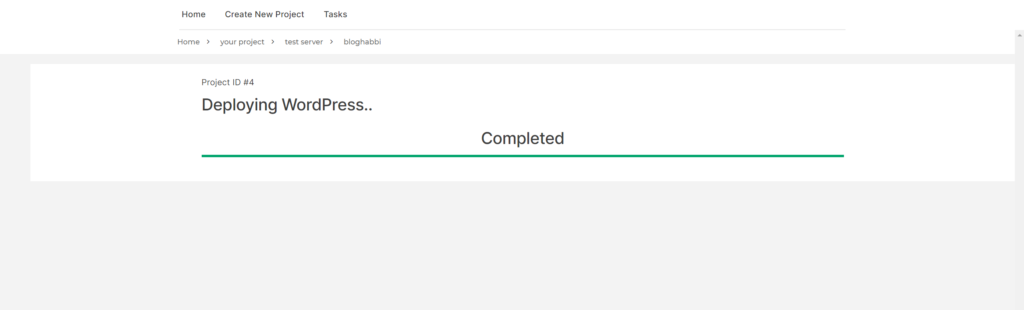
After clicking on that button the process of deploying WordPress starts.
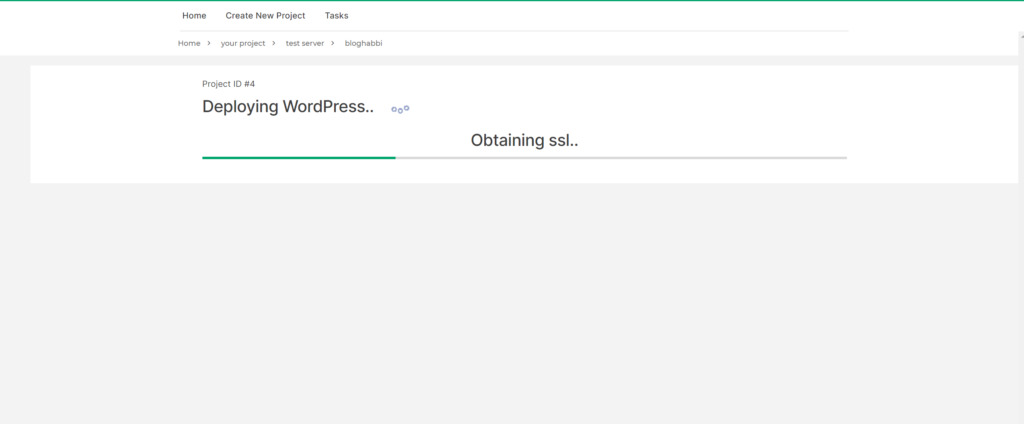
After some time you can see that the process is completed and WordPress is configured on your server.
After all processes, you will automatically go to this page
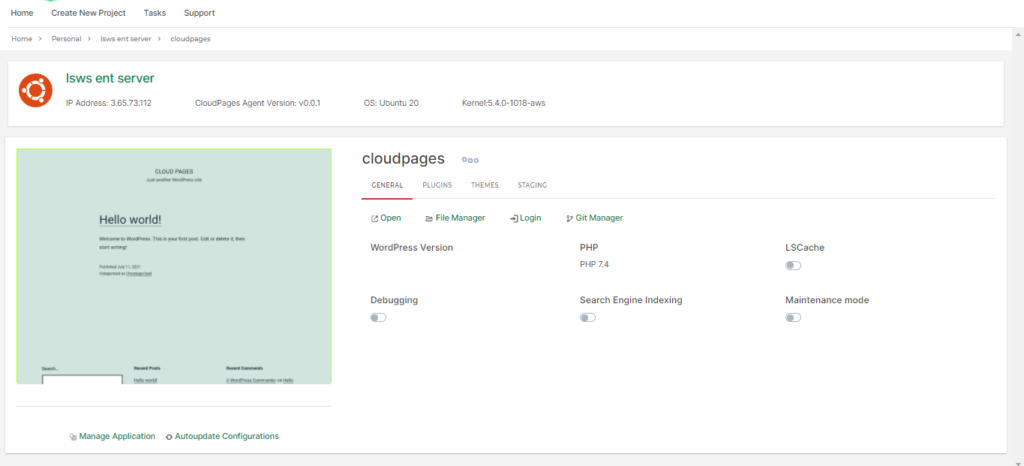
Here you can see all information according to which to set up the WordPress site.
4. How to install Redis Server?
Now that all the servers and your WordPress site have been set up, you can easily install the Redis server. You should also ensure that all Ubuntu packages and directories have been upgraded first so that Redis will take advantage of all updates if necessary. Follow these commands to accomplish this.
sudo apt update && apt upgrade
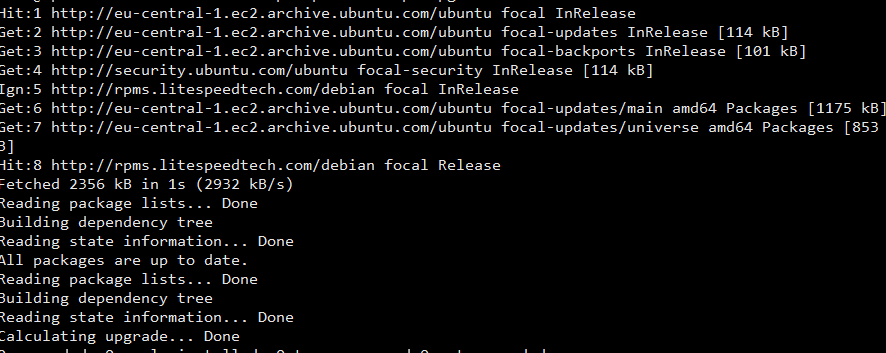
These commands will update all core packages which need the update.
Now in this step after the upgradation just need to install the Redis server. To install the Redis server on Ubuntu run the following command:
sudo apt install redis-server

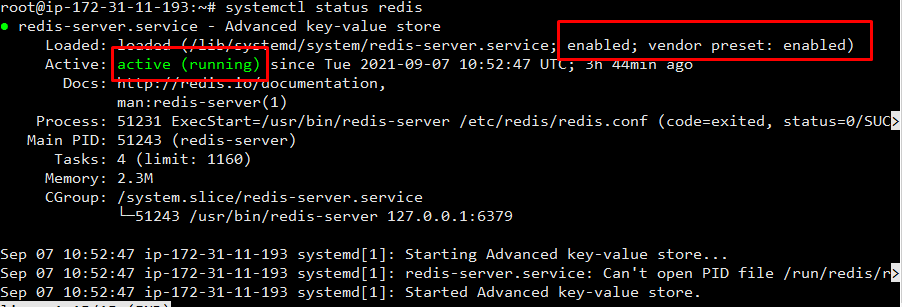
Once installation is done now you have to verify if Redis is active and enable or not. To check the status run the following command.
sudo systemctl status redis
If status or the service is disabled or inactive or failed use these commands.
To active the Redis demon run:
sudo systemctl start redis
To enable the Redis demon to run:
sudo systemctl enable redis
if you faced any issue using any of these commands.
5. Install Redis PHP extension:
PHP extension is the important and must thing to run the Redis demon on your server. The PHP extension installation is a bit different from the normal installation of PHP extension.
Like in normal you can install PHP Redis extension using this command:
sudo apt-get install php-redis
for the specific version of the PHP Redis extension you can run:
sudo apt-get install php7.X-redis
But in the case of the LiteSpeed webserver, we do not use this and we use the specific command for the Litespeed web server PHP extensions installation.
Here is the command to install the PHP extension.
sudo apt install lsphp7X-redis
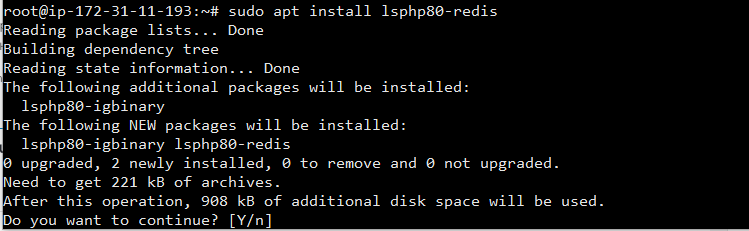
You can replace 7X with any of your required versions of the PHP extension.
After this is all done from the server side now you have to test and verify from the LS cache side.
6. Verify Redis setup with LiteSpeed Cache
In the article above we did WordPress deployment using CloudPages now login to your admin dashboard and after login if you go to LiteSpeed Cache -> Cache -> Object Cache
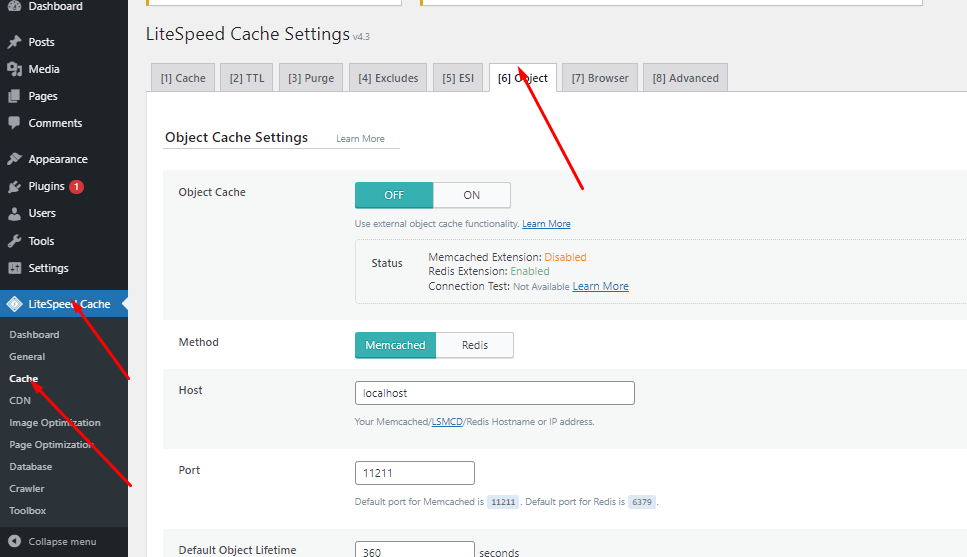
By default, you can see that the object cache is disabled press the Object Cache button to ON and then change the Redis from method and port to 6379. After doing these changes just press the save button.
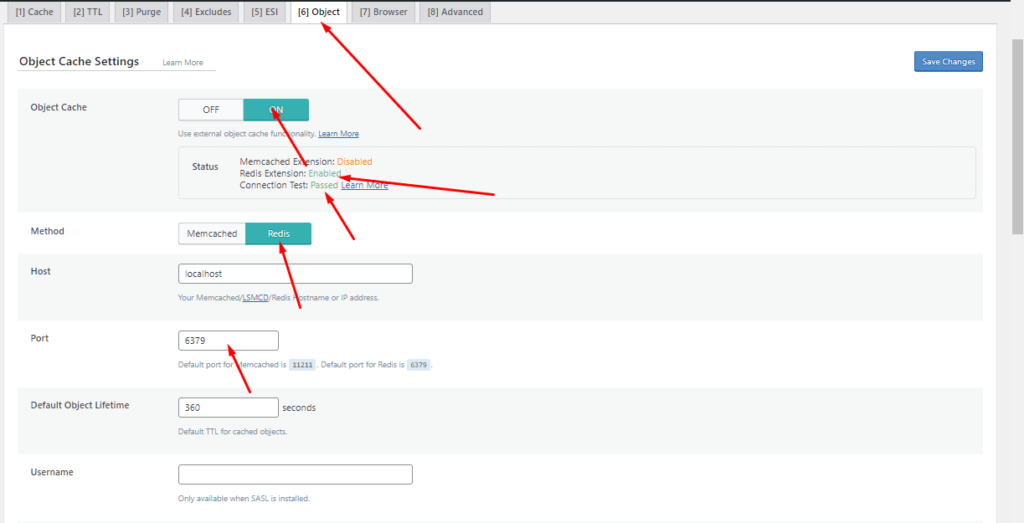
You can see these things:
Redis Extension: Enabled
Connection Test: Passed
it means that Redis is configured correctly and is in use. All setup is done.